34
Step 1.
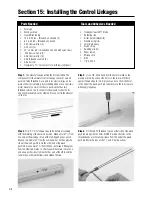
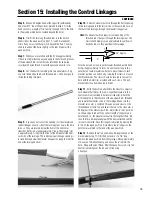
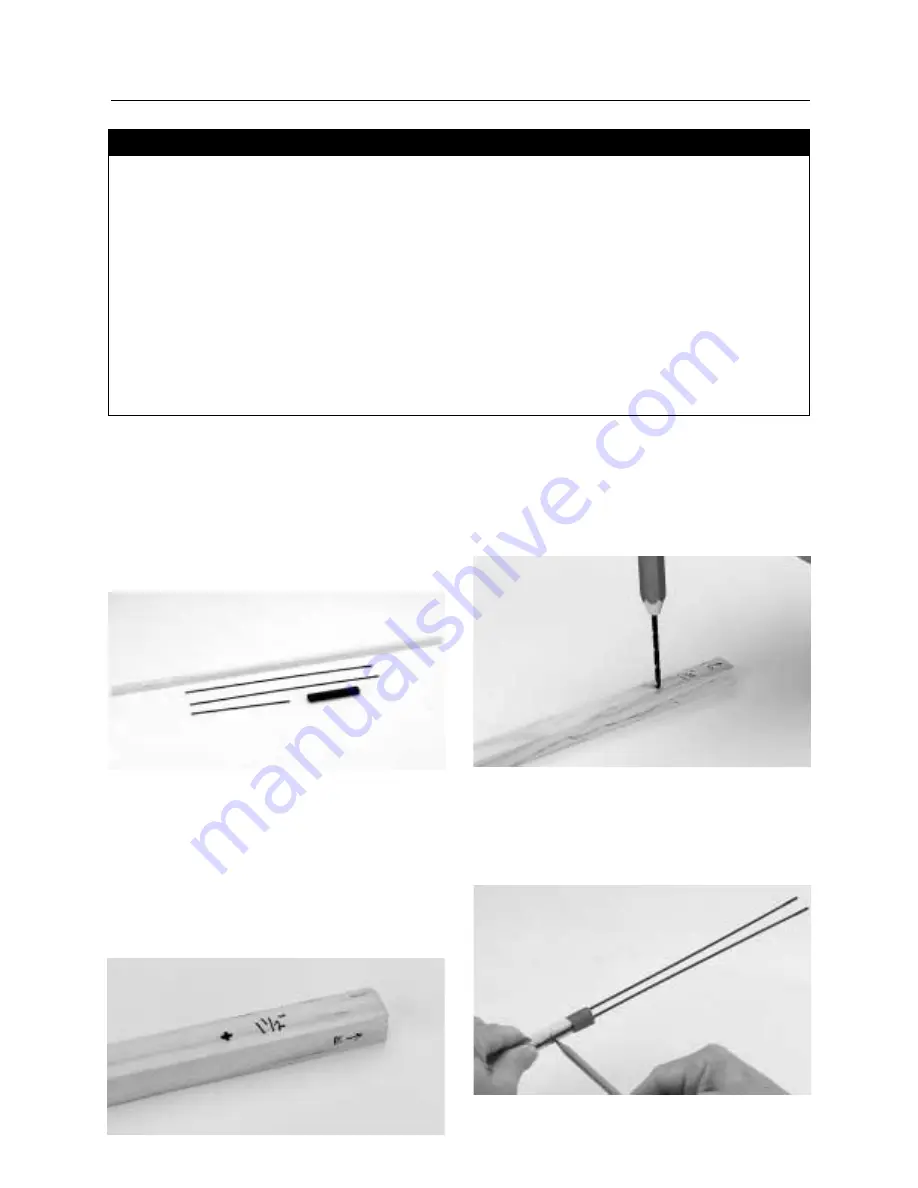
The elevator linkage will be the first described. The
components for the elevator control linkage consist of a wood
pushrod, three threaded music wire rods, clevis w/clips, and a
piece of heat shrink tubing. Since the Edge 540 uses a split (two-
piece) elevator, you will construct a pushrod that has two
threaded rods on one to connect to the elevator control horns
and one threaded rod on the other end to connect to the elevator
servo arm.
Step 2.
Trim 2
1
/
2
'' off of the wood pushrod before proceeding
with the marking of the wire rod position. Make a mark 1
1
/
2
'' from
one end, of the wood push rod with a felt-tipped pen or pencil.
Make a second mark 2'' from the same end, but on the opposite
side of the wood pushrod. On the other end of the wood
pushrod, make a mark 1
1
/
2
'' from the end, but make it 90 degrees
from the other two marks. In effect you will have two rods at one
end on opposite sides from each other, and at the other end the
rod will be on the top/bottom side between the two.
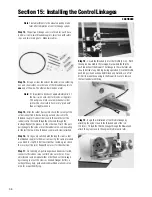
Step 3.
Use a 1/8'' drill bit and drill the holes marked on the
wood push rod. Round out the holes so the rods will fit flush
against the wood push rod. A groove can be cut from the holes
to the end of the wood push rod to help secure the rods in place
when applying epoxy.
Step 4.
Fit the two 12'' threaded rods on either side of the wood
pushrod along side the holes drilled. Position the rods so the
threaded ends are the same distance from the end of the wood
pushrod. Mark the rods at the 1
1
/
2
'' and 2'' hole positons.
Section 15: Installing the Control Linkages
• Fuselage
• Wood pushrod
• Heat Shrink tubing
• 12'' x 4-40 rod – threaded on one end (2)
• 6'' x 4-40 rod – threaded on one end
• 4-40 clevis w/clips (3)
• 4-40 nuts (3)
• 20'' x 2 mm rod - threaded on one end with nylon clevis
• .020 music wire 36'' (2)
• 2-56 clevis w/clips (4)
• 2-56 threaded couplers (4)
• 2-56 nuts (4)
• Heavy-duty 1
1
/
4
'' servo arms for 3-D throws (optional)
• Hobby knife with #11 blade
• Soldering iron
• Silver Solder (Staybrite)
• Needle nose pliers
• 30-minute epoxy
• Nylon string
• Rubbing alcohol
• Paper towels
• Mixing stick
• Drill
• 1/8” drill bit
Parts Needed
Tools and Adhesives Needed
Содержание EDGE 540
Страница 52: ...52 ...
Страница 53: ...53 Template Cut Out of Cowl Bottom MDS 1 48 ...
Страница 54: ...54 ...
Страница 55: ...55 ...
Страница 56: ... 2000 Horizon Hobby Inc www horizonhobby com ...
Страница 57: ...57 ...
Страница 58: ...58 ...
Страница 59: ...59 ...

