21
2. Using the Web Interface/Browser Configuration
2.1 Logging in
After you have correctly connected the IP camera with the PC
and set the IP address, you can use the Internet Explorer to
configure or use the camera.
Alternatively, you can configure and use the camera by installing
the configuration and viewer software from the accompanying
CD. If you want to do this, proceed as described in Section 3.
Open
Internet Explorer
to access the camera‘s web interface.
Enter the camera‘s standard IP address 192.168.2.3 in the
address bar.
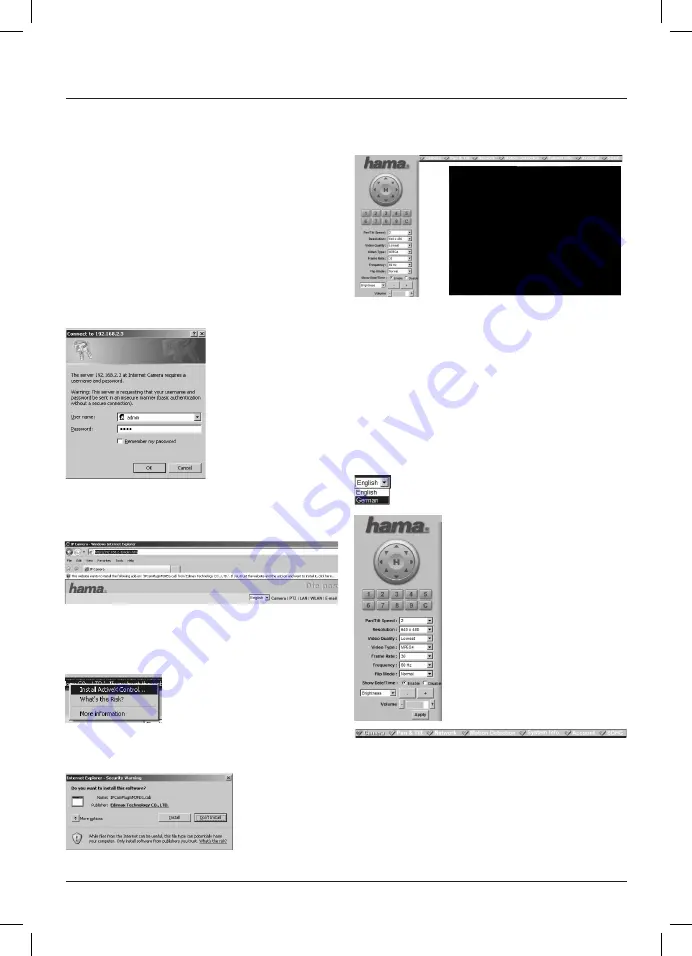
The system then asks for your user name and password.
These are:
User name:
admin
Password:
1234
After you have logged in for the first time, the system displays
the following message below the address bar in Internet
Explorer:
This wireless LAN camera requires a special ActiveX plug-in to
display the live image in Internet Explorer.
To install this plug-in, click the message displayed under the
address bar.
Then select
„Install ActiveX Control...“
in the pop-up menu
displayed.
Select
„Install“
to start the installation process.
Once the ActiveX control is correctly installed, you should be
able to see the live image from the internet camera in the black
section of the following image.
If the system displays error messages or if you cannot see any
image after installation, we recommend that you install the latest
version of the Microsoft DirectX drivers.
You can find it on the Microsoft website
http://www.microsoft.com.
2.2 Camera
Language settings:
The camera‘s menu can be set to either German or English. To
change the language, select the one you want from the menu
bar in the web interface: this menu is located in the top right of
the web interface.
You are now on the camera‘s start
page. It shows the camera‘s live
image. On this page, you can also
select different camera settings and
use the motor control and zoom
function.
Click other links in the menu bar to
access the different menu items in the
web
interface.
To return to the live image, simply click
„Camera“
in the menu bar.


