- 57 -
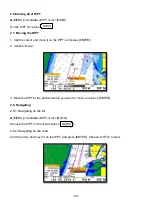
Press on the Route detail and you may add the stored WPT as (Fig.2.1).
3.5.2.1. Adding new WPT
Press on Rout detail and you may add new WPT.
3.5.3. Erasing WPT
Choose the WPT and press .
3.6. Navigating
▶
[
MENU]->Userdata->Route->List->[GOTO]
Choose the route on Route list and press .
3.4. Erasing
Choose the route and press .
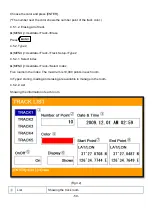
4. Track
The maximum point is 50,000.
Two ways to manage the track. The first is to manage the total 50,000 points by colors. The second is
to divide 50,000 points in five rooms, and you can store 10,000 points for the maximum in each room.
Tracking has two types, “by time and by distance”.
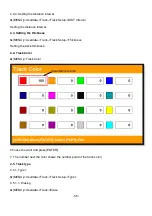
4.1. Track on/off
▶
[
MENU]->Track
Shown/Hidden the track.
4.2. Choosing the track
4.2.1. By time
▶
[
MENU]->Userdata->Track->Track Setup->Record Setup->Time
Tracking by the set time.
4.2.2. Setting the time interval
▶
[
MENU]->Userdata->Track->Track Setup->Time Interval
Setting the time interval.
4.2.3. By distance
▶
[
MENU]->Userdata->Track->Track Setup->Record Setup->Distance
Tracking by the set distance.
Содержание Smart10 Series
Страница 8: ... 8 ...
Страница 11: ... 11 2 Specification of the connectors 2 1 Metal connectors ...
Страница 12: ... 12 2 2 Plastic connectors ...
Страница 15: ... 15 3 3 Navigation Data Page 3 3 1 Navigation Data Type1 3 3 2 Navigation Data Type2 ...
Страница 19: ... 19 ...
Страница 25: ... 25 Fig 1 3 3 When finishing press to exit ...
Страница 28: ... 28 Fig 1 6 3 ...
Страница 39: ... 39 2 2 Detail Choose the AIS target and press ENTER 2 3 Goto Choose the AIS target and press ...
Страница 45: ... 45 ...
Страница 51: ... 51 2 9 Sorting MENU Userdata WPT List MENU Sorting the order of WPT on the list ...
Страница 63: ... 63 The maximum range of Correction Offset is 5nm ...
Страница 71: ... 71 ...
Страница 79: ... 79 ...
Страница 95: ... 95 ...
Страница 98: ... 98 Smart10 Flush Mounting Smart7 8 Flush Mounting ...
Страница 111: ... 111 ...

