background image


16 

Handling details 

Never  put  the  handpiece 
into  any  kind  of  liquid,  and 
never  oil  or  grease  the 

handpiece.  Clean  its  surface  with  a 
damped cloth. Pay attention, that no 
moisture 

or 

liquid 

enters 

the 

handpiece. 
 

Never  put  any  wet  burs  or 
instruments 

into 

the 

handpiece. 

Its 

moisture 

could  damage  the  interior  parts  of 
the handpiece. 
 

Any 

materials 

used 

by 

hadewe  prevent  a  formation 
of  rust.  In  cases  in  which  a 

rust infestation was found within the 
handpiece,  thorough  inspections 
and  examinations  always  have 
proved,  that  the  rust  had  a  foreign 
origin (which was usually caused by 
the 

tools 

used 

in 

these 

circumstances).  Even  in  high-grade 
steel  instruments  of  well  known 
manufacturers,  formation  of  rust 
can  appear,  e.g.,  through  wrong 
treatment  with  chemical  cleaning  
and 

disinfection 

liquids. 

This 

extraneous  rust  affects  internal 
parts  of  the  handpiece  in  form  of 
rust  bloom  and  causes  pitting. 
Therefore,  when  you  not  working 
with  the  handpiece,  always  remove 
the bur/ tool from it. 
 

Always  make  sure  that  you 
do  not  let  the  handpiece  fall 
down  or  exposes  it  to  any 

shocks.    The  ball  bearings  and  the 
motor  could  be  damaged  by  this. 
Only  work  with  tools,  which  are 

flawless.  
Do not work with tools which 

are bent or out of balance, 

whose shaft is worn out or 

are rusty. 


Working  with  faulty  tools  will 
cause a stronger vibration of 
the handpiece. A damage or 

even 

devastation 

of 

the 

ball 

bearings,  clamping  technique  or 
motor could be the consequence. 
 

Working  with  high  pressure 
will not improve the outcome 
of your work, since the motor 

will even be slowed down. A second 
disadvantage is the stronger impact 
on  the  ball  bearings  and  the  motor, 
which  will  shorten  their  life  span  in 
the long run.  
 

Always 

working 

with 

maximum  speed  might  have 
a similar effect. Please make 

sure that the speed setting  you use 
is  according  to  the  work  you  are 
doing  and  the  instruments  you  are 
working 

with. 

Содержание Xantos-BT

Страница 1: ...Manual Battery Drill Xantos BT Art No 0842 FB 04 238 Rev 3 Art no 0842 ...

Страница 2: ...stallation 11 Before the first use 11 Maintenance Care 12 Accumulators 12 Accumulator running time 12 Charging display 12 Charging process 12 Warning LED 12 Warning signal acoustic 12 Changing the accumulators 13 Clamping the bur tool 13 Adjusting the speed 13 Cleaning the chuck 14 Handling details 15 Troubleshooting 16 Technical data 18 ...

Страница 3: ...air slits are not blocked and the extracted air can escape well Only switch on the unit if the handpiece rests secured in the handpiece holder or if you hold it safely in your hand Prevent any liquids from entering into the control unit since this could damage the electronic elements Clean the outside of the box only with a damped cloth Make sure that you have unplugged the unit before Check the m...

Страница 4: ...ce during the operation To prevent injury work with extreme caution on the foot of the patient and use only light pressure To ensure that the bur tool sits firmly in the chuck do not work with tools which have an oily shaft are worn are bent This appliance can be used by children aged from 8 years and above and persons with reduced physical sensory or mental capabilities or lack of experience and ...

Страница 5: ...y reasons do not change the tool while the motor is running Switch off the unit immediately if the bur comes off during the treatment itself the motor blocks during the treatment Never use the power supply unit Meanwell GS40A12 P1J if it is open if the mains cable socket is damaged or if it has a damaged housing Warning Electric shock may occur Only work with recharging units recommended by hadewe...

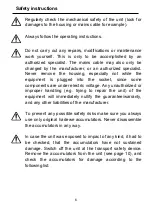
Страница 6: ...the socket since some components are under electric voltage Any unauthorized or improper handling e g trying to repair the unit of the equipment will immediately nullify the guarantee warranty and any other liabilities of the manufacturer To prevent any possible safety risks make sure you always use only original hadewe accumulators Never disassemble the accumulators in any way In case the unit wa...

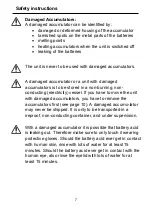
Страница 7: ... electricity vessel If you have to move the unit with damaged accumulators you have to remove the accumulators first see page 10 A damaged accumu lator may never be shipped It is only to be transported in a ireproof non conducting container and under supervision With a damaged accumulator it is possible that battery acid is leaking out Therefore make sure to only touch it wearing protective gloves...

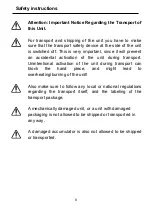
Страница 8: ...ivation of the unit during transport Unintentional activation of the unit during transport can block the hand piece and might lead to overheating burning of the unit Also make sure to follow any local or national regulations regarding the transport itself and the labeling of the transport package A mechanically damaged unit or a unit with damaged packaging is not allowed to be shipped or transport...

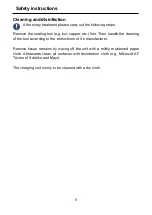
Страница 9: ... capper etc first Then handle the cleaning of the tool according to the instructions of it s manufacturer Remove tissue remains by wiping off the unit with a mildly moistened paper cloth Afterwards clean all surfaces with disinfection cloth e g Mikrozid AF Tücher of Schülke and Mayr The charging unit is only to be cleaned with a dry cloth ...

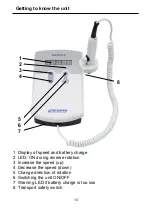
Страница 10: ...d and battery charge 2 LED ON during reverse rotation 3 Increase the speed up 4 Decrease the speed down 5 Change direction of rotation 6 Switching the unit ON OFF 7 Warning LED if battery charge is too low 8 Transport safety switch 1 2 3 4 5 6 7 8 ...

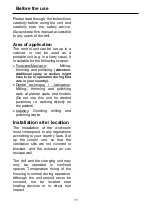
Страница 11: ... Dental technique laboratory Milling trimming and polishing work at plaster casts and models Do not use this unit for dentist purposes i e working directly on the patient Industry Grinding milling and polishing works Installation site location The installation of the workroom must correspond to any regulations according to your country laws Set up the control unit so that the ventilation slits are...

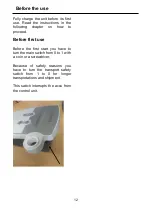
Страница 12: ... on how to proceed Before first use Before the first start you have to turn the main switch from 0 to 1 with a coin or a screwdriver Because of safety reasons you have to turn the transport safety switch from 1 to 0 for longer transportations and shipment This switch interrupts the accu from the control unit ...

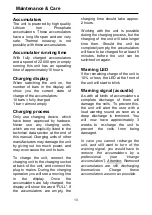
Страница 13: ... During the charging operation you will see a moving line in the display Once the accumulators are fully charged the display will show the word FULL If the accumulators are empty the charging time should take approx 2 hours Working with the unit is possible during the charging process but the charging of the unit will take longer time then Should the unit be completely empty the accumulators will ...

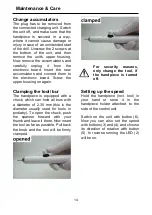
Страница 14: ...lamping the tool bur The handpiece is equipped with a chuck which can hold all burs with a diameter of 2 35 mm this is the diameter usually used for tools in podiatry To open the chuck push the spanner forward with your thumb and leave it there Now insert the tool as far as possible Pull back the knob and the tool will be firmly clamped For security reasons only change the tool if the handpiece is...

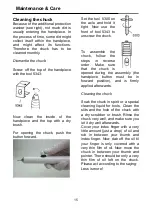
Страница 15: ...k To assemble the chuck follow the steps in reverse order Make sure that the chuck is opened during the assembly the handpiece button must be in forward position and is firmly applied afterwards Cleaning the chuck Soak the chuck in spirit or a special cleaning liquid for tools Clean the slits and the hole of the chuck with a dry scrubber or brush Rinse the chuck very well and make sure you let it ...

Страница 16: ...the handpiece in form of rust bloom and causes pitting Therefore when you not working with the handpiece always remove the bur tool from it Always make sure that you do not let the handpiece fall down or exposes it to any shocks The ball bearings and the motor could be damaged by this Only work with tools which are flawless Do not work with tools which are bent or out of balance whose shaft is wor...

Страница 17: ...an the chuck according to the instructions in the manual The unit has no function at all Press the reset switch located under the unit The unit should now be fully functional again If a fuse is blown let the fuse be exchanged by a professional service point following these instructions The plug has to be removed from the connected charging unit Switch the unit off and make sure that the handpiece ...

Страница 18: ...illisecond to check the voltage and initiate the warning signal in case of a deep discharge accumulators being completely empty being imminent This switching on is accompanied by a silent clicking noise from the transistor ...

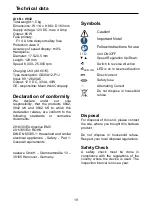
Страница 19: ...tandards or normative documents 2014 30 EU directive EMC 2011 65 EU ROHS DIN EN 60335 1 Household and similar electrical appliances Safety Part 1 General requirements hadewe GmbH Grambartstraße 10 30165 Hannover Germany Symbols Caution Important Note Follow instructions for use I O Unit ON OFF Speed Regulation Up Down Switch to reverse direction LED ON LED is on in reverse direction Direct current...

Страница 20: ...hadewe GmbH Grambartstraße 10 30165 Hannover Germany info hadewe de www hadewe de ...

Отзывы: