


12
June 5, 2003
3.
On the Recording screen for each day, set the desired recording
times.
Advanced Timelapse mode
To program both normal (day) and alternate (night) recording
schedules:
1.
On the User Preferences screen, set the Timelapse field to
Advanced Setup.
2.
On the Timelapse Recording screen, click Advanced Setup.
3.
Set the desired days and hours for normal and alternate
operating parameters (camera rates, image quality, motion
mode).
4.
On the Timelapse Recording screen, set which cameras are to
record for each day of the week during normal business hours.
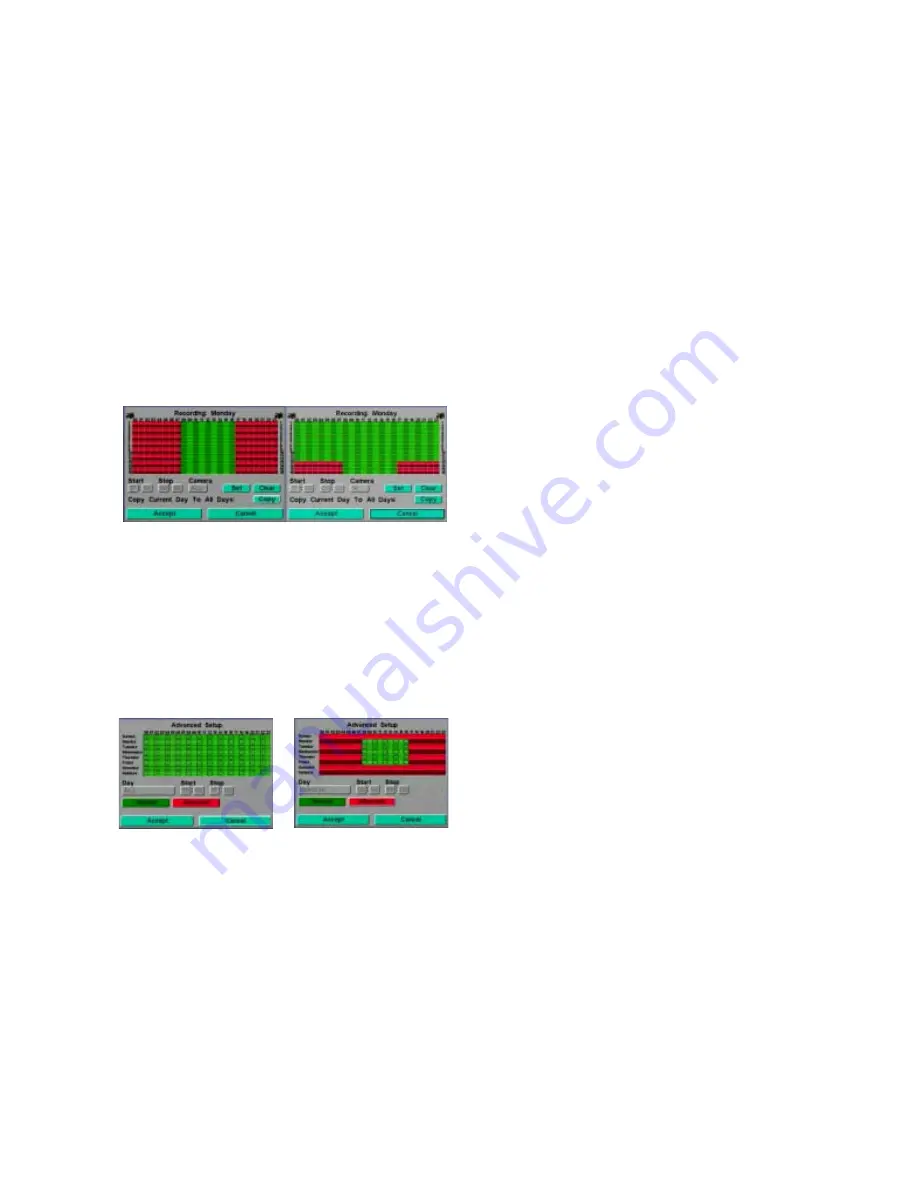
Example showing 8:00 to 17:00
recording schedule for cameras 1 to 16.
Example showing 24 hour recording
schedule for cameras 1-12 and 8:00 to
17:00 recording schedule for cameras
13 to 16.
➜
Monday to Friday, 8:00 to 17:00, Closed
after 17:00, weekends, and holidays.
5.
You can program the system to use a global record rate or set a
record rate for each camera. On the Timelapse Recording
screen, click Normal Setup.
Note
The global rate is common for timelapse VCR-type
recording. Typically, 24-hour timelapse mode is
equivalent to 5 fps and high density (real-time) timelapse
recording is about 15 fps. Disabling the global rate record
rate allows you to set the rate (fps) for each camera.
If you exceed the total number of fps (DVMS 1600: 60 for NTSC, 50
for PAL; DVMS 800: 30 for NTSC, 25 for PAL), you will see a warning
message when you select Accept. If this happens, reduce the individual
record rates so the accumulated total is 60/50 (30/25) fps or less.
Note
Only those cameras in the record sequence are available
for remote live viewing via RAS. For example, if you only
enable cameras 1-12 in the record sequence, RAS cannot
view cameras 13-16.
Motion mode in Advanced mode
Motion mode uses the Motion Event Setup to record timelapse video
only when there is motion in the field of view of the defined
camera(s). The motion must meet the detection criteria for size,
sensitivity, and direction.
Содержание dvms 1600
Страница 1: ...DVMS 1600 800 Duplex Getting Started Guide...


