5
expert net control 2i2o
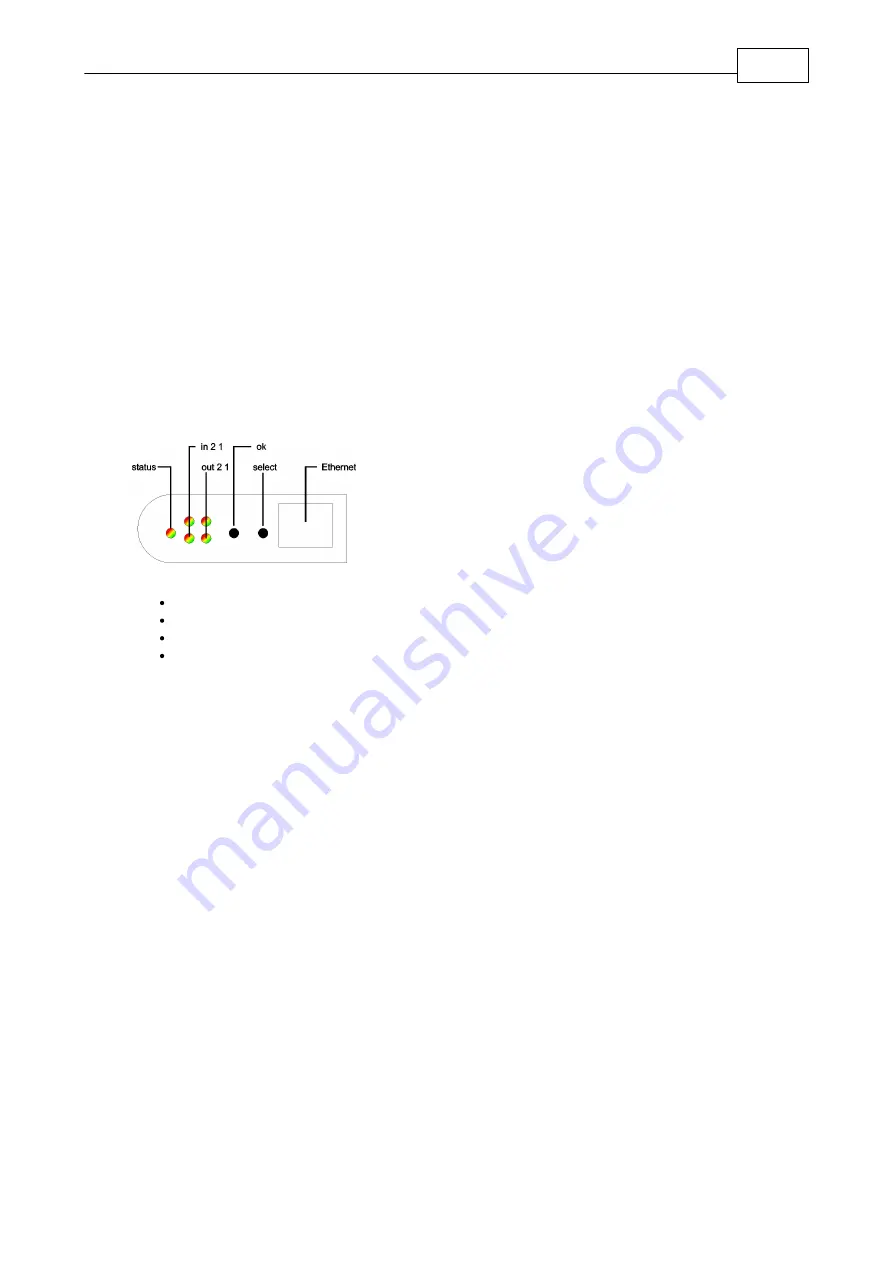
Hardware
2) LEDs Input and Output
3) Buttons "select" and "ok"
4) Ethernet jack (RJ45)
5) Terminal clamps Outport 1 und 2
6) Terminal clampe Input 1 und 2
7) Connector for power supply unit
3.3
Installation
1.) Connect the power supply cable to the of expert net control 2i2o and a socket. expert net control 2i2o now is booting
and shortly after ready for usage.
2.) Plug the Ethernet cable into the ethernet connector (RJ45) of expert net control 2i2o and connect it to your Ethernet.
3.) Connect the clients to the Power Ports of the device.
3.4
Status LED
The Status LED shows different states of the device:
Status LED red: Device is not connected to the ethernet
Status LED orange: Device is connected to the ethernet, TCP/IP settings are not allocated
Status LED green: Device is connected to the ethernet, TCP/IP settings allocated, device is ready to use
Status LED blinks alternately red and green: Device is in Bootloader mode.
4
Configuration
4.1
DHCP
After switch-on expert net control 2i2o looks for a DHCP server and requests an available IP address .
Please check the IP address allocated to expert net control 2i2o in the DHCP server settings to make sure that the same
address is used at every reboot.
4.2
Network settings with GBL_Conf
For changing the network properties manually, the program GBL_Conf.exe is required. This tool is available for free on our
website www.gude.info.
Furthermore GBL_Conf.exe enables you to install firmware updates and to reset expert net control 2i2o to its factory
settings.
Activate bootloader mode of expert net control 2i2o and run GBL_Conf.exe. The program will look automatically for
connected devices and will display their network configuration.
Содержание Expert net control 2i2o
Страница 1: ...2010 expert net control 2i2o...
Страница 2: ...expert net control 2i2o 2010 16 12 2010...
Страница 11: ...11 expert net control 2i2o Declarations of conformity 8 Declarations of conformity...
Страница 12: ...12 expert net control 2i2o Declarations of conformity...
Страница 13: ...13 expert net control 2i2o Declarations of conformity...
Страница 14: ...expert net control 2i2o 2010 16 12 2010...


