5. Sidewall Construction
PNEG-1510
Top Dry 24', 30' and 36' Manual Batch
27
Lifting Jack Usage
Give some thought before starting the bin on location of door and other accessories. Proper placement of
lifting jacks in relationship to anchor bolts could make a difference on odd or even ring bins. Walk-through
door is centered between two (2) stiffener anchor bolts. The sidewall sheets are also staggered 1/2" from
end to end.
Figure 5F
Lifting brackets should be attached to the stiffeners. Normally you will need to attach to at least four (4)
bolts per stiffener. Anchor all jacks securely with metal stakes and cable. Now raise the bin just high
enough to assemble the next ring. When lifting the bin, crank all jacks at an equal rate. This will prevent
bowing previously assembled rings and make for easier hole alignment. To the inside of the first ring, bolt
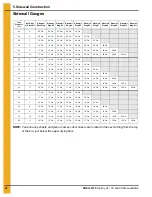
the next ring. Be sure to stagger the sheets and select the proper gauge material. Lower the bin on the
foundation after assembling and tightening bolts on the new ring or rings. When installing duct work for
the drying fans be sure to install it as you go up with the bin letting the duct set on the foundation before
the bolts are tightened to assure proper alignment. Now re-bolt the lifting straps to the lowest ring in place
thus far. Continue ring additions until you are ready for door installation. You may want to leave sheets
loose to make the attachment of the stiffeners easier.
NOTE: Add inside and outside ladders to bin walls as you continue to raise the bin.
WARNING
The number of lifting jacks required is best determined by personal experience.
Factors such as bin size, soil compaction, wind velocity, jack design, etc., are all
to be considered when deciding how many to use. If in doubt, use one jack on
every vertical seam. Be sure to use heavy duty jacks for commercial installation.
Содержание Top Dry 24
Страница 1: ...PNEG 1510 Top Dry 24 30 and 36 Manual Batch Construction and Owner s Manual PNEG 1510 Date 02 18 13 ...
Страница 2: ...2 PNEG 1510 Top Dry 24 30 and 36 Manual Batch ...
Страница 30: ...6 Stiffener Details 30 PNEG 1510 Top Dry 24 30 and 36 Manual Batch Outside Stiffeners Continued Figure 6A ...
Страница 34: ...6 Stiffener Details 34 PNEG 1510 Top Dry 24 30 and 36 Manual Batch Stiffener and Seam Locations Figure 6E ...
Страница 78: ...10 Accessories 78 PNEG 1510 Top Dry 24 30 and 36 Manual Batch 2 Ring Door Assembly Figure 10B ...
Страница 80: ...10 Accessories 80 PNEG 1510 Top Dry 24 30 and 36 Manual Batch Optional Bin Step Assembly WD 042 Figure 10C ...
Страница 82: ...82 PNEG 1510 Top Dry 24 30 and 36 Manual Batch NOTES ...


