


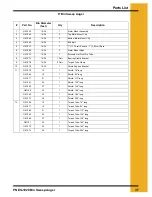
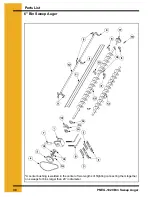

PNEG-1020 Bin Sweep Auger
23
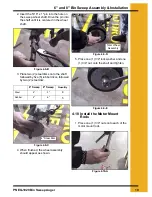
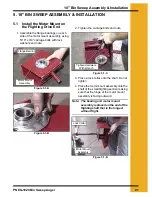
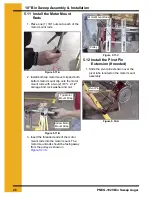
10" Bin Sweep Assembly & Installation
5.3 Position the Motor Mount
Assembly and Tighten the
Lock Collars
1. Slide the motor mount assembly toward
the pulley until there is an 1/8" to 1/4" gap
between each.
Figure 5.3-A
2. When the motor mount assembly is
positioned properly, tighten the lock
collars. To tighten the lock collars, use a
punch and hammer to drive the collar,
closest to the flighting, clockwise and the
collar, closest to the pulley, counter
clockwise, until tight. (noted in
) Then proceed to tighten
with an 1/8" hex-head wrench.
(shown in
Figure 5.3-B
Figure 5.3-C
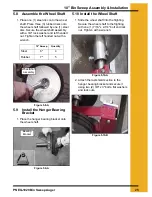
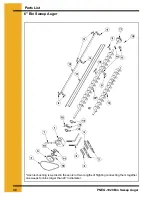
5.4 Install the Flighting
1. Insert the connecting stub into the small
section of flighting. Secure it with bolts,
lock washers and nuts.
Note: Use the chart below to determine the
number of flighting and shield
sections needed for the length of
sweep to be used.
Figure 5.4-A
Motor Mount
Assembly
Use hammer and punch
to tighten collar clockwise
10" Binsweep Flight/Shield Combinations
3' 9"
5' 3"
6' 9"
8' 3"
9' 9"
24' Bin
2
27' Bin
1
1
30' Bin
2
33' Bin
1
1
36' Bin
2
39' Bin
1
1
42' Bin
2
Connecting
Stub


