Operation with a Satellite Receiver
ķ
40
Recording and TIMER recording or
satellite TV stations
❒
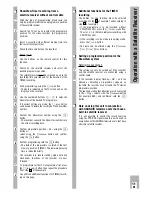
Recording from a satellite receiver with
a control cable
Switch the TV set on and select the programme
position for the video recorder (AV programme
position).
Insert a cassette with sufficient playing time into
the cassette compartment.
Select programme position, step by step with the
DC
buttons on the remote control or the
Ü *
buttons on the recorder;
or directly with the numbered buttons
1
…
0
on
the remote control.
Press the numbered buttons quickly one after the
other for two-figure programme positions.
– The recorder switches the satellite receiver on
automatically and the selected station is shown.
Select long-play recording – if desired – with the
›
SP/LP
button on the remote control.
– This doubles the cassette’s playing time.
Start recording with the
K
/
ø
button.
Pause recording using the
W
/
Ó
button.
Continue recording with the
K
/
ı
button.
End recording with the
H
/
ø
button.
❒
Recording from a satellite receiver
without a control cable
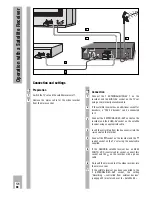
Switch the TV set on and select the programme
position for the video recorder (AV programme
position).
Insert a cassette with sufficient playing time into
the cassette compartment.
Select the »
A2
« programme position using the
›
AV
button on the remote control.
Switch on the satellite receiver and select the
desired programme position.
Start recording with the
K
/
ø
button.
Select recording pause using the
W
/
Ó
button.
Continue recording with the
K
/
ı
button.
End recording with the
H
/
ø
button.
7
6
5
4
3
2
1
7
6
5
4
3
2
1
❒
ShowView Timer recording from a
satellite receiver with control cable
Switch the TV set on and select the programme
position for the video recorder (AV programme
position).
Insert a cassette with sufficient playing time into
the cassette compartment.
Ń
!
Check the date and time on the recorder.
Ń
!
When programming each satellite TV station for the
first time, you will need to “teach” the video
recorder which programme position the TV station
is on.
How this is done is described in the chapter
“Setting a programme position for the ShowView
system” on the next page.
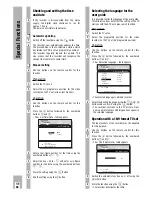
Example 1:
Use the buttons on the remote control for this
function.
Use the
›
SV/V+
button to start programming.
– The data is indicated on the TV screen and on the
display on the recorder.
Use the numbered buttons
1
…
0
to enter the
ShowView of the desired TV programme.
If incorrect entries are made, the
›
CLEAR
button
can be used to delete the last digit of the ShowView
number.
The complete ShowView number can be deleted
using the
›
SV/V+
button.
Confirm the ShowView number using the
G
button.
– The recorder converts the ShowView number into
the actual recording data.
Confirm programming using the
G
button.
– The data of the programme is stored at the first
memory position (TIMER). The remaining playing
time is indicated briefly.
Ń
!
The recorder is in record standby mode. All drive
mechanism functions of the recorder are now
“blocked”.
The recorder switches the satellite receiver on at
the selected recording time.
Ń
!
To programme further TV programmes first press
the
›
TIMER ON/OFF
button then repeat the procedure
from step
of the example.
You will find additional functions for TIMER record-
ing on the next page.
Ǻ
1
Ǻ
4
3
Ǻ
Ǻ
2
1
Ǻ
2
1
➡
Содержание GV 740 HiFi
Страница 1: ...VIDEORECORDER GV 740 HiFi...
Страница 51: ...GB 3103 166 19701 GV 740 HiFi 7453 082 B 3...


