


-30-
Model G0701 (Mfd. Since 9/17)
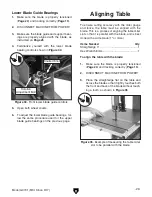
4. Use the finely incremented ruler and record
the distance between the miter slot and the
front and back of the straightedge.
— If the distances are the same, no further
adjustments are needed.
— If there is a difference between the distanc-
es from the miter slot and the straightedge,
continue with this procedure.
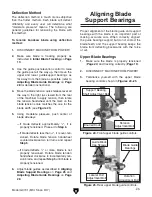
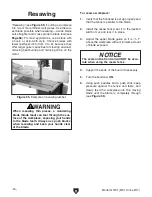
5. From underneath the table, loosen the four
trunnion cap screws that secure the table
(see
Figure 36).
6. Shift the table until the distances between
the miter slot and straightedge are equal, as
measured in
Step 4.
7. Re-tighten the trunnion cap screws, then
repeat
Step 4. If necessary, repeat Steps
4–6 until you are satisfied.
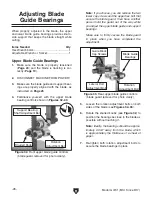
Figure 36. Trunnion cap screws (3 of 4 shown).
Trunnion Cap
Screws
(3 of 4 shown)
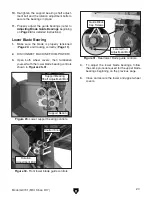
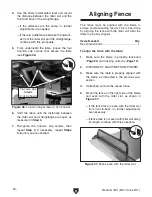
Aligning Fence
Figure 37. Fence even with the miter slot.
Items Needed
Qty
Hex Wrench 6mm .............................................. 1
To align the fence with the table:
1. Make sure the blade is properly tensioned
(
Page 24) and tracking correctly (Page 19).
2. DISCONNECT MACHINE FROM POWER!
3. Make sure the table is properly aligned with
the blade, as instructed in the previous sub-
section.
4. If attached, remove the resaw fence.
5. Mount the fence on the right side of the blade
and even with the miter slot, as shown in
Figure 37.
— If the fence face is even with the miter slot
from front-to-back, no further adjustments
are necessary.
— If fence face is not even with miter slot along
its length, continue with this procedure.
The fence must be aligned with the blade to
ensure accurate cutting results. This is best done
by aligning the fence with the miter slot after the
table is properly aligned.