background image

r3a-x2.0 

19

™


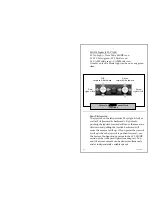
Blinking green – camera is powered on but not 
recording. 

™


Solid green – camera is powered on and recording. 

™


Blinking red – record protect tab is set, or power is 
low, or less than 5 minutes of tape remains, or 
there is no tape in the camera. 

 
TILT or PAN LIMIT Lights 

™


No light – you can continue to pan or tilt as you 
have not yet reached the limit of the Pan/Tilt 
head. 

™


Flashing amber – you have reached the pan or tilt 
limit of the Pan/Tilt head and thus you can go no 
further in that direction. 

 
PWR Button 
Power on/off the current Preview Camera by 
pressing PWR.  This assumes that the selector switch 
on the physical camera has been previously set to 
CAMERA.   
 
If you press and hold the PWR button for greater than 
2 seconds, all cameras will power on simultaneously.  
But, when powering off, each camera must be 
powered off separately - as described in the above 
paragraph. 


MODE Button 
The MODE Button indicates if you are in SYS MODE, 
CAM MODE or neither (aka Time Code Mode).   By 
pressing the MODE button you will cycle through 
these modes. 
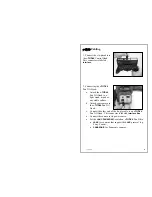
Press the MODE button : 

1.


once and you will be in SYS MODE and the 
SYS MODE Light will be on.   

Содержание r-THREE

Страница 1: ...Operating Instructions These instructions cover the r THREE family of products which includes the r ONE the r THREE and the r THREE LS Before operating any of these systems please read this manual and keep it for future reference 2004 2005 by Grizzly Pro Video ...

Страница 2: ...t cases the r THREE family of products can be described together Where differences exist a note will be given The r THREE family of Integrated Remote Camera Systems has been designed for LANC cameras including HD You will get the most benefit from this system if you are using such cameras However we do support Non LANC Panasonic cameras but only with a limited set of features The following Operati...

Страница 3: ...ace Box 25 3 r THREE Pan Tilt Head 28 Basic Operations 30 1 r ONE Example 31 2 r THREE Examples 32 r THREE Advanced Operations 35 MODES 36 Time Code MODE 37 SYS MODE 38 Table 1 SYS MODE Menu 39 Table 2 Curve Configuration 43 Table 3 Deadband Configuration 44 CAM MODE 46 Table 4 LANC Camera Commands 46 Panasonic Support 49 Helpful Hints 51 Troubleshooting 52 INDEX 57 FCC Warning 58 Warranty 59 NOTE...

Страница 4: ... status of your cameras e g record on off time codes battery charge etc o configure the system to your needs e g adjust pan tilt and zoom speed configure joystick response etc o send camera menu commands to your LANC camera as if you were dialing the menus dial from the back of your camera e g exposure control In addition only a very thin flexible CAT5 cable from each pan tilt head to one centrali...

Страница 5: ...ve become familiar running the r THREE system with only the Basic Operations then read over the features described in the Advanced Operations Keep in mind that the system as shipped is fully configured to control up to three cameras remotely so none of the features described in the Advanced Operations are required to successfully operate your r THREE system ...

Страница 6: ...rt the LANC protocol Not all LANC cameras support all LANC protocols All LANC cameras support zoom focus power on off record on off and time codes Other features like auto focus control and some CAM MODE functions see Table 4 are dependent upon what portions of the LANC protocol the manufacturer of your camera has chosen to implement Panasonic cameras do not support the rich set of LANC commands t...

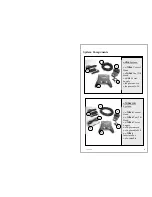
Страница 7: ...2 r THREE Pan Tilt Head 3 r ONE Power Supply 4 r3a ptzcam rca 5 r3a ptzcable 50 2 3 5 1 4 r THREE LS System 1 r THREE Control Head 2 r THREE Pan Tilt Head 3 r THREE Power Supply 4 r3a ptzcam rca 5 r3a ptzcable 100 6 r THREE Interface Box 7 r3a intcable 1 2 3 4 5 6 7 ...

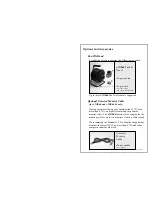
Страница 8: ...ication of 12V at no more than 0 75A we highly recommend our powered monitor cable The r THREE Interface Box can provide the needed power for up to two monitors if such a cable is used We recommend the Marshall 5 6 Pro Monitor though other monitors that draw 12V no more than 0 75A and take a composite input should work Powered Monitor Cable r3a moncable rca or phone r THREE PanTilt Head r3a ptzcam...

Страница 9: ...a light stand tripod or any stable surface b Attach your camera to the r THREE Pan Tilt Head c Connect the other end of the r3a ptzcable to an r THREE Pan Tilt Head This connector is labeled Interface Box d Connect the camera to its power source e Set the LANC PANASONIC switch on r THREE Pan Tilt to LANC for cameras that support the LANC protocol e g Sony Canon PANASONIC for Panasonic cameras ...

Страница 10: ... on your camera or to the remote connector for Panasonic cameras b The remaining plug should connect to the Video plug on your camera On most cameras this connector is yellow 5 Connecting the monitor a Connect the monitor cable that came with your monitor to the Preview on the r THREE Control Head b Connect the other end of this cable to your monitor c Connect the power cable that came with your m...

Страница 11: ...gether b Connect the end of the power supply to the 24vdc on the back of the r THREE Control Head c Then plug the power supply into the wall and you are ready to start shooting 7 The r THREE Control Head will look like See the Basic Operations section once you are ready to start shooting ...

Страница 12: ...EE Control Head This connector is labeled Interface 2 Connect the other end of the r3a intcable to the r THREE Interface Box This connector is labeled Control Head 3 Connect the r3a ptzcable to one of the three CAM connections on the front of the r THREE Interface Box ...

Страница 13: ...other end of the r3a ptzcable to an r THREE Pan Tilt Head This connector is labeled Interface Box d Connect the camera to its power source e Set the LANC PANASONIC switch on r THREE Pan Tilt to LANC for cameras that support the LANC protocol e g Sony Canon PANASONIC for Panasonic cameras 5 Connect the r3a ptzcam rca cable to the back of the r THREE Pan Tilt Head This connector is labeled Camera ...

Страница 14: ...ector is yellow 7 Repeat steps 4 6 for any additional r THREE Pan Tilt Heads that are to be controlled by the r THREE system 8 Connect the r3a moncable to the Preview Monitor on front of the r THREE Interface Box or attach your monitor to the Preview BNC on the back of the interface box 9 Connect the other end of the r3a moncable to the monitor in two locations DC 12V and Video In For a second mon...

Страница 15: ... the wall or power source 11 Power on the r THREE Interface Box using the 1 0 Power switch Powering the system on will also power on the Preview Monitor and Program Monitor if it is also connected the r THREE Control Head and the r THREE Pan Tilt Head s 12 If only one pan tilt head is attached the r THREE Control Head will look like See the Basic Operations section once you are ready to start shoo...

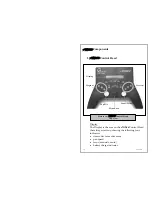
Страница 16: ...s the area on the r THREE Control Head that always starts up showing the following four indicators time codes for each camera pan speed focus manual or auto battery charge indicator Display Preview Program Pan Tilt Zoom Focus Menu Knob Picture 1a r THREE Control Head Top View ...

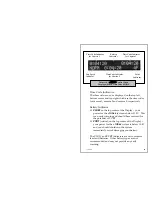
Страница 17: ...tential of VCRT VCRT critical on the top center of the Display your power for the r THREE system is below 10 8V and you should shutdown the system immediately or risk damaging your battery The VLOW and VCRT indicators are set to monitor lead acid batteries Other battery types are not recommended and may not provide any early warning Picture 1b r THREE Control Head Display when in Time Code MODE Ti...

Страница 18: ...image the focus indicator will show F N or F F to indicate that the camera is focusing near or focusing far Note Some LANC cameras were not designed to communicate the focus indicator information Thus the AF indicator may not appear on the Display even when you are set to auto focus Preview Buttons Preview buttons are by default the set of three buttons on the right which are labeled 1 2 3 This se...

Страница 19: ...and held for at least half a second The length of this dissolve is configurable in the Video Configuration section of the Sys Menu Note the r THREE system only allows for selecting Preview or Program cameras that are currently connected to the system If you select a Preview or Program button for a camera and the light does not come on check to ensure that the r3a ptzcable cable from the r THREE Pa...

Страница 20: ...an go no further in that direction PWR Button Power on off the current Preview Camera by pressing PWR This assumes that the selector switch on the physical camera has been previously set to CAMERA If you press and hold the PWR button for greater than 2 seconds all cameras will power on simultaneously But when powering off each camera must be powered off separately as described in the above paragra...

Страница 21: ...R button has been previously pressed Pressing REC will cause the CAM 1 2 3 STATUS Light to become solid green when the camera is recording and flashing green when the camera is not recording If you press and hold the REC button for greater than 2 seconds all cameras will start recording nearly simultaneously But when stopping the record each camera must be stopped separately as described in the ab...

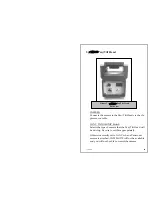
Страница 22: ...the joystick forward will cause the camera to tilt down and pulling the joystick backward will cause the camera to tilt up If you prefer the joystick to tilt up when the joystick is pushed forward see the System Configuration options in the SYS MODE section of the Advanced Operations chapter Pan and tilt axis movement can be done simultaneously and at independently variable speeds Picture 1c r THR...

Страница 23: ... the joystick up or down to Zoom this will have priority over any simultaneous left or right movement to Focus Thus Zoom has priority over Focus to ensure that you do not inadvertently lose your focus when zooming in In addition the Zoom Focus Joystick also acts as a button When pressed you ll hear a click the focus indicator on in the Display will change to indicate if the camera is in manual foc...

Страница 24: ...m the one remote camera Generally you will want to connect a monitor to this feed to allow for remote viewing of your camera A monitor cable with a BNC connector will be needed Interface For the r ONE A powered interface which connects to the r THREE Pan Tilt Head with the r3a ptzcable For the r THREE and r THREE LS A powered interface which connects to the r THREE Interface Box with the r3a intca...

Страница 25: ...for r ONE only The power which uses a locking 3 pin cable Power from this will then power the r ONE system the Pan Tilt Heads the Control Head Power for the individual cameras as well as the monitor must be handled separately ...

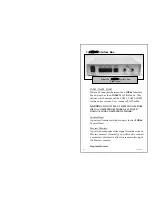
Страница 26: ... cable WARNING DO NOT PLUG THESE CONNECTORS INTO A COMPUTER NETWORK AS IT COULD DAMAGE YOUR COMPUTER NETWORK Control Head A powered interface which connects to the r THREE Control Head Preview Monitor A powered composite video signal from the current Preview camera Generally you will want to connect a monitor to this feed to allow for remote viewing of the Preview camera Program Monitor Picture 2a...

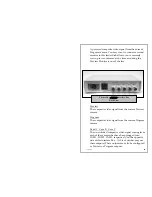
Страница 27: ...omposite video signal from the current Preview camera Program The composite video signal from the current Program camera Cam A Cam B Cam C The un switched composite video signal coming from each of the cameras that have been plugged into CAM1 CAM2 CAM3 respectively on the opposite side of this Interface Box A Live Switcher may use these outputs These outputs may also be configured as Preview or Pr...

Страница 28: ... standard 4 pin XLR cable Power from this will then power the whole r THREE system all the Pan Tilt Heads the Control Head the Interface box the Preview and Program Monitors that use the Powered Monitor Cable Power for the individual cameras must be handled separately ...

Страница 29: ... LANC PANASONIC Switch Selects the type of camera that the Pan Tilt Head will be driving Be sure to set this appropriately If this is incorrectly set to LANC when a Panasonic camera is attached CAM MODE will not be available and you will not be able to control the camera Picture 3 r THREE Pan Tilt Head Back View ...

Страница 30: ...e Pan Tilt Head to the r THREE Interface Box at CAM1 CAM2 or CAM3 This defines which camera will be CAM1 CAM2 CAM3 for the entire system WARNING DO NOT PLUG THESE CONNECTORS INTO A COMPUTER NETWORK AS IT COULD DAMAGE YOUR COMPUTER NETWORK ...

Страница 31: ...trol exposure photo capture etc configurable tilt direction zoom configuration and so on please refer to the Advanced Operations section What follows are quick step by step examples for setting up and running a single camera remote system and then a three camera remote system If at any time you encounter a problem please refer to the Troubleshooting chapter for what you need to check If you are un...

Страница 32: ...he Red PWR Button to power on your remote camera The CAM2 STATUS Light should now be blinking green The Preview Monitor connected to the r THREE Control Head should now display the video signal for your remote camera 5 Next press the green REC Button to start recording on your remote camera The CAM2 STATUS Light should now be solid green The time codes for your remote camera should start to run on...

Страница 33: ...STATUS Light is not blinking green then press the Red PWR Button to power on your remote camera The CAM1 STATUS Light should now be blinking green The Preview Monitor connected to the r THREE Interface Box should now display the video signal for your remote camera 5 Next press the green REC Button to start recording on your remote camera The CAM1 STATUS Light should now be solid green The time cod...

Страница 34: ...n The Preview Monitor connected to the r THREE Interface Box should now display the video signal for one of your remote cameras the camera displayed is based upon which camera is the current Preview camera 5 Next press and hold for at least 2 seconds the green REC Button to start recording on all your remote cameras The CAM1 CAM2 and CAM3 STATUS Light should now be solid green The time codes for a...

Страница 35: ...r3a x2 0 34 used to view a second camera on the Program Monitor assuming you have a Monitor attached to the Program Monitor on the r THREE Interface Box ...

Страница 36: ...anced features are built around three modes Time Code Mode SYS MODE and CAM Mode Time Code Mode as shown previously on Picture 1b continuously updates the state of the system with time code information battery state current pan speed and focus state The SYS MODE details follow allows the system to be uniquely configured for a particular shoot or for your particular needs for things like joystick r...

Страница 37: ...E CAM MODE Select MODE with MODE Button Find the desired configure option by dialing the Menu Dial Push the Menu Dial to select and configure Find the desired camera command by dialing the Menu Dial Push the Menu Dial to select and configure ...

Страница 38: ...he Display will look something like depending on the number of cameras being used When in Time Code MODE the Menu Knob acts exactly like the menu select dial on your LANC camera Any function that can be controlled on the camera can also be controlled remotely This feature can be used for example to manually adjust exposure ...

Страница 39: ...Speed selection you may see Cam1 25 100 100 By dialing the Menu Knob right and left the max zoom speed can be changed 4 Press the Menu Knob to make the desired change Note that changes take effect immediately The change made can be save indefinitely or just saved until the system is powered down a Save As Default Dial the Menu Knob until Save As Default appears and then press the Menu Knob to sele...

Страница 40: ...t to 100 Note you can set the max speed for each camera individually by selecting the camera with the Preview buttons Cam 1 2 3 Default zoom speed is 100 fastest LS option only Video configuration you to configure Color Bars by default the Color Bars are off Dissolve by default the number of frames used in a dissolve is 30 This value can be adjusted from 1 to 241 Video Signal by default the Bright...

Страница 41: ...individually by selecting the camera with the Preview buttons Cam 1 2 3 Default Color Bars are Off Default Dissolve is 30 frames Default Video Signal Brightness Color Hue and Contrast is 0 Default Output Config is NTSC IRE7 5 and Cam 1 2 3 outputs to Cam A B C Pan Tilt configuration allows you to configure Responsiveness curve by default the Pan Tilt Joystick will respond in an exponential manner ...

Страница 42: ...e faster it will zoom Fixed Speed Linear Speed as well as other Exponential Curves 1 9 can be configured see Table 2 3 below for further details Deadband by default the Zoom Joystick is set to have a 10 deadband so that the zoom does not get modified inadvertently This value can be configured to 1 25 Default curve is exponential 4 Default deadband is 10 System configuration allows you to configure...

Страница 43: ...own when the Tilt Joystick is pushed forward This is Normal Tilt If your preference is such that pushing the Tilt Joystick forward should cause the camera to tilt up or if your camera is mounted upside down you may prefer to reverse this so that the camera will tilt up when the joystick is pushed forward This is Reversed Tilt Default Push Fwd Tilt Dn Default CAM 1 2 3 Pan Normal Default CAM 1 2 3 ...

Страница 44: ... percent of joystick range curve can be any of the following Table 2 Curve Configuration Fixed Speed With a fixed curve once you have passed the deadband value the speed will stay at the fixed speed Linear Curve With a linear curve the speed increases at a constant rate as the joystick is pushed further Exponential Curve With an exponential curve the speed starts out slower and ramps up faster as ...

Страница 45: ... curve allows for more precise control at low speeds Unlike linear exponential keeps the ramp of the speed slower at the low end of the joystick As you push the joystick further the speed accelerates smoothly until you reach the max speed See Diagram 1 below You can also configure the exponential or linear curve to have an initial deadband Linear curve s p e e d of joystick range Exponential curve...

Страница 46: ...eed results in immediate max speed when the joystick is pushed You can also configure a deadband to provide a dead zone on the joystick See Diagram 2 below Fixed Speed curve s p e e d of joystick range Max Speed Diagram 2 Fixed Speed Curve with 20 deadband Deadband ...

Страница 47: ...isplay 2 Select the command by pressing the Menu Knob 3 If the Camera Command Display is on you will likely see some indication that the mode is on or off See your camera manual for details You can exit from CAM MODE at any time by pressing the MODE button Table 4 LANC Camera Commands With Camera Commands Menu selected you will enable the camera menu on your physical camera See the CAM MODE Exampl...

Страница 48: ...ew Camera Be aware that not all cameras support all the Camera Commands You must determine which ones work for your cameras and then use these commands accordingly Keep in mind that the Menu Knob is very useful when in Time Code MODE as it acts just like the control dial on the back of your physical camera On the Sony PD 150 for instance if you press the Auto Exposure Shift button on the physical ...

Страница 49: ...ands Menu by pressing the Menu Knob 6 Set to Time Code MODE and now you can again use the Menu Knob dial as though you were using the menu select dial on the back of the physical camera to go through and select the camera menu items such as Color Bar 7 If you set to CAM MODE again and this time select Camera Commands Display and then Time Code MODE you will no longer see the camera menu items on t...

Страница 50: ...Lights will always be off Panasonic cameras must be set to auto focus on the camera itself The Zoom Focus Joystick will only Zoom up down Focus left right will have no effect Only SYS MODE and Time Code Mode are supported as the CAM MODE feature requires LANC support which Panasonic cameras do not provide If you attempt to select CAM MODE when using a Panasonic camera the system will go to the nex...

Страница 51: ... Tilt Head must be switched to PANASONIC The r THREE Integrated Remote Camera System supports the following Panasonic cameras AG DVX100 AG DVX100A AG DVX60 AG DVC80 All other Panasonic cameras including AG DVC30 AG DVC7 AG 45x are not supported ...

Страница 52: ...cameras via the Program Buttons You may however connect the three CAM 1 3 output on the back of the r THREE Interface Box into an external Live Switcher or consider our r THREE LS product The r3a ptzcable used to connect the r THREE Pan Tilt Head to the r THREE Control Head is a standard CAT5 cable The r3a intcable used to connect the r THREE Interface Box to the Control Head is also standard CAT5...

Страница 53: ...an 5 minutes of tape left 9 Check that your camera has a tape 9 Check that the Record Protect Tab is not set on the tape 9 Check that your physical camera is ready to record can you start stop recording from the physical camera The r THREE Control Head Display indicates VLOW or VCRT 9 Check the battery that is connected to the r THREE Interface Box as it is getting low VLOW is an early warning and...

Страница 54: ... they are you have reached the limit of the r THREE Pan Tilt Head 9 Check the cabling The Preview or Program Monitor is black even though the camera is powered on and the PWR Button has been pressed 9 Check that the desired camera has been selected on the Preview Buttons and the PWR Button has been pressed 9 Check that the lens cap is off on the camera 9 Check the cabling Time Code MODE shows PANA...

Страница 55: ...lf regarding the behavior of this camera CAM MODE cannot be selected 9 If this is a LANC camera check that the switch on the r THREE Pan Tilt Head attached to the LANC camera is set to LANC 9 If this is a Panasonic Camera then see Panasonic Support for the features that are supported 9 Check the List of Tested supported Cameras on our website at http grizzlypro com SYS or CAM MODE command selectio...

Страница 56: ...ou have selected the Camera Commands Menu by pressing the Menu Knob AND that you have then gone to Time Code MODE by pressing the MODE button no MODE light should be on Only when you are in the Time Code MODE will you be able to dial through the camera menu The Menu Knob will act just as if you are using the dial on the back of the physical camera ...

Страница 57: ...ands Menu does not show any camera menu items on my monitor yet I selected the Camera Commands Menu 9 You must have the CAM MODE Camera Commands Display selected for any camera display information to be visible on the Preview Monitor ...

Страница 58: ...Knob 20 37 38 42 46 48 54 55 Mode Button 19 20 37 39 46 54 55 Monitor cable 7 9 23 27 P Pan Tilt Head 3 5 7 14 18 19 23 25 27 29 51 54 Pan Tilt Joystick 21 22 40 41 53 Panasonic 1 5 8 9 12 13 28 49 50 54 Preview Camera 19 20 25 Preview Monitor 13 14 25 26 31 32 33 Program Camera 18 26 52 Program Monitor 13 14 25 27 34 53 S SYS Mode 19 21 35 38 39 43 49 53 T Time Codes 5 15 16 20 28 31 32 33 Time C...

Страница 59: ...is operated in a commercial environment This equipment generates uses and can radiate radio frequency energy and if not installed and used in accordance with this user s guide may cause harmful interference to radio communications Operation of this equipment in a residential area is likely to cause harmful interference in which case the user will be required to correct the interference at his own ...

Страница 60: ...curring the obligation to install such improvements or changes on equipment or items previously manufactured Limitations and Exclusion We disclaim liability for incidental and consequential damages for breach of any express or implied warranty including any implied warranty of merchantability with respect to this product This writing constitutes the entire agreement of the parties with respect to ...

Страница 61: ...r3a x2 0 60 notes ...

Страница 62: ...r3a x2 0 61 notes ...

Страница 63: ...r3a x2 0 62 notes What you can do if often simply a matter of what you will do So many things are possible just as long as you don t know they re impossible The Phantom Tollbooth ...

Страница 64: ...r3a x2 0 63 http grizzlypro com Grizzly Pro Video Printed on recycled paper ...

Отзывы: