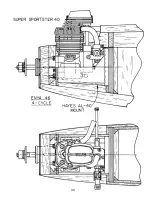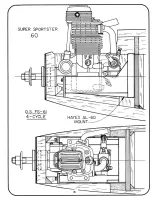
FINAL ASSEMBLY
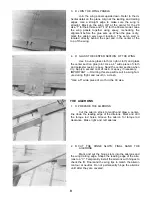
1. D ALIGN THE FUSELAGE TO THE WORK SURFACE
AND THE WING TO THE FUSELAGE
Align the fuselage upside down to the work surface
using the line along the top of the fuselage side as the
reference line. This line should be parallel to the flat work
surface. Align the wing to the fuselage by making the
following measurements: A - Center the wing side to side
in the saddle. The distance from the fuselage side to the
wing tip on each side should be the same. B - The wing tip
to stab tip distance should be the same on both sides. C -
Wing tip to work surface distance should be the same on
both sides. D - The wing has 0 degrees incidence like the
stabilizer. The leading edge to work surface should be the
same as the trailing edge to work surface distance. When
the wing is aligned correctly, mark the position of the wing
on the fuselage so you can realign the wing again. Re-
member these measurements will not work unless you
have aligned the fuselage to the work surface first. The
reference line should be parallel to the work surface.
Measure from this line down to the work surface at several
points on both sides of the fuselage. All the measure-
ments should be the same from one side to the other.
WING MOUNTING (40 AND 60 SIZE ONLY) (GO TO STEP 5
IF YOU ARE BUILDING A 20 SIZE.)
2. D DRILL AND TAP WING BOLT HOLES IN THE WING
AND FUSE
With the wing still aligned to the fuselage, drill two
13/64" pilot holes through the wing hold down plates in the
leading edge of the wing. Drill a pilot hole for the rear hold
down in the center of the trailing edge for the 40 size. Drill
two holes for the 60 size at the rear. Drill this (these) rear
hole (holes) at an angle so the bolt head(s) will rest flat on
the trailing edge. For the 60 size model, glue the 1/16" Ply
plates at the rear of the wing first before you drill holes for
the rear wing bolts. Remove the wing and redrill and
counterbore the wing holes for the 1/4-20 wing bolt clear-
ance so the bolt heads will rest flat on the hold down
plates in front and on the trailing edge or plates at the rear.
Tap the wing hold down plates in the fuselage using a
1/4-20 tap.
21
Содержание Super Sportster 20
Страница 33: ...33...
Страница 34: ...34...
Страница 35: ...35...
Страница 36: ...36...
Страница 37: ...37...
Страница 41: ...Use trim MonoKote and these letters to create your trim scheme on your Sportster 41...
Страница 43: ...PUSHROD LINKAGES 43...


