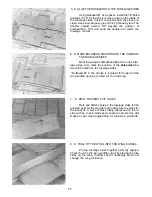
6. D ADD THE TOP SPAR, TOP LEADING EDGE SHEET-
ING AND TOP TRAILING EDGE SHEETING
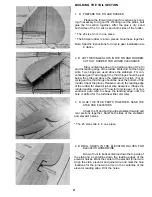
Glue the top spar in place. Glue the top leading
edge sheeting between the leading edge and the dotted
line on the top spar shown on the plans. Align the top trail-
ing edge sheeting even with the back of the trailing edge
and glue it in place.
7. D ADD THE TOP CENTER SECTION SHEETING AND
CAP STRIPS
Glue the top center section sheeting in place. Glue
the front piece on first. Then cut the rear piece to fit and
glue it in place. Add the top cap strips. Note that the cap
strip on the tip rib (outer end of the wing) is offset so the
outer edge is flush with the outer edge of the rib. After the
glue sets up, remove the wing from the building board and
check all the glue joints. Add more glue if necessary. Now
remount the wing upside down reversing the trailing edge
shim on your work surface.
8. D PREPARE THE MAIN LANDING GEAR BLOCK
Glue the torque block to the inboard (inside) end of
the ungrooved side of the landing gear block. The grooved
side of the torque block should face toward the other end
of the long landing gear block. After the glue dries, drill a
5/32" hole down through the landing gear block, using the
groove in the torque block as a guide. Epoxy is recom-
mended for the above procedure.
9. D TRIAL FIT THE LANDING GEAR BLOCK ASSEMBLY
Temporarily install the landing gear support as-
sembly into the wing. Custom fit the assembly as follows.
Shape the bottom end of the torque block to fit the contour
of the wing sheeting to which it mates. The top of the long
grooved block should be flush with the bottom sheeting (not
yet installed).
5
Содержание Super Sportster 20
Страница 33: ...33...
Страница 34: ...34...
Страница 35: ...35...
Страница 36: ...36...
Страница 37: ...37...
Страница 41: ...Use trim MonoKote and these letters to create your trim scheme on your Sportster 41...
Страница 43: ...PUSHROD LINKAGES 43...

