❏
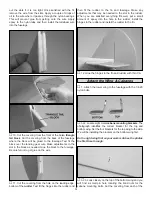
14. Make any additional needed cut outs in the cowl for
the muffler, glow driver, needle valve, etc.
❏
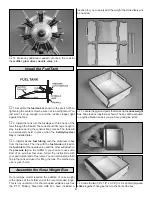
1. Assemble the fuel tank as shown in the sketch. When
tightening the center screw be sure not to overtighten it. You
just want it snug enough to pull the rubber stopper tight
against the tank.
❏
2. Install the tank into the fuselage with the neck of the
tank through the firewall. The tank should fit snug enough to
stay in place during the construction process. The tank will
be permanently held in place when the battery/receiver
tray is installed later.
❏
3. Install silicone fuel tubing onto the aluminum tubes
from the fuel tank. The line with the fuel clunk will feed to
the fuel inlet at the needle valve and the other will attach to
the pressure tap on the muffler. If you choose to use some
kind of an external fuel valve, follow the instructions with
your particular brand of fuel valve. You can also install a third
line to the tank and use it for filling the tank. The method you
use is your choice.
Our prototype model required the addition of nose weight
with engines at the bottom end of the recommended range.
This is not uncommon for short-coupled airplanes such as
the PT-17 Military Stearman ARF. We have included a
location for you to easily add the weight that most likely will
be needed.
❏
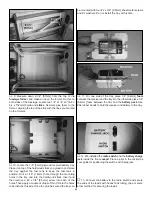
1. Locate the plywood parts that make up the nose weight
box. Glue the box together as shown. The box will be exposed
to engine vibration so be sure you have good glue joints.
❏
2. Glue the two 1/8" x 1/4" x 3-1/4" [3 x 6.4 x 83mm] plywood
sticks together. Then glue them to the front of the box.
Assemble the Nose Weight Box
Install the Fuel Tank
21


