❏
14. This completes the wires for the right side. Repeat
steps 1-13 for the opposite side.
❏
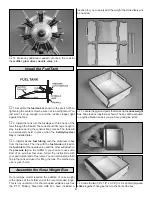
15. Make a mark identifying the top center of the
fuselage. Mark four holes as shown. Drill partially into the
fuselage with a 5/64" [2mm] drill on each of the four marks.
❏
16. Cut four pieces of elastic cord 4-1/4" [108mm] long.
Glue a cord into each of the four holes. Stretch the cord to
the top of the cabane and glue the cord to the cabane with
a small drop of CA.
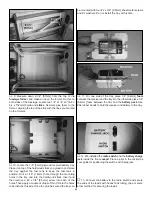
The Stearman was primarily a fabric-covered aircraft, but
there were some panel lines along the top of the fuselage.
In addition to the photographs on the box, the following
pictures should help you in the placement of the decals.
❏
1. Use scissors or a sharp hobby knife to cut the decals
from the sheet.
❏
2. Be certain the model is clean and free from oily
fingerprints and dust. Prepare a dishpan or small bucket
with a mixture of liquid dish soap and warm water-about one
teaspoon of soap per gallon of water. Submerse the decal in
the soap and water and peel off the paper backing.
Note: Even though the decals have a "sticky-back" and are not
the water transfer type, submersing them in soap & water allows
accurate positioning and reduces air bubbles underneath.
❏
3. Position decals on the model as shown on the box
cover. Holding the decal down, use a paper towel to wipe
most of the water away.
Apply the Decals
29


