❏
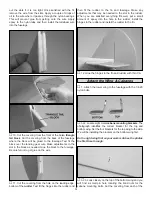
9. Drill a 1/16" [1.6mm] hole in the center of the cylinder
head and at the base of the cylinder. Cut the included red
wire into seven 1-3/4" [44mm] lengths. Insert the wire into
the holes of each cylinder. Glue them in place with a small
amount of CA glue.
❏
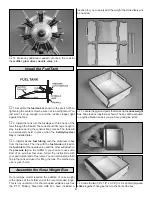
10. Slide the cowl and the dummy radial engine onto the
front of the fuselage. Position the cowl so that the front of the
thrust washer of the engine extends beyond the front of the
dummy radial engine 3/32" [2.4mm]. Once you are satisfied
with the position of the dummy radial engine, apply a couple of
drops of thin CA to the joint between the dummy radial engine
and the cowl to tack glue the parts together. Note: There is no
need to put excessive amounts of CA onto the joint. We will
more securely glue the two parts together in the next step.
❏
11. Apply a mixture of microballoons and 6-minute epoxy
to the inside of the cowl and dummy radial engine. This will
securely attach the two parts.
❏
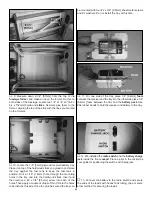
12. Apply a piece of masking tape to the fuselage in line
with the cowl mounting blocks. From the center of the
mounting block draw a line back 4" [102mm] from the center
of the block. Do this for all four cowl mounting blocks.
❏
13. Install the cowl to the fuselage, making sure that you
center the engine in the hole in the front of the dummy radial
engine and maintain the 3/32" [2.4mm] clearance for the
engine thrust washer. When satisfied with the position of the
cowl, measure forward from the end of the line 4" [102mm].
Make a mark on the cowl, then drill a 3/32" [2.4mm] hole
through the cowl and into the cowl mounting block. Screw a
#4 x 1/2" [13mm] sheet metal screw and #4 flat washer into
the cowl and mounting block. Do this for all four of the cowl
mounting blocks. Remove each of the screws and the cowl.
Apply a couple of drops into the holes in the cowl mounting
blocks to harden the threads.
20


