❏
1. Locate one 2-56 x 36" [914mm] threaded pushrod.
Thread the nylon clevis 14 turns onto the threaded end of
the pushrod and install a silicone clevis retainer.
❏
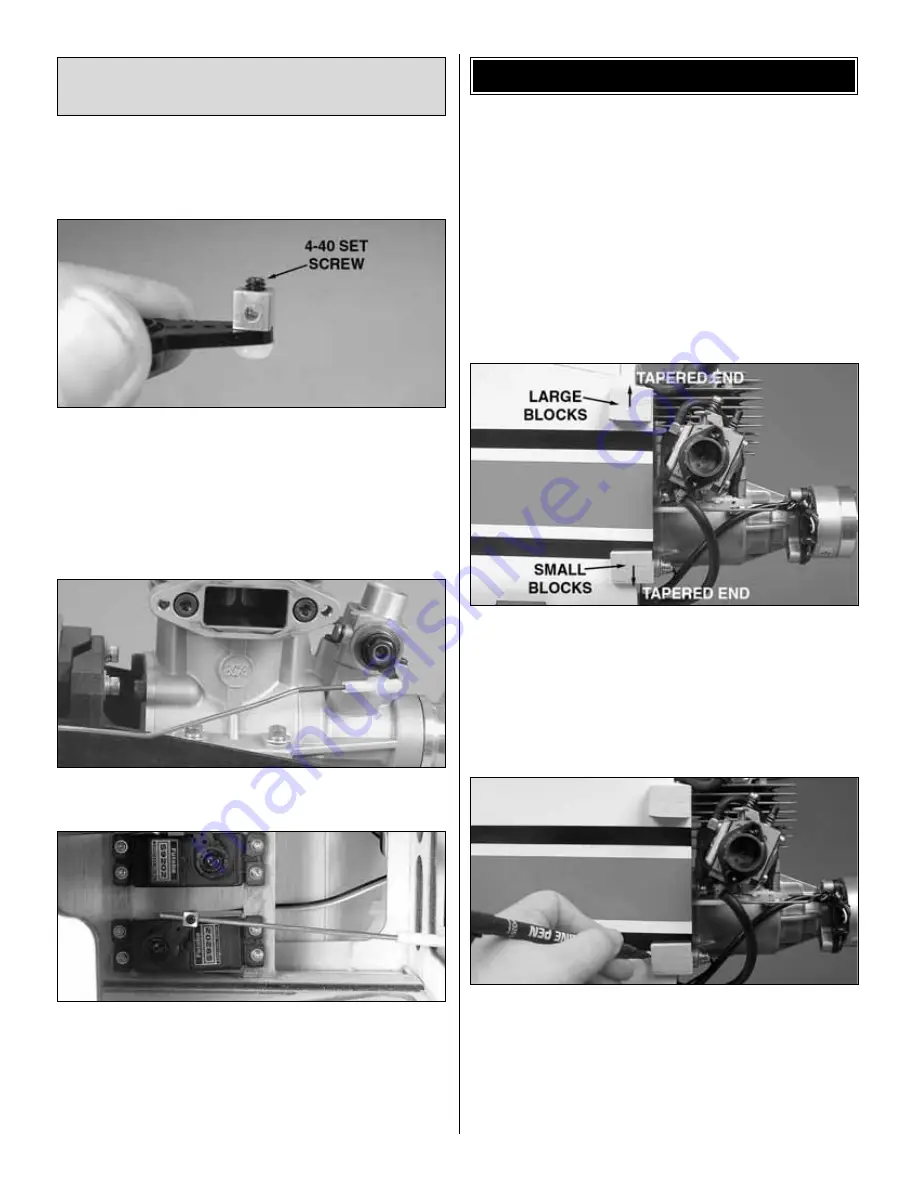
2. Remove the servo arm from the servo and install the
screw-lock pushrod connector as shown. Reattach the
servo arm to the servo.
❏
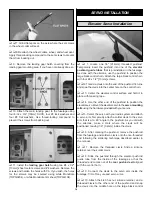
3. From the front of the fuselage slide the pushrod
through the throttle pushrod guide tube that is
preinstalled in the fuselage and through the screw-lock
pushrod connector on the servo arm.
❏
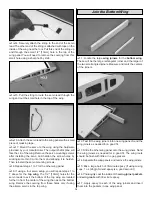
4. Bend the pushrod as needed to clear the muffler and
provide smooth throttle operation.
❏
5. Secure the pushrod to the throttle servo arm with a 4-40
set screw installed in the screw-lock pushrod connector.
❏
6. Adjust the throttle with your radio as desired. When
finished adjusting the throttle, trim the pushrod to 1/2" [13mm]
past the screw-lock pushrod connector. Use a drop of
thread-locking compound to secure the set screw.
Since there are a number of different engines that can be used
on the Giant Aeromaster ARF, the following section should be
used only as a guide for your installation. The Fuji-Imvac
BT-43EI gas engine was used for our model.
❏
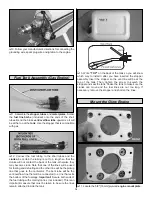
1. Locate the four hardwood cowl mounting blocks.
There are two large and two smaller blocks.
❏
2. Position the two mounting blocks as shown in the
photo. The larger blocks will be mounted towards the top of
the fuselage, while the smaller ones are used near the
bottom. Also note the wedge shape of the blocks. The
tapered ends point outward. Use a very small drop of
medium CA to tack glue the blocks in place.
❏
3.Trace the outline of the blocks using a felt-tip or Panel Line
Pen. Carefully remove the blocks and trim the covering from
inside the marks you just made using a sharp hobby knife.
❏
4. Use epoxy and permanently glue the cowl mounting
blocks in place.
MOUNT THE COWL
Install the Throttle Servo & Pushrod
(Glow Engine)
22


