background image

small metal file. Replace the wheel collar and secure it with
the set screw. Apply a drop of thread-locking compound to the
set screw prior to securing the wheel collar.

❏ 

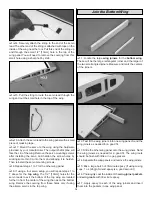
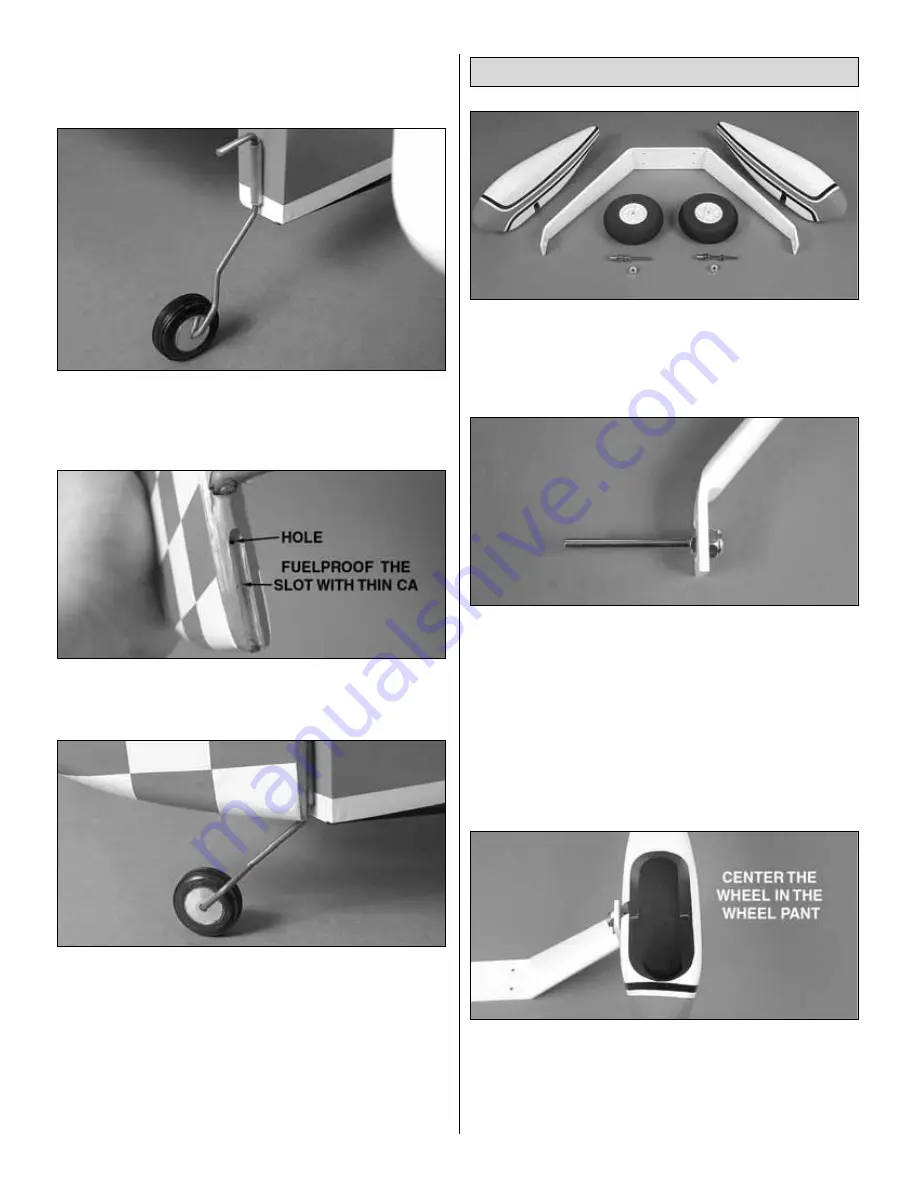
3. Epoxy the tail gear bearing into the tail of the fuselage

as shown. Apply a small dab of Vaseline

®

or petroleum jelly

to the top and bottom of the tail gear bearing where the wire
rotates to prevent epoxy from entering the tail gear bearing.

❏ 

4. FueIproof the slot in the rudder for the tail gear wire

with thin CA. Insert a small amount of epoxy into the hole in
the rudder for the tail gear wire.

❏ 

5. Attach the rudder to the fin and fuselage following the

same procedure as the ailerons. Be sure the tail gear wire
enters the hole in the rudder.

❏ ❏ 

1. Locate the main landing gear, two 4" [102mm]

wheels, four 3/16" [4.8mm] wheel collars with 6-32 x 1/4"
[6.4mm] SHCS, fiberglass wheel pants, and two 3/16" x 2"
[4.8 x 51mm] bolt-on axles with 5/16" [8mm] x 24 lock nuts.

❏ ❏ 

2. Insert one bolt-on axle into the hole on the main landing

gear leg and secure it using a 5/16" [8mm] x 24 lock nut.

❏ ❏ 

3. Slide a 3/16" [4.8mm] wheel collar onto the axle

followed by a wheel. Attach the wheel collar with the set
screw pointing down, out of the wheel pant.

❏ ❏ 

4. Temporarily attach a wheel pant to the main gear

using 4-40 x 1/2" [13mm] SHCS, #4 lock washers, and #4
flat washers.

❏ ❏ 

5. Center the wheel in the wheel pant opening. Slide

the wheel collar next to the wheel and gently tighten the set
screw to hold it in place.

❏ ❏ 

6. Remove the wheel pant. Make a mark where the wheel

collars will be positioned using a felt-tip or Panel Line Pen.

Attach the Main Landing Gear

15

Содержание Giant Aeromaster ARF

Страница 1: ...condition to the place of purchase To make a warranty claim send the defective part or item to Hobby Services at the address below Hobby Services 3002 N Apollo Dr Suite 1 Champaign IL 61822 USA Inclu...

Страница 2: ...ale in an easy to build ARF form For the latest technical updates or manual corrections to the Giant Aeromaster ARF visit the Great Planes web site at www greatplanes com Open the Airplanes link and t...

Страница 3: ...This is a partial list of items required to finish the Giant Aeromaster ARF that may require planning or decision making before starting to build Order numbers are provided in parentheses The Giant A...

Страница 4: ...43EI Electric Ignition Gas Engine FJIG0143 Per the IMAA Safety Code magneto spark ignition engines must have a coil grounding switch on the aircraft to stop the engine and prevent accidental starting...

Страница 5: ...r the term glue is written you should rely upon your experience to decide what type of glue to use When a specific type of adhesive works best for that step the instructions will make a recommendation...

Страница 6: ...isted in the Replacement Parts List Payment by credit card or personal check only no C O D If additional assistance is required for any reason contact Product Support by e mail at productsupport great...

Страница 7: ...e 1 Screw Lock Pushrod Connector 11 4 40 Hex Nut 2 5 16 8mm x 24 Lock Nut 8 4 40 Lock Nut 4 White Nylon Control Horn 4 Nylon 1 4 20 x 2 51mm Bolt 1 Nylon Clevis 1 Nylon FasLink 7 Black Heavy Duty Cont...

Страница 8: ...areas to thoroughly bond the covering to the wood 1 Locate the two bottom wing panels 2 There are four holes drilled in each wing panel to accept the hinges Test fit each hinge in the wing 3 Test fit...

Страница 9: ...to use two bottom aileron servos to drive all four ailerons The second option is to install an aileron servo for each of the four ailerons You will repeat the following steps for the top wing if you...

Страница 10: ...setup you will repeat steps 1 to 7 above for the top wing The 1 2 13mm holes for the servo leads to exit the bottom of the top wing are located further in from the center of the wing than as on the b...

Страница 11: ...photo Measure and mark the centerlines on the joiners 2 Test fit the wing joiners in the wing joiner pockets Note the direction of the main wing joiner Sand the wing joiners as needed for a good fit 3...

Страница 12: ...g Expert Tip E This is what a properly soldered clevis looks like shiny solder with good flow no blobs flux removed C Simultaneously heat the clevis and pushrod Apply Silver Solder GPMR8070 to the joi...

Страница 13: ...lizer should be parallel with the flat surface If it isn t sand the slot in the fuselage as needed to make it level 4 Insert a T pin into the fuselage near the nose and along the centerline Attach a p...

Страница 14: ...ing using the same method as the stabilizer 12 Glue the fin in place using epoxy Use a Builder s Triangle to check the alignment of the fin It should be at a 90 angle to the stabilizer as shown in the...

Страница 15: ...the hole in the rudder 1 Locate the main landing gear two 4 102mm wheels four 3 16 4 8mm wheel collars with 6 32 x 1 4 6 4mm SHCS fiberglass wheel pants and two 3 16 x 2 4 8 x 51mm bolt on axles with...

Страница 16: ...4 turns and snap the clevis into the center hole on the control horn 3 Center the elevator control surface and hold it in place with masking tape 4 Use the other end of the pushrod to position the ele...

Страница 17: ...arm and the elevator servo arms do not make contact and that the pushrods do not touch 2 Final installation will resemble the photo and sketch above Note The firewall has been set up to accept the Fu...

Страница 18: ...ap them 2 51mm as shown 5 Insert the hook and loop material in the front hatch area as shown 6 Wrap the electronic ignition unit from the gas engine in 1 4 6 4mm foam and strap it in place using the h...

Страница 19: ...the pickup line that goes to the carburetor The bent tube will be the vent overflow line that will be connected to a line that exits the bottom of the fuselage Important Secure both ends of the fuel...

Страница 20: ...ne onto the mount with four each 8 32 x 1 25mm SHCS 8 flat washers and 8 lock washers 1 Assembly of the glow stopper is very similar to the gas version In place of brass tubing you will use the hardwa...

Страница 21: ...e clevis retainer onto the threaded end of the bent pushrod 3 Slide the white pushrod into the throttle pushrod tube that is preinstalled in the fuselage and connect the clevis to the throttle arm on...

Страница 22: ...shrod connector Use a drop of thread locking compound to secure the set screw Since there are a number of different engines that can be used on the Giant Aeromaster ARF the following section should be...

Страница 23: ...tall the engine and fuel lines Mount the cowl to the fuselage using four 4 x 1 2 13mm screws and 4 flat washers 1 Attach the bottom wing to the fuselage with the 1 4 20 nylon wing bolts 2 Locate eight...

Страница 24: ...have mounted the center cabanes and N struts properly Also look at the top and bottom wings from the side They should look almost parallel If it appears that the LE of the top wing is much higher the...

Страница 25: ...ut one teaspoon of soap per gallon of water Submerse the decal in the soap and water and peel off the paper backing Note Even though the decals have a sticky back and are not the water transfer type s...

Страница 26: ...or GPMQ4646 for the 2 oz 57g weight If spinner weight is not practical or is not enough use Great Planes GPMQ4485 This is where your model should balance for the first flights Later you may wish to e...

Страница 27: ...mmended by the radio manufacturer Carefully balance your propeller and spare propellers before you fly An unbalanced prop can be the single most significant cause of vibration that can damage your mod...

Страница 28: ...te Safety Code refer to Model Aviation magazine the AMA web site or the Code that came with your AMA license 1 I will not fly my model aircraft in sanctioned events air shows or model flying demonstra...

Страница 29: ...ection 5 0 EMERGENCY ENGINE SHUT OFF Kill Switch 5 1 Magneto spark ignition engines must have a coil grounding switch on the aircraft to stop the engine This will also prevent accidental starting of t...

Страница 30: ...ust have lock nuts and sleeve fuel tubing or spring keepers Propeller tips should be painted or colored in a visible and contrasting manner to increase the visibility of the propeller tip arc 1 Fuelpr...

Страница 31: ...ottle back once the plane gets to a comfortable altitude While full throttle is usually desirable for takeoff most models fly more smoothly at reduced speeds Take it easy with the Giant Aeromaster ARF...

Страница 32: ...ection anticipating rudder corrections that will be required to maintain heading remember to throttle back at the top and make certain you are on the desired rates high low rates A flight plan greatly...

Отзывы: