


❏
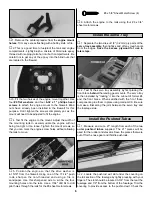
3. Carefully remove the tail post using a razor saw to
allow installation of the horizontal stabilizer.
❏
4. Locate the slot for the vertical fin on the top of the
fuselage and remove the covering.
❏
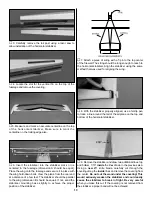
5. Measure and mark an accurate centerline on the top
of the horizontal stabilizer. Make sure to mark the
centerline on the trailing edge also.
❏
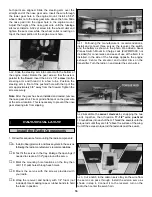
6. Insert the stabilizer into the stabilizer slot so it is
centered in the fuselage (dimension A should be equal).
Place the wing onto the fuselage and secure it in place with
the wing hold-down bolts. View the plane from the rear and
at a distance of a few feet. The stabilizer should be parallel
to the wing (dimension B should be equal). If not, sand the
stabilizer mounting base slightly to achieve the proper
position of the stabilizer.
❏
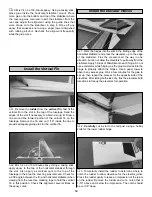
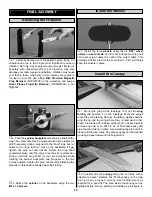
7. Attach a piece of string with a T-pin to the top center
of the firewall. The string should be long enough to reach to
the horizontal stabilizer. Align the stabilizer using the same
method that was used for aligning the wing.
❏
8. With the stabilizer properly aligned, use a felt-tip pen
to trace a line around the tail of the airplane on the top and
bottom of the horizontal stabilizer.
❏
9. Remove the stabilizer and draw two additional lines, top
and bottom, 1/16"
inside
the lines drawn in the previous step.
Using a
new
#11 knife blade, carefully cut through the
covering along the
inside
lines and remove the covering from
the center.
Do not cut the wood under the covering! This
would seriously weaken the stabilizer and could easily
cause the stabilizer to break in flight. Be very careful
when you make this cut. If the covering is not removed from
the stabilizer, a proper bond will not be achieved.
13


