background image

16

This product must not be disposed of with other waste.

Instead, it is the user’s responsibility to their waste

equipment by handing it over to a designated collection

point for the recycling of waste electrical and 

electronic equipment. The separate collection and recycling

of your waste equipment at the time of disposal will help to conserve 

natural resources and

ensure that it is recycled in a manner that protects human health and 

the environment. For more

information about where you can drop off your waste equipment for 

recycling, please contact your

local city office, your household waste disposal service or where you 

purchased the produce

  ◎ 

E

NVIRONMENTAL PROTECTION NOTES

•  

NOTE

This equipment has been tested and found to comply with the limits 
for a Class B digital device, pursuant to Part 15 of the FCC Rules.
These limits are designed to provide reasonable protection against 
harmful interference in a residential installation. This equipment 
generates uses and can radiate radio frequency energy and, if not 
installed and used in accordance with the instructions, may cause 
harmful interference to radio communications. However, there is no 
guarantee that interference will not occur in a particular installation. 
If this equipment does cause harmful interference to radio or televi-
sion reception, which can be determined by turning the equipment 
off and on, the user is encouraged to try to correct the interference 
by one or more of the following measures:
- Reorient or relocate the receiving antenna.
- Increase the separation between the equipment and receiver.
-  Connect the equipment into an outlet on a circuit different from 

that to which the receiver is connected.

- Consult the dealer or an experienced radio/TV technician for 
help.

•  

FCC radiation exposure statement

This equipment complies with FCC radiation exposure limits set forth 
for an uncontrolled environment. This equipment should be installed 
and operated with minimum distance of 20 cm between the radiator 
and your body.

Содержание X-4S HoTT SJ

Страница 1: ...OPERATING INSTRUCTION Please read this manual thoroughly Keep this manual in a convenient place for quick and easy reference No 33400 www graupner com...

Страница 2: ...rigger tension adjustment Steering wheel position adjustment Trigger Angle Adjustment Installation for left handed users Binding and Range test Control Switch Functions Fail Safe mode Configuration Tr...

Страница 3: ...9 am to 5 pm PST Pacific Standard Time during the workweek Monday through Friday E mailed questions will be answered as soon as possible A S support During the warranty period we can repair this produ...

Страница 4: ...operations of channels before use For the safe use please operate the Range Check Mode be fore use Be careful not to turn your transmitter off while in use Do not touch or grab antenna during the use...

Страница 5: ...rating Current Operating Output Power Frequency Modulation Operating Temperature Antenna Display Low voltage warning alarm High temp warning alarm Battery Charging Firmware Update Size Weight Channel...

Страница 6: ...vated please use new battery or recharge the used battery Please make sure the correct polarity when installing your battery Battery Charging If rechargeable battery is in use you can charge it up to...

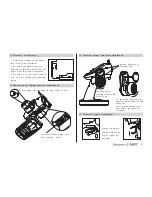
Страница 7: ...n your operating range 8 You may adjust trigger ten sion using driver You may adjust steering wheel tension using driver Steering wheel position adjustment Throttle Trigger Adjustment The angle could...

Страница 8: ...our bolts and coverage Disconnect steering wheel part Disconnect transmitter connector Install your steering wheel part on your left side Then install the connector again then coverage and bolts Now y...

Страница 9: ...is not controllable if your model is far away from you during Test mode due to the short transmit distance Control Switch Functions 1 REV Reverse Switch This is used to change the direction of the se...

Страница 10: ...er beeps twice and it is re turned to Calibration Model Move steering and throttle to back and forward left and right then move to neutral position again Now your trans mitter beeps twice indicating C...

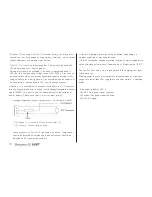
Страница 11: ...4cycle 5cycle 6cycle Slow flash Low 2Time 90sec Low 3Time Low 2Time Port1 Port2 Port3 Port4 Function Ch1 Signal output Ch2 Signal output Telemetry Sensor Batt Temp Sensor Voltage Sensor HoTT v1 Senso...

Страница 12: ...djustment and warning alarm function 3 Port 4 T V connector is designed that it will activate the beep and LED indicator when your engine gets hot Warning alarm would be activated if the batter is dis...

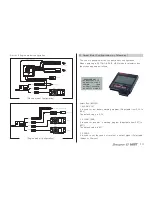
Страница 13: ...Power switch Temperature sensor Connect temperature sensor to Engine head Steering Servo Receiver battery Throttle Servo Steering Servo T V Connector T V Connector B T Connector CH2 Connector CH1 Conn...

Страница 14: ...able from 1 0V to 25 5V LiPo 4 cell max 25 2V In Auto selection Low voltage warning alarm is activated at 70 of detected voltage when power is on 5 ALARM EX TEMP Connect Temperature Sensor to Port 4 T...

Страница 15: ...l interference in a residential installation This equipment generates uses and can radiate radio frequency energy and if not installed and used in accordance with the instructions may cause harmful in...

Страница 16: ......

Отзывы: