background image

11

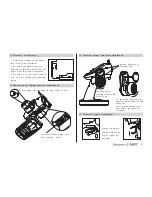
  ◎ Fail Safe Mode Configuration

  ◎ Trigger and Steering Calibration

It should be programmed after binding 
process. The default value is “Free” 
mode.
Fail Safe is set to throttle channel (CH2)
Move your throttle to the position on 
which you act fail safe mode. Now touch 
and hold BIND button for 3 sec until fail 
safe mode is set. (Buzzer beeps 3 times)
Press BIND button for 3 sec again and 
fail safe is deactivated. Now return to 
“Free” mode. (Buzzer beeps twice) 
After returning to Free mode, turn your 
transmitter off so that Fail safe mode is 
acting properly.

While pressing BIND button, turn your 
transmitter on.
Press BIND button for 5 sec until your 
transmitter beeps twice and it is re-
turned to Calibration Model.
Move steering and throttle to back and 
forward, left and right, then move to 
neutral position again. Now your trans-
mitter beeps twice, indicating Calibration 
Setup is now set.

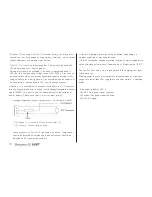
4. TRIM
The trims are used to fine-tune the point 
where the servo returns to center.
(Adjustable from -37.5% to +37.5%)

  ST- Use the ST-TRIM so your vehicle will go
  perfectly straight when the steering wheel is
  centered. (Adjustable from -37.5% to +37.5%)
  
  TH- Use the THR-TRIM to adjust the amount
  of brake that occurs when your engine’s idle
  is too low or high and your ESC is not per
  fectly at neutral.
  (Adjustable from -37.5% to +37.5%)

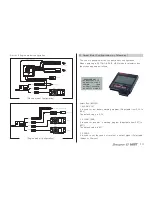
Electric model’s Fail safe position
(Neutral)         

Engine model’s Fail safe position 
(Brake)

(Control Switch)

(Control Switch)

BIND Button

BIND Button

<Steering wheel operation>

Neutral

Full left             

Full right                    

Neutral

Содержание X-4S HoTT SJ

Страница 1: ...OPERATING INSTRUCTION Please read this manual thoroughly Keep this manual in a convenient place for quick and easy reference No 33400 www graupner com...

Страница 2: ...rigger tension adjustment Steering wheel position adjustment Trigger Angle Adjustment Installation for left handed users Binding and Range test Control Switch Functions Fail Safe mode Configuration Tr...

Страница 3: ...9 am to 5 pm PST Pacific Standard Time during the workweek Monday through Friday E mailed questions will be answered as soon as possible A S support During the warranty period we can repair this produ...

Страница 4: ...operations of channels before use For the safe use please operate the Range Check Mode be fore use Be careful not to turn your transmitter off while in use Do not touch or grab antenna during the use...

Страница 5: ...rating Current Operating Output Power Frequency Modulation Operating Temperature Antenna Display Low voltage warning alarm High temp warning alarm Battery Charging Firmware Update Size Weight Channel...

Страница 6: ...vated please use new battery or recharge the used battery Please make sure the correct polarity when installing your battery Battery Charging If rechargeable battery is in use you can charge it up to...

Страница 7: ...n your operating range 8 You may adjust trigger ten sion using driver You may adjust steering wheel tension using driver Steering wheel position adjustment Throttle Trigger Adjustment The angle could...

Страница 8: ...our bolts and coverage Disconnect steering wheel part Disconnect transmitter connector Install your steering wheel part on your left side Then install the connector again then coverage and bolts Now y...

Страница 9: ...is not controllable if your model is far away from you during Test mode due to the short transmit distance Control Switch Functions 1 REV Reverse Switch This is used to change the direction of the se...

Страница 10: ...er beeps twice and it is re turned to Calibration Model Move steering and throttle to back and forward left and right then move to neutral position again Now your trans mitter beeps twice indicating C...

Страница 11: ...4cycle 5cycle 6cycle Slow flash Low 2Time 90sec Low 3Time Low 2Time Port1 Port2 Port3 Port4 Function Ch1 Signal output Ch2 Signal output Telemetry Sensor Batt Temp Sensor Voltage Sensor HoTT v1 Senso...

Страница 12: ...djustment and warning alarm function 3 Port 4 T V connector is designed that it will activate the beep and LED indicator when your engine gets hot Warning alarm would be activated if the batter is dis...

Страница 13: ...Power switch Temperature sensor Connect temperature sensor to Engine head Steering Servo Receiver battery Throttle Servo Steering Servo T V Connector T V Connector B T Connector CH2 Connector CH1 Conn...

Страница 14: ...able from 1 0V to 25 5V LiPo 4 cell max 25 2V In Auto selection Low voltage warning alarm is activated at 70 of detected voltage when power is on 5 ALARM EX TEMP Connect Temperature Sensor to Port 4 T...

Страница 15: ...l interference in a residential installation This equipment generates uses and can radiate radio frequency energy and if not installed and used in accordance with the instructions may cause harmful in...

Страница 16: ......

Отзывы: