GRAUPNER GmbH & Co. KG D-73230 KIRCHHEIM/TECK GERMANY
Keine Haftung für Druckfehler. Technische Änderungen vorbehalten! Liability for printing errors excluded. We reserve the right to introduce modifications. Sous réserve de modifica-
tions! Nous ne sommes pas responsables d’éventuelles erreurs d’impression!
#0059054
04/2008
17
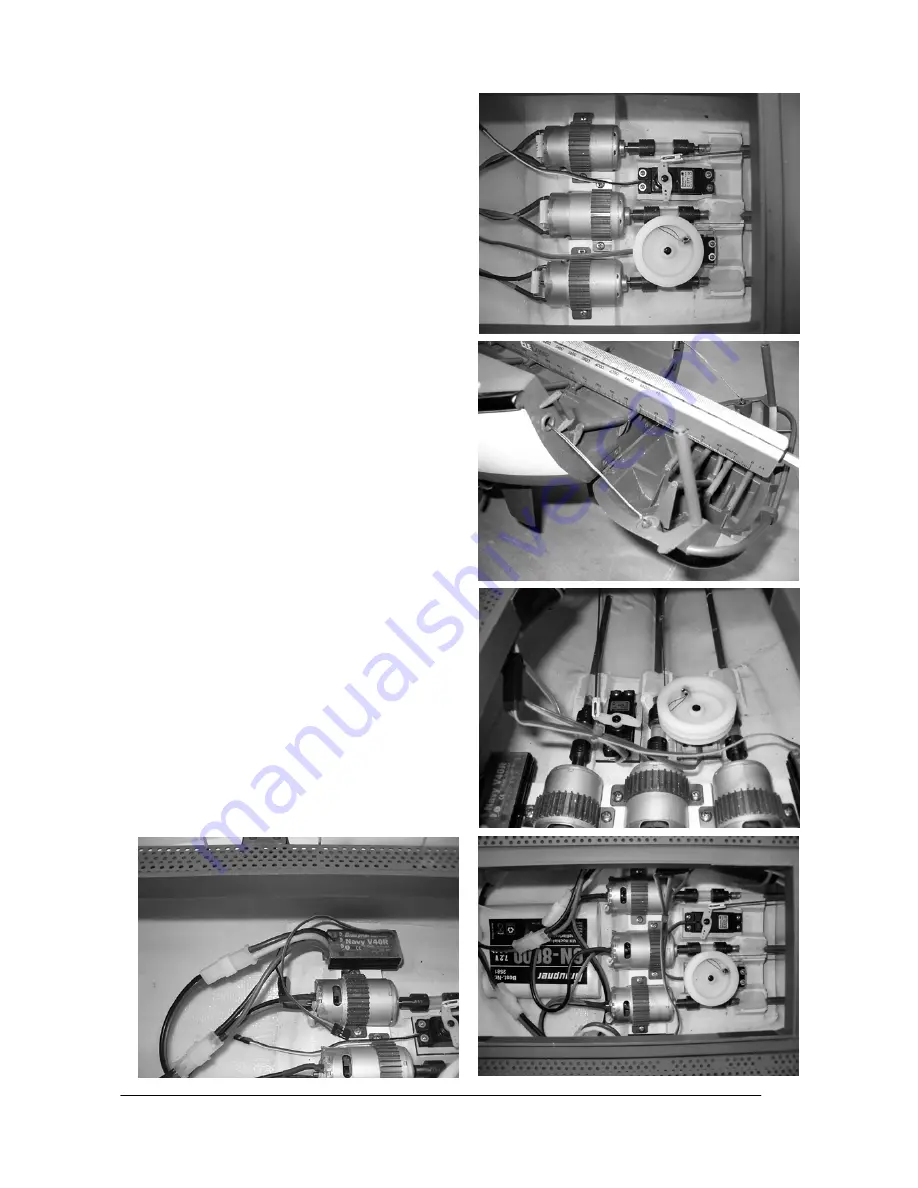
that the winch is not under load when the stern
flap is closed. The lower end-point (= stern flap
open) should be set up so that the daughter boat
can slide out of the cradle reliably. The optimum
arrangement is shown in the photo (straight con-
tinuation of the angle of the stern cradle). If you
cannot achieve this using the transmitter, mark a
point on the rotary pot on the transmitter to make it
as easy as possible to select this position. How-
ever, in technical terms it is not disastrous if the
stern flap moves down further than described; it
would simply look slightly ‘non-scale’.
NOTE:
if
you are using the recommended RC system, the
rotary pot should be used to operate the stern flap;
if you are using a computer transmitter with vari-
able servo end-points, you can use a switch in-
stead. However, a rotary pot is still the better op-
tion, as it allows you to lower the stern flap at a
low scale speed.
•
Secure the cables neatly inside the hull using ca-
ble ties or Velcro tape.
NOTE:
ensure that the
leads cannot foul the shaft couplings.
•
Deploy the receiver aerial under the deck support
flange inside the hull, and tape it in place securely.
IMPORTANT
: to ensure reliable reception, the ae-
rial wire must be as high as possible above the
waterline, and should run round the hull in a broad
curve; the GRP material only has a very slight ad-
verse effect on radio reception. If you prefer, you
can install a vertical whip aerial made of thin, stiff
wire. If you do this, shorten the flexible aerial at-
tached to the receiver by the same length as the
whip, then solder the two together.
•
Connect the two speed controllers using the G2
distributor lead (Order No. 3068). Place the battery
in the model, connect it to the parallel cable, and
check the working systems. The battery must be
fixed securely so that it cannot slip out of position
when the boat is running. Stick a strip of Velcro
tape to the battery, and the mating strip in the hull;
this will prevent it shifting.
NOTE:
the battery must
be positioned in the hull in such a way that the
vessel floats level at the marked waterline.
NOTE:
the photograph shows the approximate position of
the battery.


