Setting Up Media Files for Sharing
Before you can transfer media files to another Aurora Edit workstation, you need to
set up your workstation for sharing.
To share files:
1. In Windows Explorer, navigate to the drive where media files are stored (usually
D:\).
2. Right click on the VibrintAVFiles folder and choose Sharing.
3. Select the Shared As option and leave the default share name VibrintAVFiles.
Click
OK
.
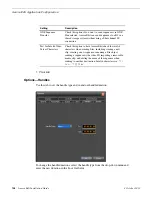
The folder you shared appears with the standard Windows sharing icon.
About Aurora Edit video sources
Before using footage from a particular source, you need to add the source to the Aurora
Edit source list. Aurora Edit pre-installs two sources for you — a video source and a
clip source:
Allows you to record footage directly into the Timeline or Bin; usually
a tape deck.
Video source
Allows you to edit a clip as a Timeline source directly in the Bin, which
is useful for large clips so you don’t have to go back and forth from a
Clip source
tape deck. You only need one clip source; you don’t have to create a
new clip source for each clip you want to use
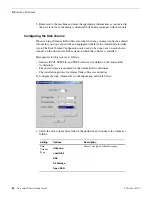
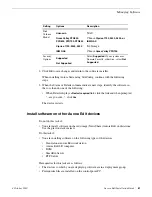
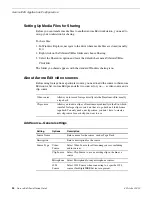
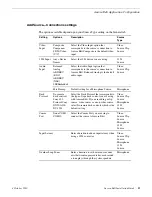
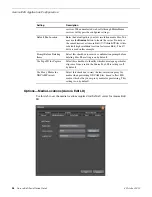
Add Source—General settings
Description
Options
Setting
Enter a name for the source, such as Tape Deck.
Source Name
Enter a description for the source.
Description
Select Video Source for all incoming sources, including
audio sources.
Video
Source
Source Type
Select Clip Source to use an existing clip in the bin as a
source.
Clip Source
Select Microphone for any microphone sources.
Microphone
Select 1394 Source when connecting to a specific 1394
source if multiple IEEE devices are present.
1394
Source
90
Aurora Edit Installation Guide
4 October 2010
Aurora Edit Application Configuration

