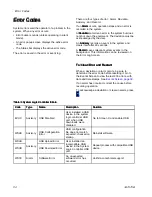


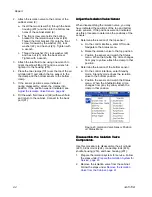


11. To replace the seals in the top housing, see
Service and Reassemble the Top Housing of the
Isolation Valve, page 69
.
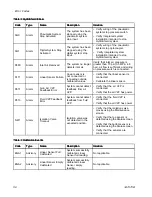
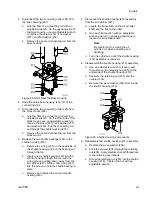
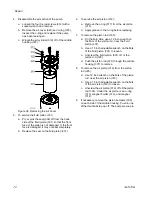
Figure 33 Lower Retainer
Reassemble
Reassemble
Reassemble the
the
the Bottom
Bottom
Bottom Housing
Housing
Housing of
of
of the
the
the
Isolation
Isolation
Isolation Valve
Valve
Valve
Use this procedure after replacing the seals
in the lower piston housing as described in
Service the Bottom Piston Housing, page 67
.
This procedure requires the piston tool (111). See
1.
Replace the spacer U-cup (206) and the packing
U-cup (204):
a.
On the smaller side of the spacer U-cup
(206) is a recessed groove that helps align
the packing U-cup (204). Snap or set the
packing U-cup (204) into the groove on the
spacer U-cup (206)
b.
Grease around the lip of the seal (204) and
pop, seal side first, into place in the housing
(201).
2.
Grease around the o-ring (208) and screw into
the housing (201). Tighten with a 15/16 inch
socket until the retainer (202) bottoms out.
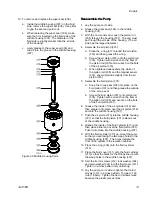
3.
Insert the piston tool (111) into the piston (211).
Grease the sides of the tool, especially the top,
so that it can be pulled past the U-cups in the
housing assembly (201) more easily.
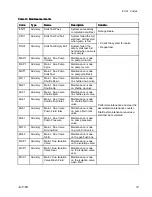
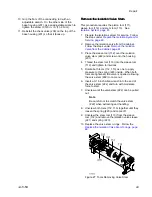
4.
Together, insert the piston tool (111) and piston
(211) into the retainer (202) on the housing (201).
Push the piston (211) until the tool comes through
the housing (201) and the piston (211) is in place.
Figure 34 Piston Tool Through Lower Housing
Note
If the piston tool (111) and piston (211)
come apart within the housing (201), pull
the piston tool (111) through the housing.
Pull the piston (211) back out. Join the
parts and try again.
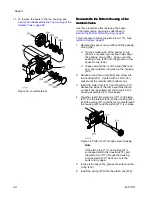
5.
In the piston cap (216), grease the sides and the
o-ring (230).
6.
Insert the spring (215) into the piston cap (216).
68
3A7370B
Содержание HydroShield WMBH00
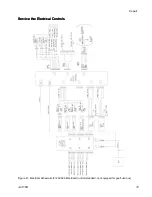
Страница 76: ...Repair Figure 42 Electrical Schematic for 26C716 Electrical Control equipped for gun flush box 76 3A7370B ...
Страница 82: ...Parts Figure 46 Isolation Cabinet Interior 82 3A7370B ...
Страница 88: ...Parts 25N031 25N031 25N031 Pump Pump Pump Parts Parts Parts Figure 48 Pump 88 3A7370B ...


