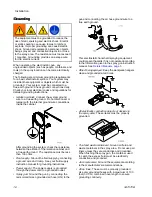

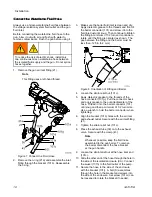


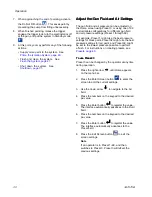


12. Tighten the strain relief nut (101c) and set screw
(202m).
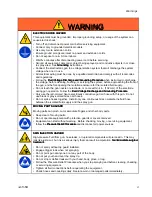
Note
The Graco warranty and approvals
are void if the electrostatic spray gun
is connected to a non-Graco voltage
isolation system or if the gun is operated
above 60 kV.
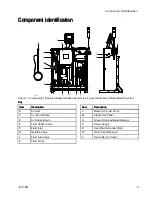
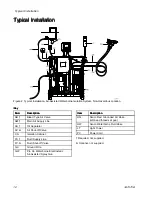
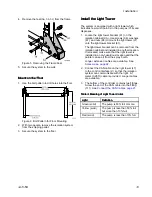
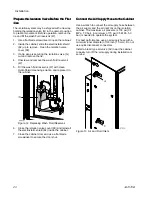
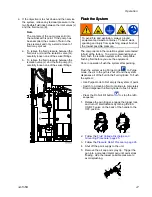
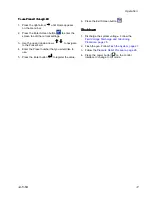
Figure 9 Hose Connection at Enclosure
Figure 10 Hose Connection at Enclosure
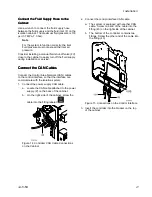
Connect
Connect
Connect the
the
the Air
Air
Air Hose
Hose
Hose from
from
from Gun
Gun
Gun to
to
to the
the
the
Cabinet
Cabinet
Cabinet
Connect the gun air hose between the air outlet (D)
on the isolation cabinet and the gun air inlet swivel
on the gun. Before beginning this procedure, the fluid
hose should be attached to the gun barrel and the air
inlet swivel should be positioned through the bracket
at the gun handle.
1.
Install and tighten the air hose onto the gun air
inlet swivel.
Note
This fitting connection is a left-hand
thread.
2.
Connect the air hose from the gun to the air outlet
(D) on the isolation cabinet.
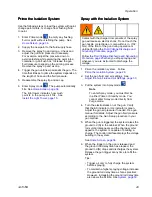
Figure 11 Air Connection Location
3.
The fitting on the air hose has a ground
connection for electrostatic guns. Attach the
other end of the ground wire to a true earth
ground. See
.
3A7370B
19
Содержание HydroShield WMBH00
Страница 76: ...Repair Figure 42 Electrical Schematic for 26C716 Electrical Control equipped for gun flush box 76 3A7370B ...
Страница 82: ...Parts Figure 46 Isolation Cabinet Interior 82 3A7370B ...
Страница 88: ...Parts 25N031 25N031 25N031 Pump Pump Pump Parts Parts Parts Figure 48 Pump 88 3A7370B ...


