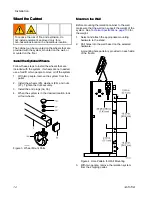


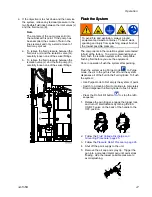


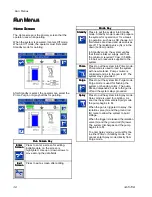


6.
Clean the air cap and spray tip as instructed in
the spray gun manual.
7.
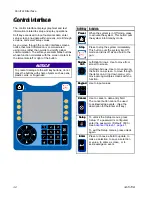
Use the control interface to change the mode to
Purge mode
.
8.
Switch the fluid inlet to a compatible cleaning
fluid.
9.
The system fills until the pump is completely full.
Trigger the gun into a waste container until the
fluid runs clear. When the pump is empty, the
fluid will stop coming out of the gun while the
pump refills. Continue triggering the gun while
the pump refills and the gun will resume flushing
once the pump is full.
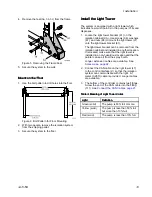
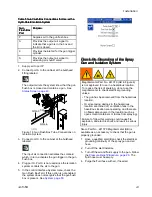
10. As soon as the fluid starts to run clear,
activate the Do Not Fill button
so that
the pump will not refill after it is empty. See
.
11. Trigger the gun until the system indicates that
the pump is empty.
12. Follow the
Pressure Relief Procedure, page 26
.
13. Engage the trigger lock.
14. Align the spray tip tab with the groove in the air
cap. Install the tip.
15. Reinstall the air cap, tip guard, and retaining ring.
16. Hang the gun from its hook, with the nozzle
pointing down. Be sure to keep the gun from
grounding out.
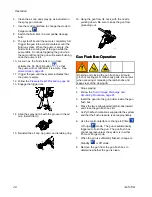
Gun
Gun
Gun Flush
Flush
Flush Box
Box
Box Operation
Operation
Operation
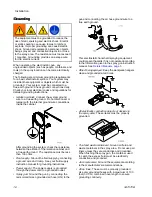
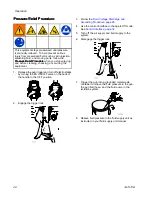
Opening and closing the gun flush box lid could
pinch or cut fingers or other body parts. Be careful
when pressing or releasing the latch knobs and
keep clear of the closing lid.
1.
Stop spraying.
2.
Follow the
3.
Insert the gun into the gun holder inside the gun
flush box.
4.
Press the two spring-loaded latch knobs inward
and close the gun flush box lid.
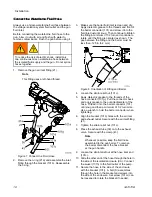
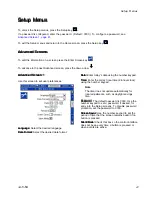
5.
Verify that flush material is supplied to the system
and that the flush pressure is set appropriately.
6.
Use the control interface to change to Prime
or Purge
mode. The gun is automatically
triggered to flush the gun. The gun flush box
cannot operate unless the system is in either
Prime or Purge mode.
7.
When the gun is sufficiently flushed, change to
Standby
or Off mode.
8.
Remove the gun from the gun flush box to
determine whether the gun is clean.
28
3A7370B
Содержание HydroShield WMBH00
Страница 76: ...Repair Figure 42 Electrical Schematic for 26C716 Electrical Control equipped for gun flush box 76 3A7370B ...
Страница 82: ...Parts Figure 46 Isolation Cabinet Interior 82 3A7370B ...
Страница 88: ...Parts 25N031 25N031 25N031 Pump Pump Pump Parts Parts Parts Figure 48 Pump 88 3A7370B ...


