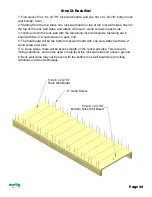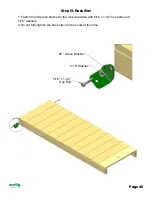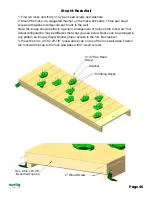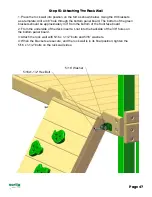
Step 2: Assembling The Left Side Frame
1: Lay the left side corner posts on the ground in their proper orientation.
2: Lay the 2 x 6 x 78” rope ladder runner on top of the right side corner posts at the
bottom of the corner posts. The offset holes in the sandbox board must face downward.
3:Use 5/16 x 4-1/2” hex bolts and 5/16” washers to attach the top holes of the sandbox
board to the t-nuts installed on the corner posts. The bottom holes will be used later.
4: Lay the 2 x 6 x 47-1/2” bottom panel board on top of the left side corner posts in
the middle of the corner posts. The offset holes in the bottom panel board must face
downward.
5: Use 5/16 x 4-1/2” hex bolts and 5/16” washers to attach the bottom holes of the
bottom panel board to the t-nuts installed on the corner posts. The top holes will be
used later.
6: Lay the 4 x 4 x 78” rope ladder support on top of the left side corner posts.
7: Find two torque washers. Place a 6-1/2” carriage bolt inside the torque washer,
making sure that the teeth are facing in the same direction as the threads of the
carriage bolt. Place the torque washer/carriage bolt assembly into the holes of the
corner post so that the head of the carriage bolt faces what will be the inside of the fort.
Use a hammer to set the torque washer into
The corner post. Attach
the top holes of the rope
ladder support to the
t-nuts installed on the
corner posts.
8: Do not install any
lag screws at this
time.
6-1/2” Carriage Bolt
2 x 6 x 47-1/2”
Bottom Panel
Board (Offset
holes down)
Torque Washer
2 x 6 x 78”
Rope Ladder Runner
(offset holes down)
Bolt Cap
3/8” Nut
3/8” Washer
5/16 x 4-1/2”
Hex Bolt
5/16” Washer
®
Page 34
Содержание Riverview
Страница 29: ...Picture Description Qty Iron Ductile Swing Hangers 6 Telescope 1 10 Rope 1 Page 29 ...
Страница 30: ...Picture Description Qty 90 Green Bracket Spring Clamp 6 Spring Clamp 4 Safety Handles 1 Page 30 ...
Страница 31: ...Picture Description Qty Unassembled Chimney Unassembled Dormer 1 Tic Tac Toe Panel 1 2 Flag Kit 1 Page 31 ...
Страница 32: ...Picture Description Qty Window Panel 4 Steering Wheel 1 Sunburst Screen 2 Page 32 ...
Страница 84: ...Step 52 Chimney Dormer 1 Use the instructions provided to assemble and install the chimney and dormers Page 84 ...


