background image

- 40 -

Specifications

TV BROADCASTING

PAL I/I’

RECEIVING CHANNELS

VHF (BAND I/III)

UHF (BAND U)

HYPERBAND

CABLE TV (S1-S20/ S21-S41)

NUMBER OF PRESET CHANNELS 100

CHANNEL INDICATOR

On Screen Display

RF AERIAL INPUT

75 Ohm (unbalanced)

OPERATING VOLTAGE

230-240V AC, 50 Hz.

AUDIO

Nicam Stereo

AUDIO OUTPUT POWER (W

RMS.

) (%10 THD)

2 x 10

POWER CONSUMPTION (W) (max.)

180

< 3 W (Stand-by)

PANEL

16:9 display, 

32”

 Screen Size

DIMENSIONS (mm)

:HLJKWNJ


'

/

+

',0(16,216PP

:LWKIRRW

:LWKRXWIRRW

ENG-3210W-17MB11-(UK IDTV)-1558UK-(WO DVI)-CHI MEI-50072184.p65

22.07.2005, 16:52

40

Содержание GTV32W3LCD

Страница 1: ...Goodmans LCD Colour Television Model GTV32W3LCD Goodmans Product Information Helpline 0870 873 0080 User Guide...

Страница 2: ...ram table 29 Source Select 31 Other Features Analogue TV 31 TV Status 31 Active window switch 32 Programme Swap SWAP 32 Freeze Picture 32 Sound Indicator 32 Mute Indicator 32 AV Modes 32 Teletext 33 C...

Страница 3: ...old PIP position Update Split screen GUIDE Index Page Electronic Programme Guide EPG Reveal PIP size WIDE Expand Image size Mix PIP on PIP off Teletext Time Subpage RED Page Down GREEN Page Up Mute I...

Страница 4: ...3 ControlPanelButtons 2 3 1...

Страница 5: ...utton Program Up Program Down buttons Volume Up Volume Down buttons Power cord input On Off switch RF Aerial Input Audio Line Out L R Scart Socket 1 AV 1 Scart Socket 2 AV 2 PC Audio In PC Input CI Co...

Страница 6: ...TFT panel would be placed Fix the stencil wall mount shown in Figure 2 on the wall The stencil wall mount is used for placing the wall hangers on the wall properly 4 Level and mark with a pencil the 4...

Страница 7: ...7 7 3 1 6 5 2 6 25 3 67 3 16 3 67 3 16 6 5 6 6 5 3 67 1 25 1 5 85 1 56 67 1 02817 ENG 3210W 17MB11 UK IDTV 1558UK WO DVI CHI MEI 50072184 p65 22 07 2005 16 52 6...

Страница 8: ...ion The slots and openings on the receiver are intended for ventilation and to ensure reli able operation To prevent overheating these openings must not be blocked or cov ered in anyway Features Remot...

Страница 9: ...kept away from children Battery including those which is heavy metal free should not be disposed of with household waste Please dispose of used battery in an environmentally sound man ner Find out ab...

Страница 10: ...tion of other devices via scart refer to the manuals of the related devices Inserting Batteries In The Remote Control Handset Insert the batteries observing the correct po larities as shown below Remo...

Страница 11: ...strial TV broadcasts and display ing the names of channels found This pro cess will take about five minutes To cancel searching press MENU button at any time during the process 0 18 RGHF RGHF 6HDUFKLQ...

Страница 12: ...Operation with Remote Control The remote control handset of this TV is de signed to control all the functions of the TV Volume Setting Press button to increase volume Press button to decrease volume A...

Страница 13: ...all channels broadcast the programme data If the name and times of the programme is not avail able then No Information Available is displayed in the information banner Icons are also displayed in the...

Страница 14: ...r EPG is the current time Programme information for the follow ing 2 hours is shown in the guide pane Press or buttons to move through the available programme information in the guide Displaying The S...

Страница 15: ...ion needs to be Enabled in Receiver Upgrade setting For details see page 18 Widescreen Depending on the type of broadcast being transmitted programmes can be viewed in a number of formats Press the WI...

Страница 16: ...cting NO cancels the delete operation Renaming channels To rename a specific channel the channel must be highlighted using or buttons and then highlight the Edit Name item us ing or buttons Press SELE...

Страница 17: ...the menu func tions For Channel List menu the following message is displayed on the screen 3UHVV WKH 6 7 EXWWRQ RQ RXU UHPRWH FRQWURO WR WXQH WR WKH KLJKOLJKWHG FKDQQHO 3UHVV 0 18 WR H LW WKLV VFUHHQ...

Страница 18: ...RQ HV 1R Press SELECT button whilst Yes is high lighted to start installation After the channel search is completed a message asking to search for analogue channels appears on the screen HV R RX ZDQW...

Страница 19: ...enu Favourites on page 16 Use or buttons to turn favourite mode on off If the Favourite Mode is on in normal operating mode pressing P CH and P CH buttons will only navigate through the channels that...

Страница 20: ...ed QWHU RFN H There is only one key which is set to 0000 initially Enter lock key If wrong Lock key is entered the following message is displayed on the screen URQJ RFN H If it is correct the Parental...

Страница 21: ...QQRW EH WKH VDPH DV VWDUW WLPH 3OHDVH FKRRVH D GDWH DQG WLPH LQ WKH IXWXUH RU QWHUHG WLPH LV QRW YDOLG DSSHDU RQ WKH VFUHHQ GHSHQGLQJ RQ WKH PLVWDNH GXULQJ WKH WLPH RU GDWH HQWU Language Some programm...

Страница 22: ...harpness or color and use or buttons to adjust the settings GRZQ IRU SLFWXUH VHWWLQJV IRU FXUUHQW ZLQGRZ EULJKWQHVV FRQWUDVW VKDUSQHVV FRORXU SLFWXUH Window Menu Using buttons select the third icon wi...

Страница 23: ...utton 0DLQ 0HQX KDQQHO LVW QVWDOODWLRQ RQILJXUDWLRQ 7LPHUV DQJXDJH 79 6HWXS RPPRQ QWHUIDFH It is required to subscribe to a pay channel company to view the pay channels of the Digital Terrestrial broa...

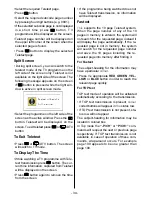
Страница 24: ...n the background The second programme from the tuner 2 is seen in the pip window To activate PIP layout directly by using the button split screen Using buttons select split screen ok activates two win...

Страница 25: ...IRU SLFWXUH VHWWLQJV IRU FXUUHQW ZLQGRZ EULJKWQHVV FRQWUDVW VKDUSQHVV FRORXU WLQW SLFWXUH When TV is in AV mode picture menu items brightness contrast sharpness and colour may require re adjustment W...

Страница 26: ...the button pip position Using buttons select pip position right left to adjust PIP position is seen on the screen Using buttons it is pos sible to change the pip position as left top right top middle...

Страница 27: ...button to increase balance towards the right Press button to uncrease balance towards the left Balance level can be adjusted between 50 and 50 Equalizer Using buttons select equalizer right left for e...

Страница 28: ...ing buttons the OSD timeout can be changed to either 5 sec 15 sec or 60 sec Menu background Using buttons select menu back ground right to change menu back ground is shown on the screen You can change...

Страница 29: ...t icon Programming menu is shown on the screen GRZQ WR SURJUDPPLQJ RSWLRQV SURJUDPPLQJ SURJUDP ILQH WXQH FKDQQHO VWDQGDUG FKDQQHO W SH HGLW ODEHOV VWRUH SURJUDP W UNL H 6 YFU RQ RII Program Using butt...

Страница 30: ...wing menu will be shown on the screen SURJUDP VWRUHG manual search Using buttons select manual search right left to search is shown on the screen Using or buttons you can start programme searching and...

Страница 31: ...hange the name of a selected programme use navigation keys to select that programme and press the YELLOW button The following menu is shown on the screen XS GRZQ OHIW ULJKW WR HGLW ODEHO VRXUFH WR FOH...

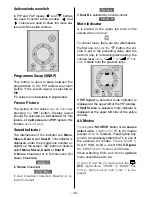
Страница 32: ...und Indicator are displayed on the upper right side of the screen Source is also displayed with them on the right bottom side of the screen They are displayed after programme change during 3 seconds 3...

Страница 33: ...broadcast detected Dual A is se lected in default 8 If Dual B is selected by remote control 8 Mute Indicator It is placed in the upper left side of the screen when activated To cancel mute there are...

Страница 34: ...ess P CH button to move the Teletext screen backward one page at a time To Select Index Page To select the page number of the index press button To Select Teletext With A TV Programme Press button The...

Страница 35: ...eletext will be displayed on the screen Press button again to remove the time from the screen If the programme being watched does not have Teletext transmission no information will be displayed Fastex...

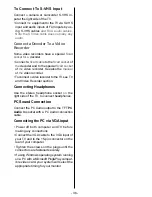
Страница 36: ...tained by con necting with a SCART cable Playback NTSC To use this option you can Connect NTSC VCR player to the scart socket at the rear of the TV Connect NTSC VCR player to RCA Jacks at the right si...

Страница 37: ...To connect a video recorder to the TV see TV and Video Recorder section Connecting Headphones Use the stereo headphone socket on the right side of the TV to connect headphones PC Sound Connection Conn...

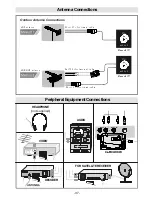
Страница 38: ...9 2 1 1 287 1 287 DECODER FOR SATELLITE RECEIVER VIDEO HEADPHONE not supplied AUDIO 9 8 9 8 9 8 DQWHQQD 9 DQWHQQD 5RXQG RKP FRD LDO FDEOH 5RXQG RKP FRD LDO FDEOH ODW RKP WZLQ OHDG FDEOH 5HDU RI 79 5H...

Страница 39: ...Hz and a horizontal sync frequency range of 30 69 KHz The following table is an illustration of some of the typical video display modes RUL RQWDO 9HUWLFDO RU N 9HU 0RGH UHTXHQF 5HVROXWLRQ The native r...

Страница 40: ...socket Is the aerial cable damaged Are suitable plugs used to connect the aerial If you are in doubt consult a specialist dealer No Picture means that the TV is not receiv ing any transmission Have y...

Страница 41: ...1 NUMBEROFPRESETCHANNELS 100 CHANNELINDICATOR On Screen Display RFAERIALINPUT 75 Ohm unbalanced OPERATINGVOLTAGE 230 240V AC 50 Hz AUDIO Nicam Stereo AUDIO OUTPUT POWER WRMS 10 THD 2 x 10 POWER CONSUM...

Страница 42: ...e connected to the terminal which is marked with the letter L or coloured Red For continued protection against risk of fire replace only with same type and rating of fuse ASTA approved 10A 250VAC fuse...

Отзывы: