2 6
Hardware Installation Process
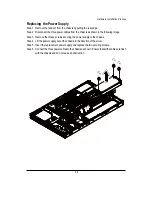
Replacing the Power Supply
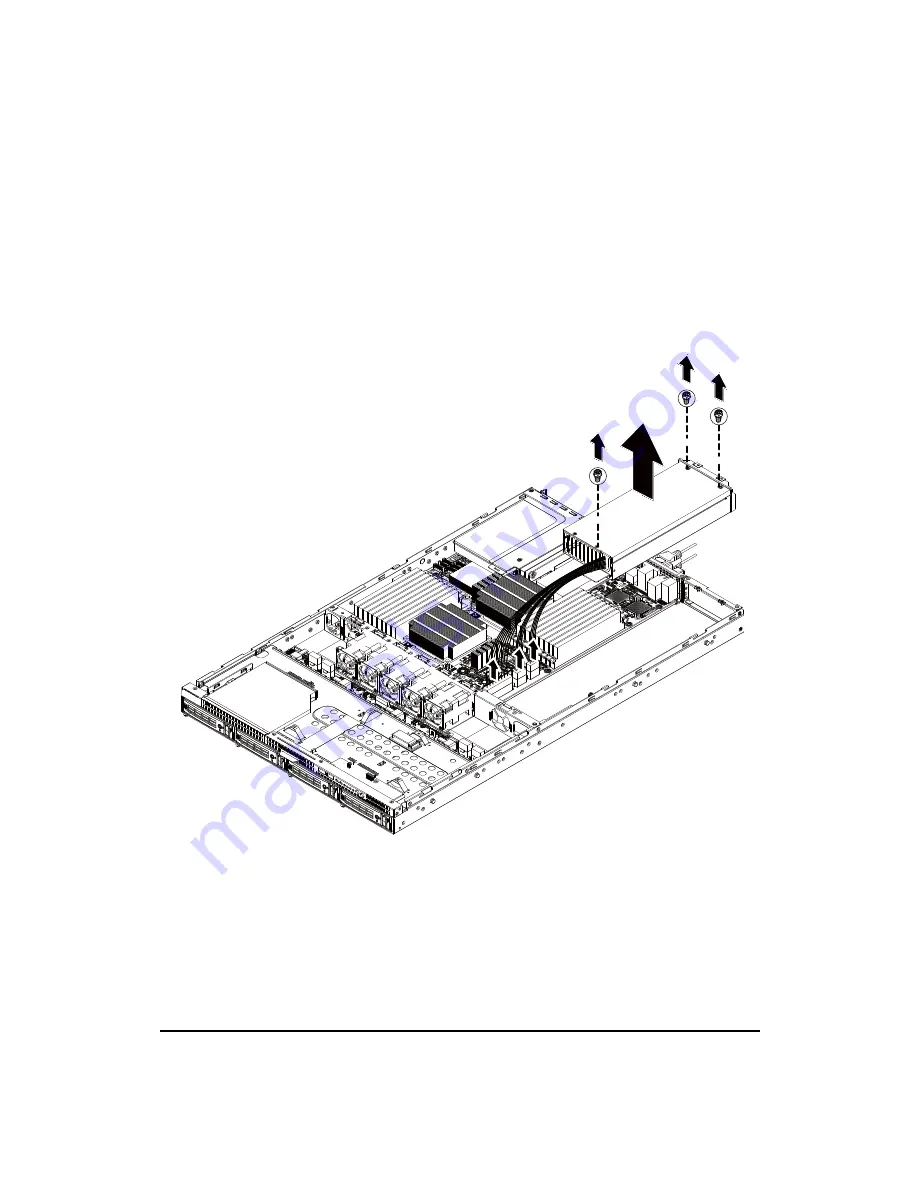
Step 1 Remove the fanduct from the chassis by pulling the rear edge.
Step 2 Disconnect the three power cables from the chassis as shown in the following image.
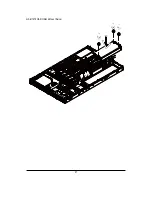
Step 3 Remove the thress screws securing the power supply to the chassis.
Step 4 Lift the power supply out of the chassis in the direction of the arrow.
Step 5 Insert the replacement power supply and replace the two securing screws.
Step 6 Connect the three power cables to the chassis as shown. Ensure that all the cables are flush
with the chassis and do not cause an obstruction.
Содержание GS-R12T102
Страница 20: ...20 GS R12T4H2 RH Rack Mount Server 3 4 5 6 5 6 ...
Страница 27: ...27 GS R12T4H2 RH Rack Mount Server ...
Страница 46: ...46 BIOS Setup TotalMemory The BIOS determines how much total memory is present during the POST ...
Страница 48: ...48 GS R12T4H2 RH Rack Mount Server Processor Configuration ...
Страница 54: ...54 BIOS Setup Memory Configuration ...
Страница 56: ...56 BIOS Setup Advanced Chipset Configuration ...
Страница 57: ...57 GS R12T4H2 RH Rack Mount Server Figure 2 3 1 Intel VT for Directed I O VT d ...
Страница 62: ...62 GS R12T4H2 RH Rack Mount Server SATA Configuration Figure 2 5 SATA Configuration ...
Страница 74: ...74 BIOS Setup Server Figure 5 Server ...
Страница 75: ...75 GS R12T4H2 RH Rack Mount Server System Management ...

