2.1.2 Assigning an IP Address
To assign a new static IP address, log in the Web interface and access the network setting
page. The following is illustrated using GV-EBD4711.
Note:
If your router does not support DHCP, the default IP address is set as
192.168.0.10
. In this case, it is strongly suggested that you modify the IP address to
avoid IP address conflicts with other GV-IP devices on the same LAN.
1.
Open your Web browser and type the default IP address
. A dialog box
appears.
2.
Type the default username and password
admin
. Click
Login
.
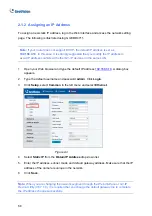
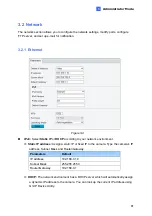
3. Click
Setup
, select
Common
in the left menu and select
Ethernet
.
Figure 2-4
4. Select
Static IP
from the
Obtain IP Address
drop-down list.
5.
Enter the IP address, subnet mask, and default gateway address. Make sure that the IP
address of the camera is unique in the network.
6. Click
Save
.
Note:
When you are changing the network segment through the Web interface or GV-IP
Device Utility (V8.7.1.0), it is required that you change the default gateway too to complete
the IP address change successfully.
68


