background image

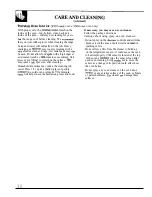
Proper care and cleaning are important so your range will give you efficient
and satisfactory service. F

O

I1

OW 

these directions carefully in caring for it to

help assure safe and proper maintenance.
BE SURE 


 IS OFF BEFORE CLEANING ANY PART

OF THE RANGE.

A

 your range is removed for cleaning, servicing or any reason,

be sure the anti-tip device is 

 properly when the

range is replaced. Failure to take this precaution could result in
tipping of the range and cause injury.


 and 

 Pans

To clean the surface units, 

 the control to the

highest setting for a minute. The coils will bum off
any soil.

● 

Be sure 

 the controls are turned to OFF and

the surface units are cool before attempting to
remove them.

● 

Do not immerse the surface units in 

of any kind.

● 

Do not clean the surface units in a dishwasher.

● 

Do not bend the 

 unit plug 

● 

Do not attempt to clean, adjust or in any way repair

the plug-in receptacle.

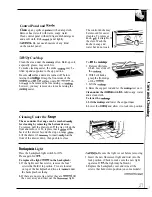
To remove a surface unit:
To remove the drip pans for cleaning, the surface units
must be removed first.

 Unit

\

Drip Pan

Lift the surface unit about 1 inch above the drip pan
and 

 it out.

Do not 

 the surface unit more than 1 inch.

 you do, it may not 

 flat on the drip pan when

you plug it back in.

Repeated 

 of the surface unit more

than 1 inch above the drip pan can permanently
damage the receptacle.

To replace a surface unit:

● 

Replace the drip pan into the recess in the

 Make sure opening in the pan lines up

with the 

 Insert the terminals of the 

 unit through the

opening in the drip pan and into the receptacle.

● 

Guide the surface unit into plain so it rests 

Drip Pans
Remove the surface units. Then lift out the drip pans.
For best 


 the drip pans by hand.

Place them in a covered container (or a plastic bag)

 1/4 

CUP 

ammonia to loosen the 

 Then 

with a soap filled scouring pad if 

 Rinse

with 

 water and polish with a clean soft cloth.

The 

 pans may 

 be cleaned in the dishwasher.

 drip pans (on some models) may be cleaned in

a self-cleaning oven after they have been 

 However, self-cleaning them may cause them

to lose their 

 luster and shine.

 the area under the drip pans often.

Built-up 

 especially grease, may catch on fire.

Do not cover the drip pans with 

 Using foil

so close to the receptacle 

 cause 

 fire or

damage to the range.

 Enamel 

The porcelain enamel finish is sturdy but

 acids spill on the 


 it is 

 use

breakable if misused. 

This finish is acid-resistant.

a dry paper towel or cloth to wipe it up right away.

However, any acid foods spilled (such as fruit 

 the surface has 

 wash with soap and

tomato or vinegar) should not be permitted to remain

water. Rinse well.

on the finish.

For other 

 such as fat 

 wash with

soap and water or cleansing 

 after the surface

has 

 Rinse well. Polish with a dry cloth.

Содержание JCP67

Страница 1: ...8 l O Canning Tips 10 Control Settings 8 9 Cooktop Comparison 8 CooWare Tps 9 Care and CIeaning 26 3O tioKop 26 Door Removal 29 Oven Light 28 Self leaning Instructions 24 25 Standard 0en 3O Surface Uni 26 Problem Solver 34 More questions call GEAnswer n 80 626 2000 Installation 31 33 Anti Tip Device 33 Flooring Under the Range 5 Leveling 5 Consumer Services 35 Appliance Registration 2 Important Ph...

Страница 2: ...f you received a damaged range Immediately contact the deder or builder that sold you the range Save time and money Before you request service Check the Problem Solver in the back of this guide It lists auses of minor operating problems that you can correct yourself W YOU ED SERWCE To obtain service see the Consumer Services page in the back of this guide We re proud of our service and want you to...

Страница 3: ......

Страница 4: ......

Страница 5: ...g This wfil allow the range to be instded on a 1 4 thick sheet of plywood or sitiar moved for clcaning or servicing material as follows hveling the Mnge bveling screws maybe Iomted on each omer of To remove the drawer pdl the drawer out dl the way the base By removing the bottom drawer you m tit up the front and remove it To repla insert the level the range to an uneven floor by adjusting the ides...

Страница 6: ...FwmS OF YOm WGE i JCP67 6 11111 111111 JCS57 4 ...

Страница 7: ...oiling se ions 11 Oven Shelves with StoD Locks 13 17 18 24 25 28 12 Bake Element k the right oven maybe lifted gentiy 3 4 28 for wiping the oven floor 13 Oven Light Switch 13 14 Storage Drawer 15 Lift Off Oven Door with Brofl Stop Position 21 2 29 16 Storage Compartment with Shelf Model JCS57 27 17 Broiler Pan and Wck 19 21 24 Do not clean in the self cleaning oven model JCP6 n 18 Broil Element 3 ...

Страница 8: ...ys hot enough to continue cooking after it is turned off Remove the pan from the surface unit if you want inking to stop Pans must be made of ferrous metals metal that attracts a magnet Heat is produ d by a magnetic circuit between the mil and the pan Heats up right away and changes heat settings right away like a gas cooktop After turning the wntrol off the glass cooktop is hot from the heat of t...

Страница 9: ...tings Steel pans may cook unevedy if not combined with other metis For best cooking resdts pans should be flat on the bottom Match the stie of the sauceDan to the she of Not over 1 inch the surfau unit me pan shotid no extend over the edge of the surfau unit more than 1 inch WRONG Over 1 inch Deep Fat F ng Do not ovetidl wobare with fat that may spill over when adding food Frosty foods bubble vigo...

Страница 10: ...ow the canner to be centered on the surface unit use smaller diameter pots for good eating results 2 For best results use mers with flat bottoms tinners with flanged or rippled bottoms often found in enamelware don t make good contact with the stiaee unit and take a long time to bofi water Hat bottomed cannem a recommended 3 When ting use recipes and proudures from reputable sources Reliable recip...

Страница 11: ...ter setting the clock let the knob out and turn the minute timer pointer to 0 To Set the mute Timer Model JCP67 To set the minute timer turn the center knob clockwise without pushing in until the pointer reaches the number of minutes you wish to time Up to 60 At the end of the set time a b er sounds to tell you time is up Turn the center knob without pushing in untfl the pointer reaches 0 and the ...

Страница 12: ...d ov r the directions for the automatic oven timer so you understand their 4 Keep this guide handy so you can refer to i use with the controls especially during the first weeks of getting a uainted with your range 2 Check the oven interior hok at the shelves Take a practice run at removing and replacing them properly to give sure sturdy support Oven Controls me controls for the right oven are mark...

Страница 13: ...uggested in the Bting Roasting and Broiling sections hft Oven Model JCP67 This oven also has four shelf suppo l ottom 2 3 and 4 top See the Bting Roasting and Brofiing sections for the suggested shelf positions me Offset Shelf Model JCP67 The ofiet shelf is provided for use in shelf position CAWON On model JCP67 never use the straight 1 to prevent contact with the deep se leaning oven shelf in she...

Страница 14: ... for BaMg ght Oven To avoid possible b s place the shelvm in the correct position before you turn the oven on 1 Turn the O SET knob to B and the OWN TEMP knob to the temperature in the recipe 2 Check food for doneness at minimum time in the recipe Cook longer if necessary 3 Turn the OWN SET and the OWN TEMP knobs to 0 and then remove the food from the oven Ow muP o OWN SH How to me Bake ght Oven T...

Страница 15: ... turn the oven on automatidy cook for a specific lenmh of time and turn off automaticrdly pearance may vary 1 To set the SW Time push in the knob on the ST T did and turn the pointer to the time you want the oven to turn o for example 6 30 2 To set the Stop Time push in the knob on the STOP did and turn the pointer to the time you want the oven to turn off for example 9 00 You have now set the ove...

Страница 16: ...the LEFT OWN knob to OFF when the food To avoid possible burns place the shelf in the is done and remove the food mrrect position before you turn the oven on Questions and hswers Q Must the clock be set on the correct time of day when I wish to use the automatic timer for baking A Yes if you wish to use the ST T and STOP dids to turn on and off at the set times during the time functions Q Can I Ti...

Страница 17: ...t set the and roasts preheating is not necessary Mer the oven lecting a higher oven at the correct temperati is preheate place the food in the oven as quic y as temperature does not shorten preheat time possible to prevent heat from escaping Bating Pans Use the proper baking pan The type of finish on the pan determines the amount of browning that til occur Dark rough or ddl pans absorb heat restit...

Страница 18: ...e sheet A tie baked in a pan larger than the recipe for baking since the shiny fofi pan reflects heat away remrnmends til ustily be crisper thinner and drier from the pie crust the aokie sheet helps retain it than it should be H baked in a pan sdler than recomrnende it maybe undercooked and batter may ovefflow Check the recipe to make sure the pan size used is the one rewrnmended Muminum Foil Neve...

Страница 19: ...o compensate for this temperature increase remove the roast from the oven before it reaches the temperature you want NO You may wish to use Timed Baking to turn the oven on and off automatically Remember that food wU1 continue to cook in the hot oven and therefore should be removed when the desired intemrd temperature has been reached How to Roast in the hfi Oven Model JCP67 Follow Steps 1 and 2 a...

Страница 20: ...e 3M0 185 1900 10 to 15 Ibs Over 15 lbs In tbi Turkey 325 Well Done 1 25 1s20 185 1900 For boneless rolled roasts over 6 inches thick add 5 to 10 minutes per pound to times given above tThe U S Department of Agriculture says Rare beef is popular but you should know that aking it to ordy 140 F means some food poisoning organisms may survive Sourm Safe Food Book Yourfi tchen Guide USDA Rev June 1985...

Страница 21: ...g How to Bmti in the Ufi Oven Model JCP67 Follow Steps 1 through 3 as outlined in the How to Turn the foo then use the times given for the second Brofi in the Right Oven section side as a guide to the preferred doneness were two bave the door ajar about 3 inches Then turn the thicknesses and times are given together use the first LE OWN knob to BRO Preheat 10 minutes times given for the thinnest f...

Страница 22: ...ick 1 to 1 Ibs 7 9 13 10 35 7 9 13 74 1 16 2 25 Steaks less than 1 inch thick cook through before browning Pan frying is recommended Slash fat 1 inch thick 2 to 2 lbs Reduce time about 5 to 10 minutes per side for cut up chicken Brush each side with melted butter Broil skin side down first 1 whole 2 to 2 lbs split lengthwise l 1 5 Bakery Products Bread oast or Toaster Pastries 2 to 4 sli s Space e...

Страница 23: ... Done Pork Chops 2 1 2 inch thick Well Done 2 1 inch thick about 1 lb Wieners and l lb pkg 10 similar pr ked sausages bratwurst Shelf Position 4 4 A 4 4 4 4 4 4 4 4 4 Second Side Minutes 9 w 5 9 11 13 74 12 15 2 25 M l 12 2 3 Co ents Space evenly Steaks less than 1 inch thick cook through before browning Pan frying is recommend Slash fat Slash fat If desire split sausages in half lengthwise eut in...

Страница 24: ...he door gasket the fiberglass matend of the gasket has an extremely low resistance to abrasion An intact and well fitting oven door gasket is essential for energy efficient oven operation and good baking results If you notice the gasket becoming worn frayed or rnaged in any way or if it has become displaced on the door you shotid have it replaced Do not let water run down through openings in the t...

Страница 25: ...e to set a delay clean to end at a specific time Q k the Ccracfing y or pping sound I hear during cleaning normal A Yes This is the sound of the metal heating and cooling during both the cooking and cleaning functions Q My oven shelves do not sfide easily mat is the matter A After many cleanings oven shelves may become so clean they do not slide easdy To make the shelves slide more easdy after eac...

Страница 26: ...receptacle To replace a surface unit Replace the drip pan into the recess in the cooktop Make sure opening in the pan lines up with the rewptacle c Insert the terminals of the surfaw unit through the opening in the drip pan and into the receptacle Guide the surface unit into plain so it rests everdy Drip Pans Remove the surface units Then lift out the drip pans For best resdts clean the drip pans ...

Страница 27: ...t on it Clean under the coo p with ho mild soapy water and a clean cloth To lower the cootip 1 Lift the cooktop and lower the support rod 2 Lower the moktop and allow it to lock into position Cleaning Under the Mnge The area under the range can be reached eastiy 1 1 1 for cleaning by removing the bottom drawer To remove pull the drawer out dl the way tilt up the front and remove it To replace inse...

Страница 28: ...pad If food has burned on sprirdde the rack with detergent whfie hot and cover with wet paper towels or a dishcloth Soaking the pan wdl remove burned on foods The broiler pan may be cleaned with a commercial oven cleaner Do not use an oven cleaner on the rack Both the brofler pan and rack can also be cleaned in the dishwasher Do not store a soiled broder pan and rack anywhere in the range Do not c...

Страница 29: ...E DOOR Inside of door not on self cleaning models Clean the inside of the oven window with a mild non scratching cleaner and a damp cloth Soap and water wU1 normally do the job Heavy spattering or spillovers may require cleaning with add abrasive cleaner Soapy wet metal pads may dso be used Do not allow food spflls with a high sugar or acid content such as ti tomatoes sauerkraut fruit juices or pi...

Страница 30: ... make the cleaning job easier Place 1 2 cup in a shallow glass or pottery mntainer in a cold oven overnight me ammonia times will help loosen the burned on grease and food If necessary you may use an oven cleaner Follow the package directions Cautions about using spray on oven cleaners Do not spray on the electrid controls and switches because it could cause a short circuit and resdt in sparking o...

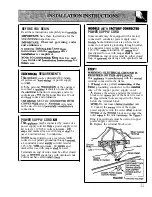
Страница 31: ...t rated at 125 250 VOltS minimum 40 PS and marked for use with ranges sh be used Terminals on end of wires must be either closed loop or open nd spade lugs with upturned ends Cord must have strain rehef cbp MODEM WITH FA ORY CONNE ED POWER SUPPLY CORD Some models may be equipped with a factory connected 3 conductor power supply cord Mobfle home initiation or area where local codes do not permit gr...

Страница 32: ...nect the other wires to the outer teds E Replace the terrnind block cover FIGURE 2 CORD J To ehate the hward of reaching overheated surface elements mbinets or storage spaces should not be provided over a range Hcabinets are provided the h d can be reduced by insfig a rmge hood that projects hotiontiy a minimum of 5 beyond the botiom of the cabinets men ins g the range between base cabinets refer ...

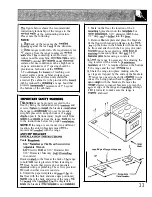
Страница 33: ...Screwdriver Adjustable Wrench 3 8 Electric Dfl 3 16 Diameter Bit 3 16 Diameter Masonry Dfl ifins g in concrete Brackets a ch to the floor at the back of tie range to hold boti rear leg levelers When fastening to tie floor be sure that screws do not penetrate electrid wiring or plumbing The screws provided d work in either wood or concrete 1 Unfold the paper template and pb it fit on tie floor with...

Страница 34: ... QUESmONS USE mS PROBLEM SOLmR PROBLEM I POSSIBLE CAUSE If you need more help dl toll free The GE Answer Center 800 626 2000 consumer information setice 3 4 ...

Страница 35: ... provide Consumerswiti impaired hearing or speech who have Braille controls for atietyof GE access to a TDD or a conventional teletyptiter may appliances and a brochure to cdl 80 TDK C 80 W3 322 to request assist in plannir g a barrier free information orsefice kitchen forpersonswith tiited mobflity To obtain these items free of charge cd 800 626 2000 SewiE n a 80W2 2224 You n have the secure feel...

Страница 36: ...nd Care material Failure of the product if it is used If you then have any questions for other than its intended purpose about operating the product or used commercially please contact your dealer or our Consumer Affairs office at the Damage to product caused by accident fire floods or acts address below or call toll free of God GE Answer CenteP 800 626 2000 WARRANTOR IS NOT consumer information s...

Отзывы: