Initial Setup
2-1
March 2008
Introduction
This chapter provides instructions for entering the minimum amount
of programming data required to place the Model GS868 flowmeter
into operation. Before the Model GS868 can begin taking
measurements and displaying valid data, the current system and pipe
parameters must be entered. In addition, a 2-Channel meter requires
that each channel be activated prior to use. Additional programming
options provide access to the more advanced features of the Model
GS868, but this information is not required to begin taking
measurements.
Note:
See the
Programming Manual
for information on those
User
Program
options not covered in this chapter.
Navigating Through the
User Program
In order to begin using the Model GS868, the following submenus
within the
User Program
will be accessed:
•
ACTIV
- enables selection of the desired measurement method (for a
2-Channel meter, it is also used to activate a channel)
•
SYSTM
- prompts the user to enter the required system data
•
PIPE
- prompts the user to enter the required pipe parameters
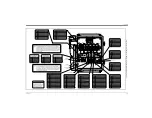
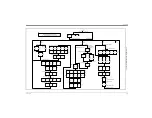
As a guide in following the programming instructions in this chapter,
the relevant portions of the Model GS868 menu map have been
reproduced in Figure 2-1 on page 2-11.
Note:
There are minor differences at the start of the
ACTIV
and
SYSTM
submenus for the 1-Channel and 2-Channel models, but the
PIPE
submenus are identical.
The following discussion assumes that the left screen pane is active.
If the right screen pane is active, only the function key designations
change. That is, replace
[F1]-[F4]
with
[F5]-[F8]
. Be sure to record all
programming data in Appendix B,
Data Records
.
Use the keypad, as described in the
Programming Manual
, to
navigate through the
User Program
. The menu map may be followed
in sequence, or the [
↑]
and [
↓]
keys may be used to scroll through the
prompt screens. The [
←]
key may be used to delete the last
alphanumeric character that was entered from the keypad.
Содержание DigitalFlow GS868
Страница 6: ...Chapter 1...
Страница 28: ...Chapter 2...
Страница 40: ...Chapter 3...
Страница 41: ...Operation Introduction 3 1 Powering Up 3 2 Using the Display 3 3 Taking Measurements 3 5...
Страница 49: ...Chapter 4...
Страница 50: ...Specifications General 4 1 Electrical 4 2 Operational 4 4 Transducer 4 4 Flowcell 4 5...
Страница 56: ...Appendix A...
Страница 57: ...CE Mark Compliance Introduction A 1 Wiring A 1 External Grounding A 1...
Страница 59: ...Appendix B...
Страница 60: ...Data Records Option Cards Installed B 1 Initial Setup Data B 2...
Страница 64: ...Appendix C...
Страница 65: ...Optional Enclosures Introduction C 1 Rack Mount Enclosure C 1 Rack Mount Wiring C 1 Rack Mount Front Panel C 2...
Страница 71: ...Appendix D...
Страница 72: ...Measuring P and L Dimensions Introduction D 1 Measuring P and L D 1...


