41
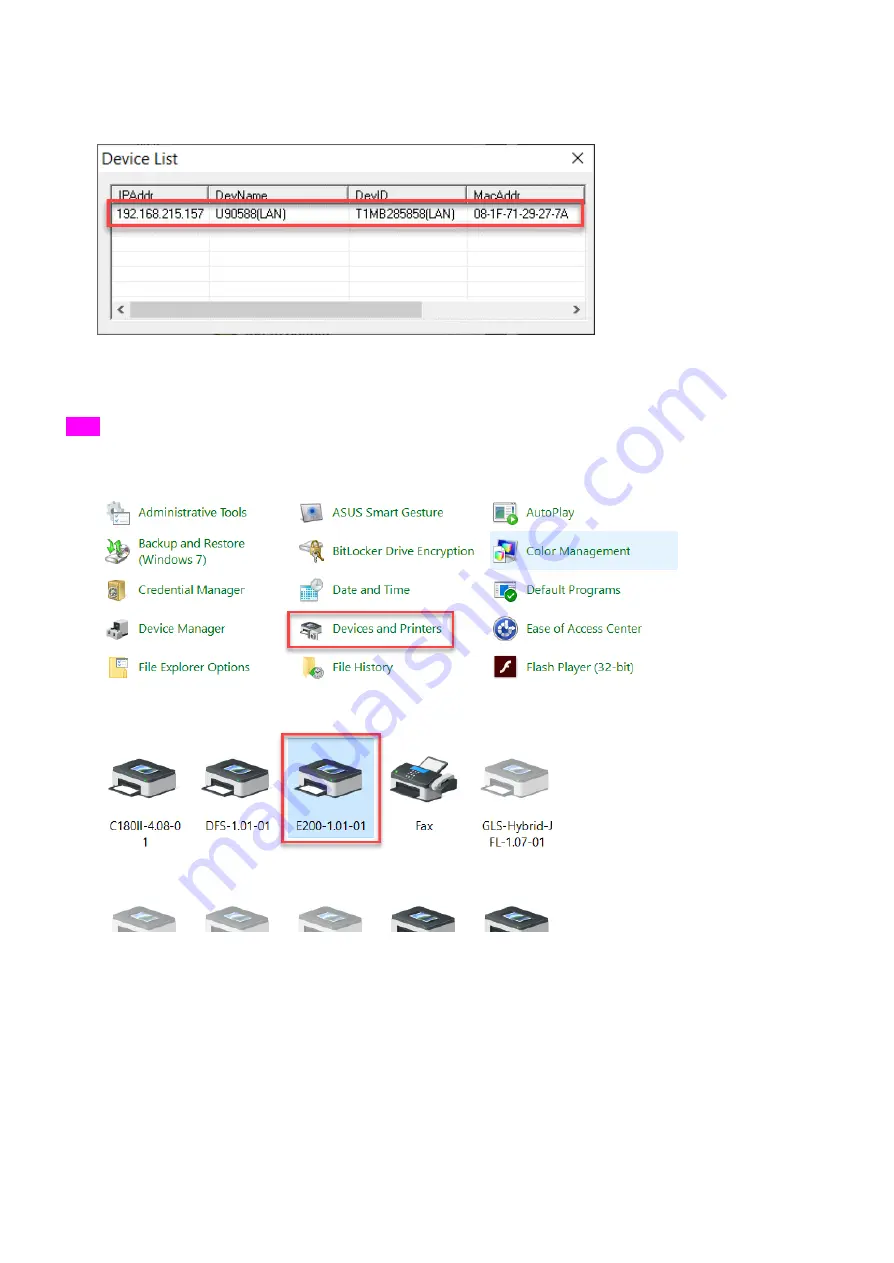
6) Double click your machine from the Device List and the setting is complete. Pleae check your serial number
of the machine to make sure the connection is correct if you have many machines.
7) WiFi/LAN Connection setting is completed.
USB
1) G
o to “Control panel”
“Devices and Printers”
2)
Double click “E200” printer driver to open the printer driver window
3) C
lick “Printer”
“Properties” on the menu bar to open the properties window.
Содержание LaserPro E200 Series
Страница 13: ...12 Chapter 2 Unpacking Unloading Unpacking...
Страница 19: ...18 3 3 Right Profile View 3 4 Left Profile View...
Страница 20: ...19 3 5 Rear View...
Страница 21: ...20 3 6 Water Chiller Front View...
Страница 22: ...21 3 7 Water Chiller Right View 3 8 Water Chiller Left View 3 9 Water Chiller Rear View...
Страница 23: ...22 Chapter 4 Machine Setup Water Chiller Setup E200 Desktop Laser Engraver Setup...
Страница 31: ...30 2 Click Next 3 Clip Launch SmartJOB and clip Finish...
Страница 36: ...35 5 Choose the WiFi connection 6 WiFi Setting is complete...
Страница 70: ...69 7 4 E200 Touch Panel Operation 7 4 1 Navigation Chart of E200 Touch Panel...
Страница 81: ...80 Chapter 8 Optional Items Fume Extraction System Air Compressor Rotary Attachment...
Страница 99: ...Chapter 10 Appendix GCC LaserPro E200 Specification Sheet...


