M-40 OPERATOR & SERVICE MANUAL
ISSUE 05/01
REPAIR AND REPLACEMENT
SECTION F – PAGE 4
•
See Section B page 16
3.
Place one sheet of the current stock in the sensor area and adjust the
sensor with the sheet blocking the sensor. Check that printing on the
stock is not interfering with the sensor.
Y
N
•
Check the wiring to PLC
•
Check the amplifier
F.1e
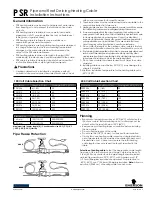
Paper Could Not Be Fed RAP
Refer to Section H Schematics.
Initial Action: clear the paper that was jammed in the machine and remove
any obstructions.
1.
Are mechanical settings correctly made?
Y
N
Check the wiring and connections for intermittent connections.
•
Adjust the singulator roller.
•
Adjust the auxiliary feed belts.
•
Adjust the Demand Switch plate.
•
Adjust the Creeping Conveyor.
•
Check that the paper guides ensure that the paper passes under the
sensor.
•
Ensure that the drive pulleys are tight.
•
Check the feed clutch.
2.
Clean the sensors. Do the sensor keys light up on diagnostic display
screen?
Y
N
•
Replace the sensor.
3.
See section B page 16
Y
N
•
Check the wiring to PLC (CPU).
•
Check the amplifier
F.1d
Paper Jam in Feeder RAP
Refer to Section H Schematics.
Initial Action: clear the paper that was jammed in the machine and remove
any obstructions.
1.
Are mechanical settings correctly made?
Y
N
Check the wiring and connections for intermittent connections.
•
Adjust the singulator roller.
•
Adjust the auxiliary feed belts.
•
Adjust the Demand Switch plate.
•
Adjust the Creeping Conveyor.
•
Check that the paper guides ensure that the paper passes under the
sensor.
•
Ensure that the drive pulleys are tight.
•
Check the feed clutch.
•
Check that the paper feed is set up to run the length of stock that is
being used.
2.
Are the lights on the Feed Sensor illuminated?
Y
N
•
Go to step 4.
3.
Place a sheet of the current stock in the sensor area and adjust the
sensor so that the red LED goes on with a sheet blocking the sensor.
Check that printing on the stock is not interfering with the sensor. Does
the red LED on amplifier light when a sheet is under the sensor?
Y
N
•
Check the wiring to PLC
•
Check the amplifier
4.
Select page 6 “DIAGNOSTICS”. Block sensor with paper. Does selected
sensor button light up on the display screen?
Y
N
•
Check wiring connection of the sensor
5.
Is there 24 VDC at connectors?
Y
N
Содержание M-40
Страница 6: ...M 40 OPERATOR SERVICE MANUAL ISSUE 05 01 COVER 071 27939 400 6 NOTES...
Страница 43: ...M 40 OPERATOR SERVICE MANUAL ISSUE 05 01 OPERATION SECTION B PAGE 27 Purge Screen Glue System Diagram...
Страница 50: ...M 40 OPERATOR SERVICE MANUAL ISSUE 05 01 OPERATION SECTION B PAGE 34 NOTES...
Страница 52: ...M 40 OPERATOR SERVICE MANUAL ISSUE 05 01 ALARM MESSAGES SECTION E PAGE 2 NOTES...
Страница 63: ...M 40 OPERATOR SERVICE MANUAL ISSUE 05 01 REPAIR AND REPLACEMENT SECTION F PAGE 11 NOTES...
Страница 79: ...M 40 OPERATOR SERVICE MANUAL ISSUE 05 01 PARTS SECTION G PAGE 16 002B 18043 AUXILIARY FEED BELTS 1 2 3 4 5 6 7...
Страница 83: ...M 40 OPERATOR SERVICE MANUAL ISSUE 05 01 PARTS SECTION G PAGE 20 002B 16631 FRONT SHAFT ASSEMBLY 7 1 2 3 4 5 6...
Страница 91: ...M 40 OPERATOR SERVICE MANUAL ISSUE 05 01 PARTS SECTION G PAGE 28 703 27277 500 FOLDER 4 PLATE PAGE 1...
Страница 93: ...M 40 OPERATOR SERVICE MANUAL ISSUE 05 01 PARTS SECTION G PAGE 30 703 27277 500 FOLDER 4 PLATE PAGE 2...
Страница 95: ...M 40 OPERATOR SERVICE MANUAL ISSUE 05 01 PARTS SECTION G PAGE 32 703 27277 500 FOLDER 4 PLATE PAGE 3...
Страница 97: ...M 40 OPERATOR SERVICE MANUAL ISSUE 05 01 PARTS SECTION G PAGE 34 703 27277 500 FOLDER 4 PLATE PAGE 4...
Страница 114: ...M 40 OPERATOR SERVICE MANUAL ISSUE 05 01 PARTS SECTION G PAGE 51 NOTES...
Страница 117: ...M 40 OPERATOR SERVICE MANUAL ISSUE 05 01 PARTS SECTION G PAGE 54 750 27251 000 EXIT CONVEYOR PAGE 2...
Страница 119: ...M 40 OPERATOR SERVICE MANUAL ISSUE 05 01 PARTS SECTION G PAGE 56 NOTES...
Страница 138: ...M 4 OPERATOR SERVICE MANUAL ISSUE 05 01 MAINTENANCE SECTION C PAGE 5...
Страница 147: ...M 40 OPERATOR SERVICE MANUAL ISSUE 05 01 MAINTENANCE SECTION C PAGE 14 NOTES...