


TIRE CHANGER FOR TRUCK TWC-1600
16
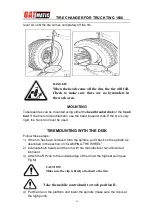
8) Move the tool carrier arm to its non-working position. Lower the spindle until
the tire is pressed down against the platform. As the platform is moved
slightly towards the outside, the tire will open a little and thus create enough
space to remove the inner tube.
9) Remove the inner tube and lift wheel back up.
10)Move the tool carrier arm to the inside plane of the tire, turn the hook tool
180º and lower the arm to its work position. Insert it between rim and bead
and move it until the bead is by the form edge of the rim ( best to do this with
the wheel turning).
11)Move the rim about 4-5 cm form the tool making sure the hook does not
detach from the rim.
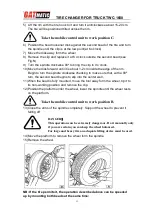
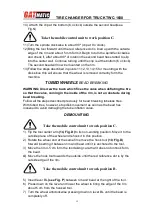
12) Move the hook tool so that its red reference dot is about 3 cm inside the
rim.
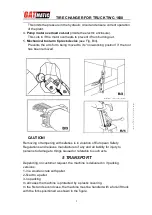
13) Insert lever BL between rim and bead at the right of the tool (see Fig. Q).
14) Press down on the lever and lower the wheel to bring the edge of the rim
about 5 cm from the hooked tool. Turn the wheel anticlockwise pressing
down on lever BL until the tire comes completely off the rim.
MOUNING
1) If the rim has been removed from the spindle, put it back on the spindle as
described in the section on “CLAMPING THE WHEEL”.
2) Lubricate both beads and the rim with tire manufacturer recommended
lubricant.
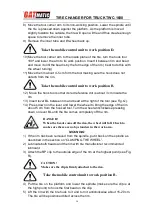
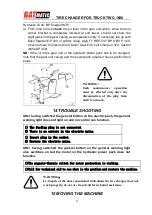
3) Attach the RP clip to the outside edge of the rim at the highest point (see Fig.
R).
4) Put the tire on the platform and lower the spindle (make sure the clip is at
the high point) to hook the first bead on the clip.
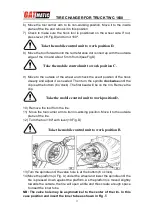
5) Lift the rim with the tire hook to it and turn it anticlockwise about 15-20 cm.
The tire will be positioned tilted across the rim.
Take the mobile control unit to work position D.
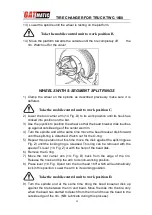
Take the mobile control unit to work position B.
DANGER!
When the beads come off the rim, the wheel will fall. Check to
make sure there are no by-standers in the work area.
CAUTION!
Make sure the clip is firmly attached to the rim.
Take the mobile control unit to work position B.


