


TIRE CHANGER FOR TRUCK TWC-1600
14
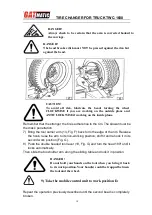
-Follow the steps described under points 1,2,3,4 described above but instead
attaching the clip to just the first bead (refer to point 4)clip it to both.
-Lift the rim with the tire hooked to it and turn it anticlockwise 15-20 cm (clip at
10 o’clock).
-Follow the steps described in points 10,11,12,13,14,15 above.
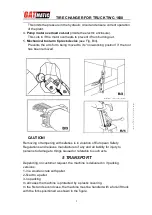
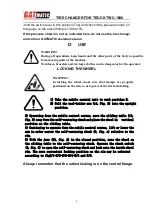
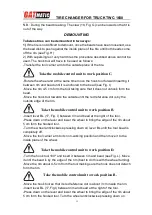
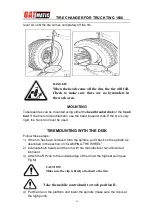
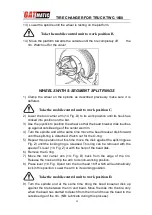
MOUNTING WITH THE HOOKED TOOL
1) Follow the steps described in points 1,2,3,4,5 for mounting with the disk.
2) Move the tool carrier arm to its non-working position. Move it to the inside
plane of the tire and rehook it at this position.
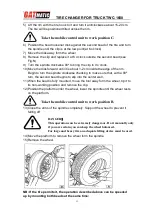
3) Check to make sure the hook tool is positioned on the wheel side. If not,
press lever (19,Fig.D)and turn it 180º.
4) Move the tool forward until the red reference dot is lined up with the outside
edge of the rim and about 5 mm form it(see Fig.O).
5) Move to the outside of the wheel and check the exact position of the took
visually and adjust it as needed. Then turn the spindle clockwise until the
clip is at the bottom (6 o’clock). The first bead will be on the rim.
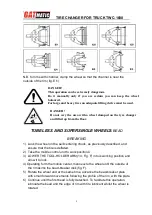
6) Remove the clip.
7) Remove the tool from the tire.
8) Move the tool carrier arm to its non-working position. Move it to the outside
plane of the tire and rehook it in this position.
9) Turn the tool 180º with lever (19,Fig.D).
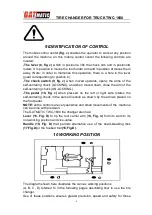
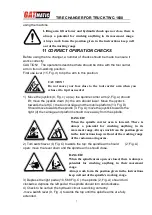
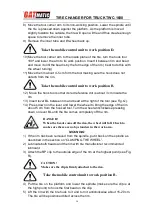
Take the mobile control unit to work position D.
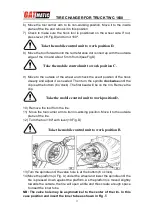
Take the mobile control unit to work position C.
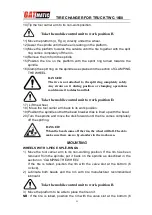
Take the mobile control unit to work position D.


