


32
Replacing or Adding System Components
9
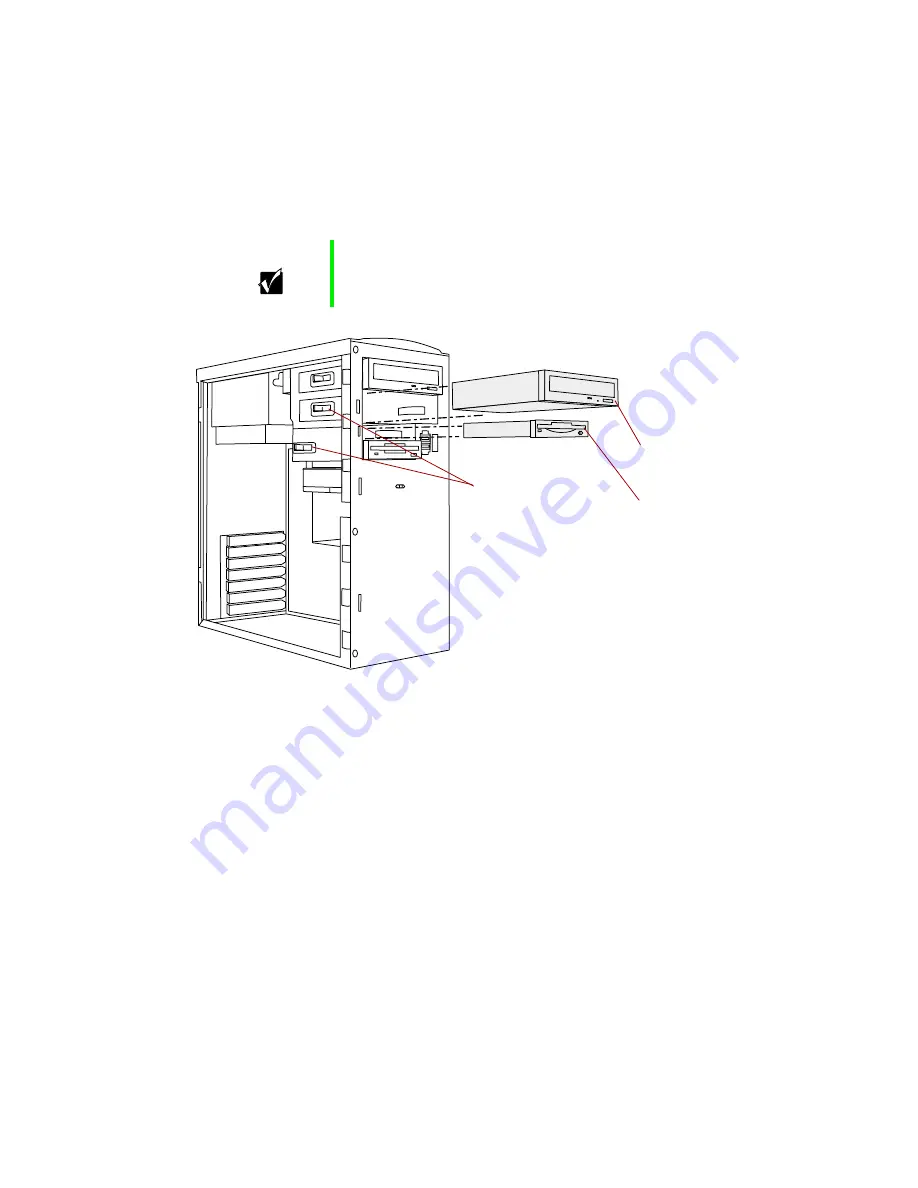
Align the drive with the open bay, then slide it into the chassis until it
is positioned correctly with the bezel.
10
Push the drive release latch forward (locked position) to secure the drive
in the bay.
11
Connect the power, data, and audio (if applicable) cables to the back of
the drive.
12
Reinstall the bezel. (See “Reinstalling the bezel” on page 21.)
13
Reinstall the cover panel. (See “Reinstalling the cover panel” on page 22.)
14
Reconnect external devices, the power cord(s), and the modem cable (if
installed), then turn on the server.
15
Run the BIOS Setup utility to make sure that the server recognizes the
drive. (See “About the BIOS Setup utility” on page 57.)
Important
You may want to install the bezel temporarily to see if the
drive is properly aligned. Adjust the drive as needed, then
remove the bezel.
5.25-inch
device
3.5-inch
device
Drive
release latch
Содержание 910 Series
Страница 1: ...8508341 Gateway 910 Series System Manual September 2001 ...
Страница 6: ...iv Contents ...
Страница 22: ...14 System Setup ...
Страница 26: ...18 Case Access 7 Lift the back edge of the cover panel then remove the panel from the server ...
Страница 28: ...20 Case Access 3 Swing the bezel outward and disengage the bezel from the hinges ...
Страница 100: ...92 Troubleshooting ...
Страница 112: ...104 Safety Regulatory and Legal Information ...
Страница 122: ...114 Reference Data ...


