Y35 HD v3
User Manual & Install Guide
51 of 156
All
: All available video.
Normal
: Normal video only (without any alarm events).
Alarm
: Only videos with alarm events.
Locked
: Only locked videos.
▪
Select Camera Channels:
Click to toggle select the camera channels to include. Selected camera
channels are marked with a red check. Recorded video will only be retrieved for playback from
the selected camera channels.
▪
Search:
After selecting the video type and camera channels, clicking on the
(Search)
button will
proceed to the playback screen for the recorded video.
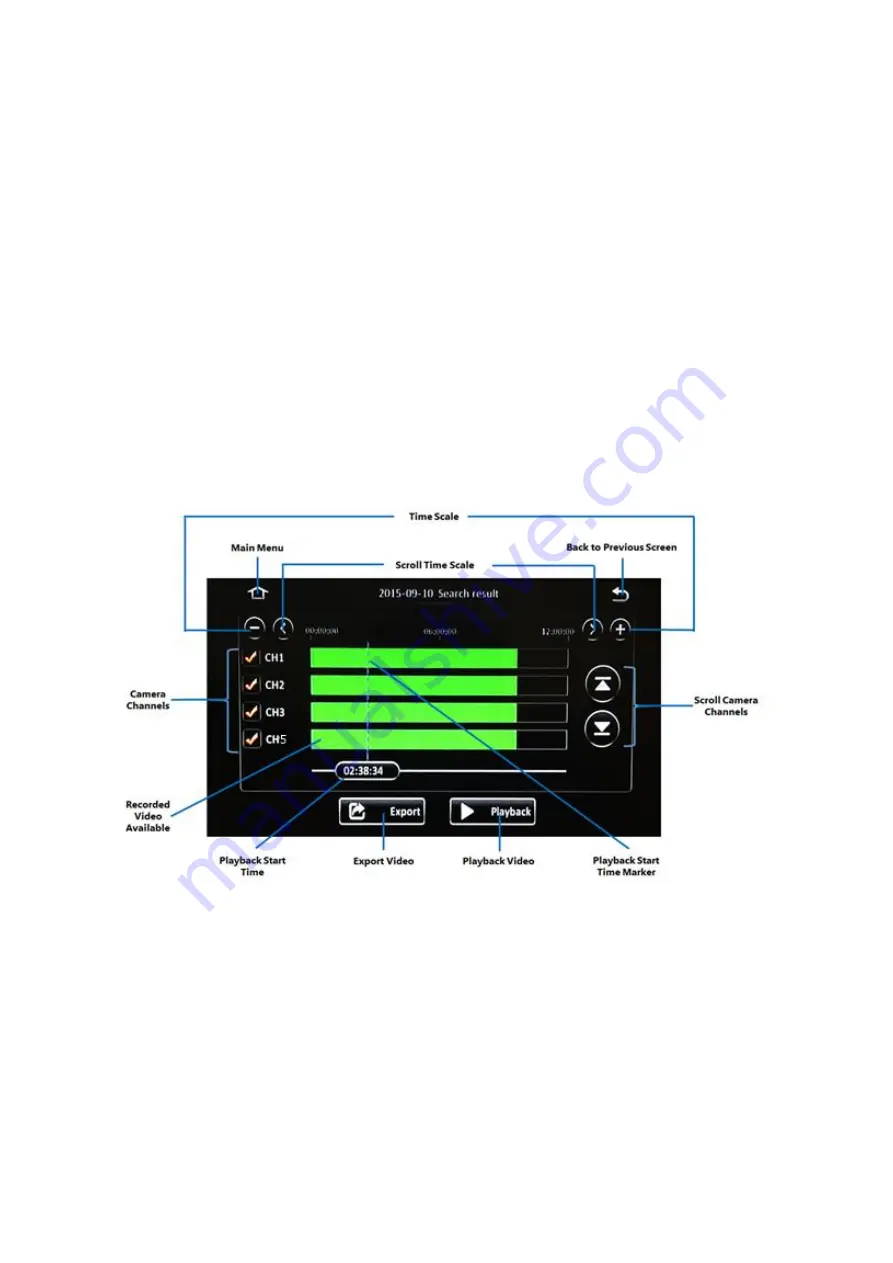
REC Search Step 3: Selecting the Time Period
After the date and camera channels have been selected, the time period display screen allows you to
visualise easily (using a time bar) when recorded video data is available, and on which channels. You
may then select the time of interest from, as well as the specific camera channels, from which to
commence playback. The system also allows you to export a video clip of the specified time period.
Figure 5-5 REC Search Time Controls
▪
Main Menu:
Click this icon to return to the Main Menu.
▪
Back to Previous Screen:
Click this icon to return to the Previous Screen that you were at.
▪
Time Scale:
This is the time bar which shows recorded video availability for the day (from
00:00:00H to 23:59:59H). Click the
(+)
and
(-)
buttons to zoom in and zoom out respectively.
Zooming in decreases the time scale, and zooming out increases the time scale
–
to allow for
easier visualisation and selection of time periods.


