background image

11

Getting Started

Main Page Sequence

11

SKYWATCH Interface

Section 3

)

)

To begin tracking intruder aircraft

1.  Turn the cursor on and highlight 

STBY

.

2.  Turn the small right knob to select 

OPER

.

3. Press 

ENT

 to confi rm operating mode and begin tracking intruder aircraft.

The FAILED message occurs when the system detects an error that prohibits further traffi c 
display operation as long as this message stays on the screen. 

User-initiated Test

A user-initiated test can only be performed when in standby or failed mode.

In addition to the power-up test, the SKYWATCH performs a continuous self-test.  This continuous 

self-test is performed several times per minute. A user-initiated test of the SKYWATCH Interface can also 
be performed.

To perform a user-initiated test:

1.  Turn the small right knob to select the Traffi c Page.

2.  From the Traffi c Page, press 

MENU

 to display the Page Menu.

3.  Turn the small right knob to select ‘Self Test?’ and press 

ENT

.

Voice Announcements

See the SKYWATCH Pilot’s Guide for information on voice announcements.

Switching Between Standby and Operating Modes

 The unit must be in operating mode for traffi c to be displayed. The ability to switch out of standby 

into operating mode on the ground is especially useful for scanning the airspace around the airport before 
takeoff.

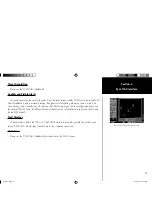
Operating Mode is confi rmed by the display of 
‘OPER’ in the upper right-hand corner of the 
Traffi c Page.

thirdparty.indd   11

3/12/2003, 4:13:21 PM

Содержание GNC 420

Страница 1: ...PE WX 500 Series II Weather Mapping Sensor Goodrich SKYWATCH Traf c Advisory System Model SKY497 Goodrich SKYWATCH HP Traf c Advisory System Model SKY899 Bendix King KTA870 TAS KMH880 Multi Hazard Awa...

Страница 2: ...9199 Fax 886 2 2642 9099 Except as expressly provided herein no part of this addendum may be reproduced copied transmitted disseminated downloaded or stored in any storage medium for any purpose witho...

Страница 3: ...e operation thoroughly practice basic operation prior to actual use When in actual use carefully compare indications from the Garmin Series Unit with all available navigation sources including the inf...

Страница 4: ...Page 400 Series 8 Weather Page 500 Series 8 Weather Display 9 Weather Display Interpretation 9 SECTION 3 SKYWATCH INTERFACE Introduction 10 SKYWATCH Description 10 Power up Self Test 10 User initiated...

Страница 5: ...dvisory Criteria 16 SECTION 4 RYAN TCAD INTERFACE Ryan TCAD Description 17 Operator Controls and Basic Displays 18 Con guring TCAD Data on the Map Page 19 Monitoring Traf c 20 Highlighting Traf c Data...

Страница 6: ...Goodrich SKYWATCH Traf c Advisory System Model SKY497 Goodrich SKYWATCH HP Traf c Advisory System Model SKY899 Bendix King KTA870 TAS KMH880 Multi Hazard Awareness System Ryan TCAD 9900B and 9900BX Th...

Страница 7: ...erly An error message is displayed on the Message Page if data is no longer being received User Initiated Test In addition to the power up test the WX 500 performs a continuous self test This continuo...

Страница 8: ...e mode or CELL when in cell mode The strike data display phases are 1 Lightning Symbol latest strikes less than one minute a black guard band is placed around the strike symbol during the rst six seco...

Страница 9: ...Page Menu Turn the small right knob to select Clear Storm Data and press ENT Changing the Storm Data Display Range Storm data can be displayed on the 2000 nm zoom scale but the data only goes out as...

Страница 10: ...ence of Nav Pages resulting in a total of eight pages Weather Page 500 Series In addition to the Map Page storm data can also be viewed on the Weather Page In the 500 Series when the STORMSCOPE is con...

Страница 11: ...select the Weather Page 2 Press MENU to display an options menu 3 Select the desired display angle from the options menu and press ENT Weather Display Interpretation For weather display interpretatio...

Страница 12: ...eck for the following test criteria on the Traf c Page during power up 1 If the SKYWATCH passes the power up test and your aircraft both has a squat switch and is on the ground the Standby Screen is d...

Страница 13: ...est is performed several times per minute A user initiated test of the SKYWATCH Interface can also be performed To perform a user initiated test 1 Turn the small right knob to select the Traf c Page 2...

Страница 14: ...ude Display Mode To change the Altitude Display Mode 1 From the Traf c Page turn cursor on highlight the current mode and turn the small right knob to cycle through the options 2 With each turn of the...

Страница 15: ...ch is active Traf c Page Display Range You can change the display range on the Traf c Page at any time To change the display range on the Traf c Page 1 Press the RNG Key to zoom through the following...

Страница 16: ...b to select the desired Traf c Mode option Turn the small right knob to select the desired option and press ENT Repeat the step for Traf c Symbol and Traf c Label 5 Return to the Map Page by pressing...

Страница 17: ...he panning function by pressing the small right knob a target pointer flashes on the map display A window also appears at the top of the map display showing the latitude longitude position of the poin...

Страница 18: ...reen prevent continued use of the SKYWATCH Please see the Goodrich SKYWATCH Pilot s Guide for detailed information on Failure Response Description of Traf c Advisory Criteria For a description of Traf...

Страница 19: ...shield size Ryan 9900BX 2 nm 2 and 6 nm 6 and 12 nm 12 and 24 nm Ryan TCAD Description Refer to the Ryan TCAD Pilot s Guide for a detailed description of the Ryan TCAD System The Ryan TCAD Traffic and...

Страница 20: ...for closing and parting traffic shown on both the Map Page and the Traffic Page are identical to those shown on the Ryan TCAD TRFC White Altitude separation 500 feet steady altitude separation TA Yel...

Страница 21: ...Mode option Turn the small right knob to select the desired option and press Repeat the step for Traffic Symbol and Traffic Label 6 Return to the Map Page by pressing CLR The Map Page has the ability...

Страница 22: ...l right knob to activate the panning target pointer 2 Turn the small right knob to move up turn clockwise or down turn counterclockwise 3 Turn the large right knob to move right turn clockwise or left...

Страница 23: ...remaining options fields Turn the small right knob to select the desired option and press ENT 3 Return to the Traffic Page by pressing CLR Traf c Page Fields There are two selectable fields on the Tr...

Страница 24: ...e field by pressing the CRSR button When the TCAD 9900BX model is interfaced there is an additional annunciation in the lower left hand corner of the Traffic Page This indicates the TCAD unit being in...

Страница 25: ...used The voice alerting can be turned on or off either on the TCAD Setup Page or on the configuration pages See the Garmin 400 500 Series Installation Manual available at your authorized Garmin Servic...

Страница 26: ...24 Section 4 NOTES Notes thirdparty indd 24 3 12 2003 4 13 28 PM...

Страница 27: ...151st Street Olathe Kansas 66062 U S A Garmin Europe Ltd Unit 5 The Quadrangle Abbey Park Industrial Estate Romsey SO51 9DL U K Garmin Corporation No 68 Jangshu 2nd Road Shijr Taipei County Taiwan www...

Отзывы: