background image

3

Select an option:
• If the handlebar diameter is

25.4 mm, place the thicker pad

around the handlebar.

• If the handlebar diameter is

31.8 mm, place the thinner pad

around the handlebar.

• If the handlebar diameter is 35

mm, do not use a rubber pad.

4

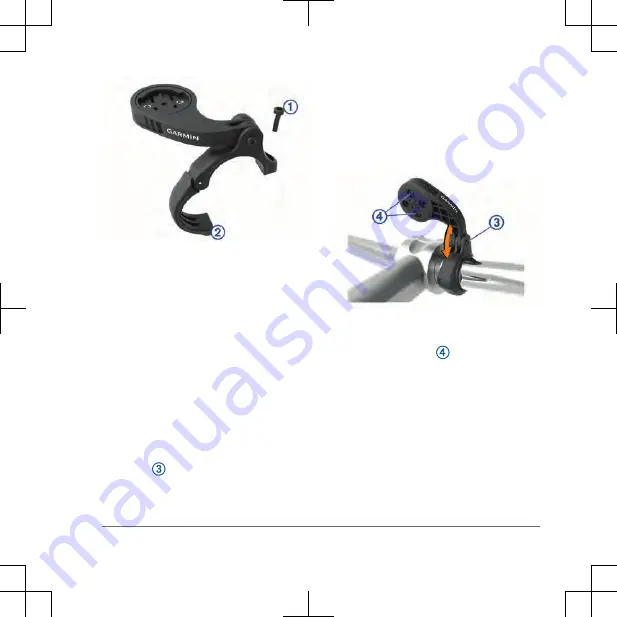
Place the handlebar connector around

the handlebar, so that the mount arm

is above the bike stem.

5

Use the 3 mm hex key to loosen the

screw   on the mount arm, position

the mount arm, and tighten the screw.

NOTE: 

Garmin recommends

tightening the screw so the mount arm

is secure, with a maximum torque

specification of 20 lbf-in. (2.26 N-m).

You should check the tightness of the

screw periodically.

6

If necessary, use the 2 mm hex key to

remove the two screws on the back

side of the mount  , remove and

rotate the connector, and replace the

screws to change the orientation of the

mount.

7

Replace and tighten the screw on the

handlebar connector.
NOTE: 

Garmin recommends

tightening the screw so the mount is

secure, with a maximum torque

specification of 7 lbf-in. (0.8 N-m). You

Quick Start Manual

5

Содержание EDGE 840

Страница 1: ...EDGE 840 Quick Start Manual...

Страница 2: ...l contacts Charge using an Edge external battery pack accessory NOTE Go to www buy garmin com to purchase optional accessories Pairing Your Smartphone To use the connected features of the Edge device...

Страница 3: ...the back of the bike mount The rubber tabs align with the back of the bike mount so it stays in place 3 Place the bike mount on the bike stem 4 Attach the bike mount securely using the two bands 5 Ali...

Страница 4: ...ion of 7 lbf in 0 8 N m You should check the tightness of the screw periodically 6 Align the tabs on the back of the Edge device with the bike mount notches 7 Press down slightly and turn the Edge dev...

Страница 5: ...mount arm and tighten the screw NOTE Garmin recommends tightening the screw so the mount arm is secure with a maximum torque specification of 20 lbf in 2 26 N m You should check the tightness of the s...

Страница 6: ...ed and can be activated during initial setup 1 Hold to turn on the device 2 Go outside and wait while the device locates satellites The satellite bars turn green when the device is ready 3 From the ho...

Страница 7: ...t any icon to change the settings 2 Swipe left or right to view more widgets Bluetooth Connected Features The Edge device has several Bluetooth connected features for your compatible smartphone using...

Страница 8: ...s friends and family to follow your races and training activities in real time You can invite followers using email or social media allowing them to view your live data on a Garmin Connect tracking pa...

Страница 9: ...me and GPS location to your emergency contacts For more information see your owner s manual Wireless Sensors Your device can be used with wireless ANT or Bluetooth sensors For more information about c...

Страница 10: ...k arm securely The band you select should be the smallest one that stretches across the crank arm 2 On the non drive side place and hold the flat side of the cadence sensor on the inside of the crank...

Страница 11: ...ct other parts of your bike NOTE The LED flashes green for five seconds to indicate activity after two revolutions Device Information Charging the Device NOTICE To prevent corrosion thoroughly dry the...

Страница 12: ...rature range From 5 to 50 C from 23 to 122 F Wireless frequency protocol 2 4 GHz 16 4 dBm nominal Product Updates On your computer install Garmin Express www garmin com express On your smartphone inst...

Страница 13: ...s These trademarks may not be used without the express permission of Garmin Android is a trademark of Google Inc The BLUETOOTH word mark and logos are owned by the Bluetooth SIG Inc and any use of suc...

Отзывы: