13–8–609 Page 19
Pressure And Temperature Digital Readouts –
These readouts normally indicate pressure at the mini-
mum pressure check valve and temperature at the air
end discharge. See “High Air Temperature LED”, page
18, for a description of readout action during a high
temperature condition.
Alternately, these readouts can be selected to display
oil reservoir pressure and separator air temperature. To
obtain such display while the compressor is running,
simply press the operating mode button that corre-
sponds to the current operating mode of the unit. (For
Example: If the unit is operating in “AUTO LEAD”
mode, press the “AUTO LEAD” button.) This will cause
the readout to display the alternate parameters. This al-
ternate display mode is indicated by illuminated deci-
mal points in the lower right hand corner of each dis-
play. After releasing the button, the display will revert
to its normal mode in 5 seconds.
The digital readouts are also used to display error mes-
sages. These error messages correspond to various
indications concerning condition of pressure and tem-
perature sensors and EMERGENCY STOP condition.
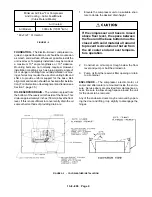
DEFINITIONS OF ERROR MESSAGES – Refer to
the chart in FIGURE 4–4 below for definitions. An error
message will stop the compressor, if running, and pre-
vent it from restarting. The failed sensor must be re-
placed to clear the error.
Any condition requiring the control panel to be reset will
be indicated by a flashing “STOP/RESET” LED. If all
readouts and LED’s are flashing, a power interruption
has occurred, requiring the control panel to be reset.
Programming The Load–Unload Pressure Set-
points – Programming of the Load and Unload Pres-
sure setpoints can only be accomplished with the unit
not running.
Step 1:
Stop the compressor and remove all power
from the unit by opening main disconnect.
Electrical shock can cause injury or
death. Open main disconnect, tag
and lockout power supply to the start-
er and any other circuits before work-
ing inside the control box.
Step 2:
Turn the “Setup” switch located on the con-
troller circuit board (inner side of control box
panel) to the “+” position. Close the control
box panel and restore power.
This switch is provided to prevent un-
authorized programming of the set-
points. If this level of security is not
required, the “Setup” switch can be
left in the “+” position, eliminating
Steps 1 and 2.
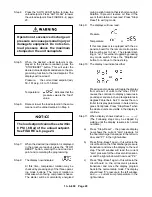
Step 3:
With the unit already in the STOP/RESET
condition, press the “STOP/RESET” button
a second time. This puts the controller in pro-
gram mode. The displays will read as follows:
Pressure: the current unload setpoint (adj.
58–175 psig, 4.0 to 12.1 Bar)
Temperature:
indicates that the
pressure value is the “un–
load” value.
Pressure Readout
Temperature Readout
Error # Meaning
Error # Meaning
E01
Failure of Final Discharge Pressure Sensor
E01
Failure of Compressor Temperature Sensor
E02
Failure of Oil Sump Pressure Sensor
E02
Failure of Separator Temperature Sensor
E03
Failure of Both Pressure Sensors
E03
Failure of Both Temperature Sensors
E04
EMERGENCY STOP
FIGURE 4–4 – DEFINITION OF ERROR MESSAGES
Содержание ELECTRA-SCREW EBE DH-15 HP
Страница 10: ...13 8 609 Page 2 200EBE797 Ref Drawing FIGURE 1 2 PACKAGE MINIMUM PRESSURE CHECK VALVE SEPARATORS OIL FILTER...
Страница 11: ...13 8 609 Page 3 200EBE797 Ref Drawing FIGURE 1 3 PACKAGE OIL LEVEL GAUGES STARTER CONTROL BOX AIR FILTER...
Страница 14: ...13 8 609 Page 6 DECALS 206EAQ077 212EAQ077 218EAQ077 211EAQ077 207EAQ077...
Страница 15: ...13 8 609 Page 7 DECALS 216EAQ077 217EAQ077 222EAQ077 221EAQ077 208EAQ077...
Страница 32: ...13 8 609 Page 24 FIGURE 4 10 WIRING DIAGRAM DUAL CONTROL 218EBE546 Ref Drawing...
Страница 33: ...13 8 609 Page 25 FIGURE 4 11 WIRING DIAGRAM WYE DELTA 220EBE546 Ref Drawing...
Страница 51: ......


