


Understanding and using these operating instructions
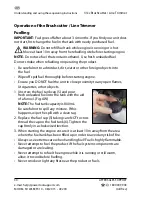
31cc Brushcutter / Line Trimmer
AFTER SALES SUPPORT
e-mail: [email protected]
1800 909 909
MODEL: №. WLBCF310 • 08/2015 • 49290
(toll free)
38
Operating instructions and safety notes!
AFTER SALES SUPPORT
(toll free)
31cc Brushcutter / Line Trimmer
e-mail: [email protected]
1800 909 909
MODEL: №. WLBCF310 • 08/2015 • 49290
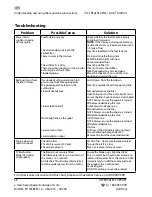
Troubleshooting
Problem
Possible Cause
Solution
Power loss or
sudden stopping
of the engine
Fuel Tank (6) is empty
The mixture does not reach the
carburettor.
There is water in the mixture.
The air filter (3) is dirty.
There are carbon deposits in the cylinder
exhaust pipe or the muffler.
Flooded engine.
Check whether the fuel tank (6) is empty
and refuel if required.
NOTE:
If the trimmer is being used a lot on
its side, the tank may require a minimum of
1/4 tank of fuel.
Clean the fuel filter in the fuel tank (6).
Drain and rinse the fuel system.
Refill the fuel tank (6) with new
uncontaminated fuel.
Clean the air filter (3).
Clean or change the muffler.
Take the product to a Service Agent.
Move the choke to the run or Hot start
position and restart the unit.
Bad quality cut from
the line trimmer
Overloaded cutting due to too high
grass or too thick for engine power.
Wrapped vegetal material on the
cutting tool.
Line will not advance.
Line welded to itself.
Not enough line on the spool.
Line worn too short.
Line tangled on spool.
Cut tall grass from the top down.
Clean the material from the spool and line.
Manually advance the lines.
Open the spool and line assembly (35) and
ensure the lines have not crossed or tangled.
NOTE: Always ensure the engine is turned
off before undertaking this task.
Lubricate with silicone spray.
Manually advance the lines.
NOTE: Always ensure the engine is turned
off before undertaking this task.
Install more line.
NOTE: Always ensure the engine is turned
off before undertaking
this task.
Pull lines while alternately pressing down
on and releasing bump knob (34).
Remove line from the spool and rewind.
Engine does not
reach full speed
Check the fuel.
Check oil reservoir (24) level.
Check spark plug (1).
Use fresh fuel. Do not use ethanol based fuel.
Top up the oil if it is low.
Clean or replace if dirty or worn.
3T Brushcutter
Blade (28) rotates
at idle speed.
The Blade is not securely fitted.
The blade only rotates on run down of
the motor. i.e 5 seconds.
At idle the 3T brushcutter blade (28) is
rotating under power from the motor.
Ensure the blade nut is tightened (26)
This is normal but should not continue to
rotate under power from the motor at idle.
Immediately turn off the motor and take
the product to an authorized
Service Agent.
DO NOT continue to use the product.
For other issues not covered in this chart, please call Customer Service on 1800 909 909.


