GAR AC/DC 180. Instructions Manual.
14
CHAPTER 3. START-UP. OPERATION AND ADJUSTMENT.
3.1. OPERATION CONTROLS.
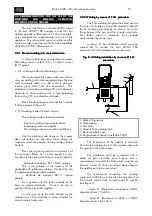
The control panels of the GAR AC/DC
equipment can be seen in figure 5. The operations
carried out by the controls are described below:
Fig. 5. Control panel of the Gar AC/DC equipment.
Fig. 5. Control panel of the Gar AC/DC equipment.
Fig. 5. Control panel of the Gar AC/DC equipment.
Fig. 5. Control panel of the Gar AC/DC equipment.
A- Start-up switch. It connects the equipment to the
mains. In 220V connection the scale level (E1 or E2)
can be selected in the TIG welding process.
B- Connection to mains light.
C- Welding current adjustment wheel.
D- Dial which indicates the welding current set.
E- Output connectors for Alternating C. working
mode (A.C.)
F- Output connectors for Direct C. working mode
(D.C.)
3.2. START-UP. PRELIMINARY OPERATIONS.
In principle, the system must be connected as
indicated in the previous chapter and before starting
the system up definitely, the operations indicated
below must be carried out:
3.2.1 Control and operation in A.C. mode (Coated
3.2.1 Control and operation in A.C. mode (Coated
3.2.1 Control and operation in A.C. mode (Coated
3.2.1 Control and operation in A.C. mode (Coated
electrode)
electrode)
electrode)
electrode)
1. Place the welding clip and ground in connectors E
on the front of the appliance (see Fig. 5)
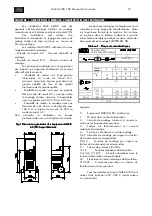
2. Set the welding current with wheel C to the desired
welding intensity value. The adjustment value is given
on part F4 of the dial (see figure 7).
3. Apply the on/off switch (A) depending on the
supply voltage. The adjustment scale in A.C. working
mode must be E2.
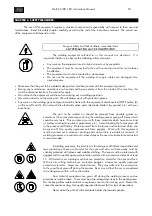
Check start-up of ventilator (fig. 6)
Fig. 6.- Warning. Ventilator in movement.
Fig. 6.- Warning. Ventilator in movement.
Fig. 6.- Warning. Ventilator in movement.
Fig. 6.- Warning. Ventilator in movement.
Fig. 7.- Graduated dial indicating welding current.
Fig. 7.- Graduated dial indicating welding current.
Fig. 7.- Graduated dial indicating welding current.
Fig. 7.- Graduated dial indicating welding current.
3.2.2. Control and operation in D.C. mode
3.2.2. Control and operation in D.C. mode
3.2.2. Control and operation in D.C. mode
3.2.2. Control and operation in D.C. mode
(Electrode or T.I.G.)
(Electrode or T.I.G.)
(Electrode or T.I.G.)
(Electrode or T.I.G.)
1. Place the clip or T.I.G. torch - depending on the
work to be carried out- and the welding ground in
connectors F on the front of the appliance. Make
sure of the correct polarity (see section 3.3).
2. Adjust the welding current with wheel C to the
desired welding intensity value. The adjustment value
is give in one of the areas (Franjas) F1, F2 and F3 of
the dial on the front (see figure 7).
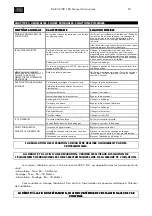
- Indication of area F1 - T.I.G. welding. Scale E1
- Indication of area F2 - T.I.G. welding. Scale E2
- Indication of area (Franja) F3 - Welding with
electrode. Scale E2.
3. Apply on/off switch according to mains power
supply. If you wish to obtain E1 adjustment scale in
T.I.G. welding you must connect the equipment to
220V.


