22
z
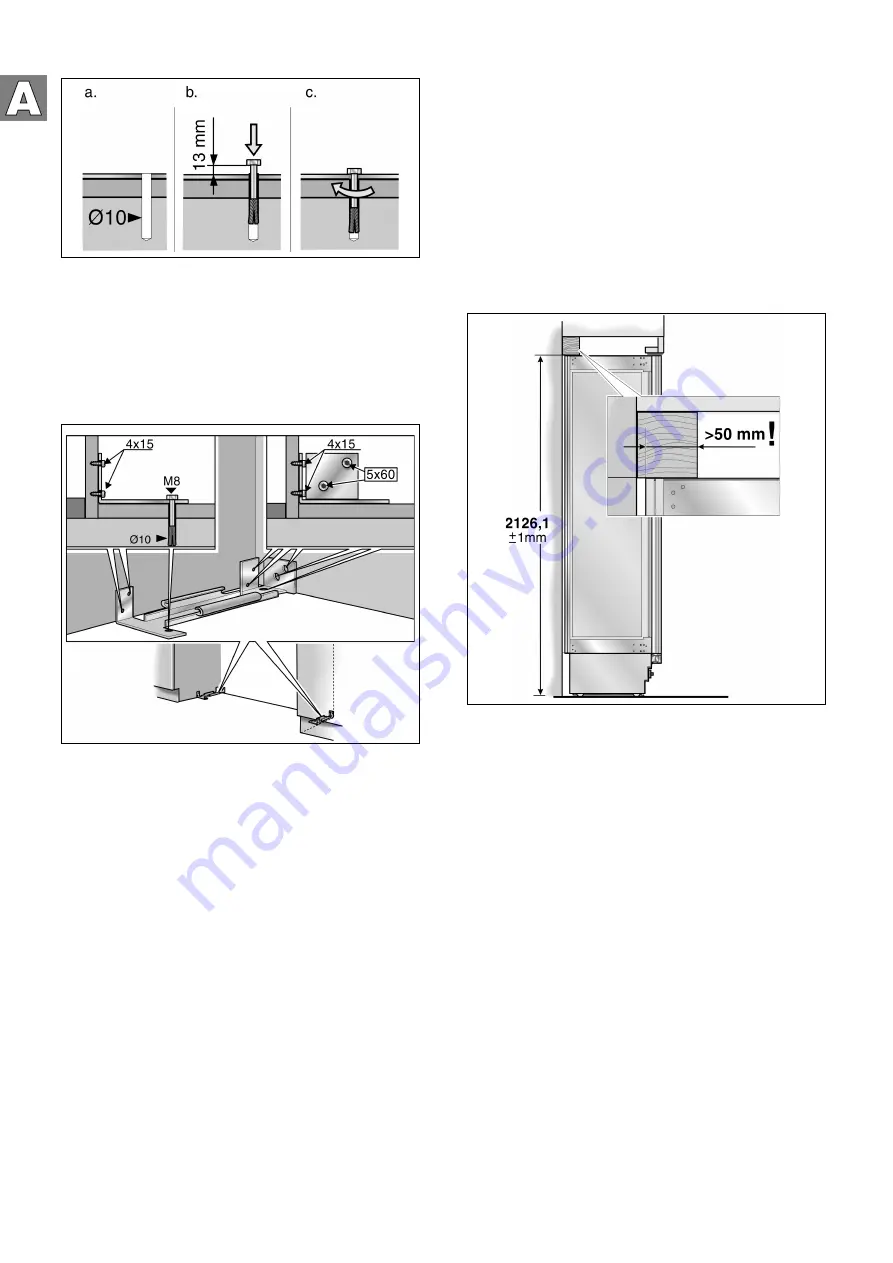
By hand, screw into the dowel until you can feel
resistance.
z
Strike the dowel and screw into the hole until the head
of the screw has a 13 mm distance to the anti-tilt
securing device.
z
Screw tightly.
z
Additionally use the supplied wood screws
(if the subsurface allows).
7.
Alternative anti-tipping device
Important note:
If the anti-tilt ribs cannot be fastened securely, a wooden
beam can be used above the appliance as an alternative
anti-tilt mechanism. Care should be taken that there is not
a gap between the appliance and the wooden beam.
As far as possible, always screw the wooden plank
to the rear wall of the niche.
z
Cut the wooden plank to the required length
(cross section min. 8 x 10 cm).
The length should correspond to the width
of the installation niche!
Note:
–
If the installation niche is deeper than the
appliance, select a stronger beam or use two,
one behind the other.
–
The plank must overlap the appliance by at least
50 mm.
z
Mark the installation height (underside edge
of the plank) on the rear wall of the niche.
z
Select the screws according to the thickness
of the wooden plank: Length min. 2.5 x wood
thickness, diameter 12 or 14 mm.
Note:
Select the number of screws corresponding to the
niche width so that you ensure that the plank can
be securely mounted.
According to the subsurface:
z
Look for the supports on the rear wall of the niche
and mark the drill holes on the plank corresponding
to the position of the support.
or
z
Fasten suitable dowel into the rear wall.
z
Pre-drill.
z
Screw the plank onto the rear wall of the niche.
Содержание RC 462 AU
Страница 1: ...Gaggenau en Installation instruction RC 462 AU RF 463 AU RW 464 AU ...
Страница 2: ...2 ...


