4
4.
(
For 7-AR only
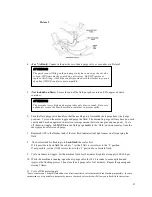
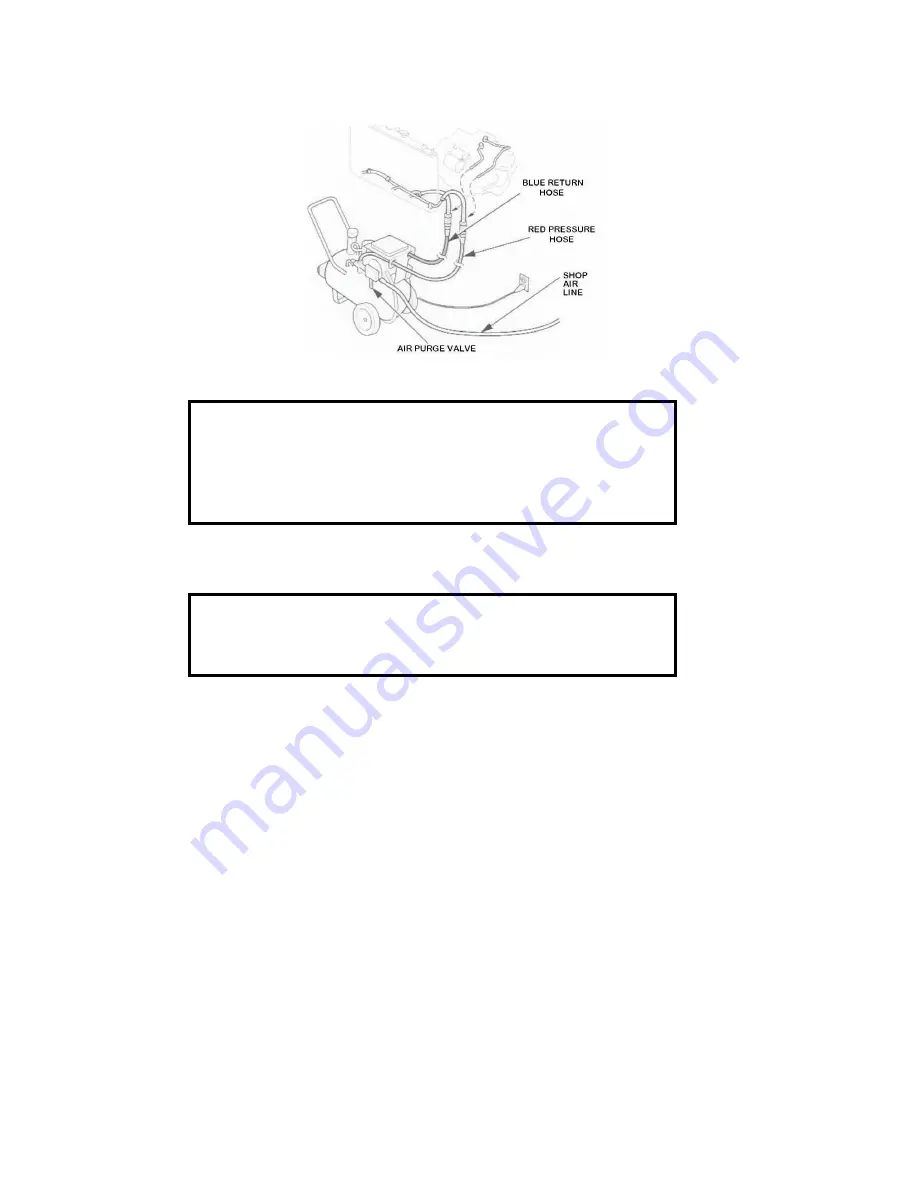
) Connect a shop air hose to the air purge valve as seen above in Picture 2.
5.
(
Not included on Basic
) Secure the end of the fluid purge hose into an EPA-approved waste
container.
6.
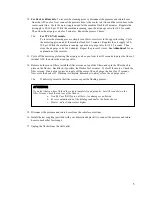
Turn the fluid purge valve handle so that the needle points toward the short purge hose (the ‘purge’
position). Cycle on the motor toggle and purge the fluid. The amount to purge will vary based on each
vehicle and based on operator’s discretion (average amount between one pint and one quart). Cycle
off the motor toggle.
ALWAYS
turn the fluid purge handle to the ‘flush’ position (or away from the
short purge hose) after each purge.
7.
Replenish ATF to the flusher tank, if the low fluid indicator (red) light comes on after purging the
fluid.
8.
The best method for flushing is to
back-flush
the cooler first.
If it is possible to back-flush the vehicle * set the (7AR) reverser lever to the ‘2’ position.
If not possible, set the (7AR) reverse lever to the ‘1’ position for a forward flush.
9.
Cycle on the motor toggle. Let the machine flush for 15 minutes. Regulate air supply to 90-100 psi.
10.
While the machine is running, open the air purge valve for 10-15 seconds to cause agitation and
improve the flushing process. Then close the air purge valve for 5 minutes. Repeat the opening and
closing 3 times.
11.
Cycle off the motor toggle.
*Some vehicles can’t be back-flushed due to a directional check valve that makes back-flushing impossible. In some
circumstances, it is possible to temporarily remove the check valve which will allow you to back-flush the system.
Pict. 1
ATTENTION
The quick connect fitting on the air purge valve has a one-way check valve
to keep ATF from entering your shop’s air system. Do NOT remove or
replace this fitting. Attach the coupler provided with the flusher to your air
shop line if YOUR coupler is not compatible.
ATTENTION
The pressure is very high and purging takes only a few seconds. Be sure to
adequately secure the short hose into a container to prevent spills.
Picture 2


