Appendix
Image Backup and Recovery Procedures
The following instructions cover separate Backup and Recovery Procedures for Windows®
7 and Backup and Recovery Procedures for Windows 10. Please follow instructions
that are applicable to your system’s operating system.
Windows® 7 Procedures
It is very important that you create DVD copies of your Recovery Image and
Bootable Disc before beginning to use your system.
It is also important that you create a copy of essential software to external writable
media or an external drive. Follow the instructions in the "“Creating a Backup of the
System-Speci
fi
c Software Drivers”"section to create the copy.
Creating a Backup of Bootable Disc and Recovery
Image for Windows 7
When you purchased your new system, a copy of the recovery image was loaded into a
hidden partition on your hard disk drive. Having a copy of the recovery image available to
you means that in the event of system failure, you will be able to restore it.
To make a copy of the recovery image to DVD discs, you will need three or four blank
discs to create the copy. After creating the copy, be sure to label the discs and keep
them in a safe place to ensure they do not get damaged.
Note:
If your system does not have an internal writable DVD drive, connect your system
to an external drive* before beginning the following steps.
* DEPENDING UPON YOUR OPTICAL DRIVE AND MEDIA FORMAT USED, SOME MEDIA
TYPES MAY BE INCOMPATIBLE FOR CREATING IMAGE BACKUPS.
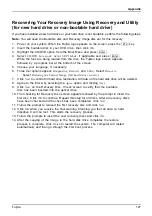
1. Launch
System Restore and Recovery
from the desktop icon. It will allow you to create
the Bootable Disc and the Recovery Image Disc Set.
2. On
Step 1: Select the Bootable Disc from the list
:
a. Select a media type.
b. Notice the number of discs that are needed for the set.
c. Click
Next
to proceed.
3. On
Step 2: Confirm your Recovery Disc
, click
Next
.
4. On
Step 3:
follow the on-screen instructions to make the disc or disc set, then click
Start
.
It takes approximately 20 minutes to make one disc.
5. On
Step 4
, when the disc creation is completed, a message appears.
Click
Finish
to exit the program.
6. Repeat
Step 1: Select Recovery Disc from the list
and repeat the above
steps 2(a), 2(b), 2(c), 3, 4 and 5.
Fujitsu
123
Содержание lifebook t726
Страница 1: ...System Operating Manual FUJITSU LIFEBOOK T726 ...
Страница 10: ...Contents 8 Fujitsu ...
Страница 27: ...Working with the notebook Opening the notebook Fold the LCD screen upwards Fujitsu 25 ...
Страница 32: ...Working with the notebook From Tablet PC to notebook Raise the LCD screen into a vertical position 30 Fujitsu ...


