background image

132

FUJIFILM Digital Camera Worldwide Network

TEL 00967-1-503977  FAX 00967-1-503983

AFRICA

Egypt

Foto Express Egypt

Technical support 

426 Pyramids St., Giza, Egypt

& Repair service

TEL (202) 7762062  FAX (202) 7760169  [email protected]

Kenya

Fuji Kenya Ltd

Repair service

P.O.Box 41669-00100, Fuji Plaza, Chiromo Road, Nairobi, Kenya.
TEL (254-20)4446265-8  FAX (254-20)4448515 / 7  [email protected]

OCEANIA

Australia

FUJIFILM Australia Pty Ltd

Technical support

114 Old Pittwater Road, Brookvale, NSW, 2100, Australia
TEL 1800 226 355  FAX  +61 (2) 9938 1975  [email protected]

Repair service

114 Joynton Avenue, Zetland, NSW, 2017, Australia
TEL 1800 226 355  FAX  +61 (2) 9938 1975  [email protected]

Fiji

Brijlal & Co. Ltd

Technical support 

70-72 Cumming Street,Suva,Fiji

& Repair service

TEL (679)3304133  FAX (679)3302777  [email protected]

New Caledonia

Phocidis SARL

Technical support 

58, rue Higginson - B.P.661 - 98845 

& Repair service

TEL (00 687) 25-46-35  FAX (00 687) 28-66-70  [email protected]

New Zealand

Fujifilm NZ Ltd

Technical support

Cnr William Pickering & Bush Road Albany, Auckland

& Repair service

TEL +64-9-4140400  FAX +64-9-4140410  [email protected]

Papua New Guinea

Oceania PNG Limited

Technical support

Section 15, Allotment 1, Reke St, Boroko  NCD. PNG.  Mail: PO Box 2167, Boroko  NCD. PNG.
TEL +675 3256411  FAX +675 3250311  [email protected]

ASIA

Hong Kong

Fuji Photo Products Co., Ltd.

Technical support 

8/F.,TSUEN WAN IND. CENTRE, 220 TEXACO RD., TSUEN WAN, HONG KONG

& Repair service

TEL (852)2406 3287  FAX (852)2408 3130 [email protected]

Indonesia

PT Modern Photo Tbk

Technical support 

Jl.Matraman Raya 12, Jakarta Timur 13150

& Repair service

TEL +62 021 2801000  FAX +62 021 62 021 2801012  [email protected]

Malaysia

Fuji Photo Film (Malaysia) Sdn. Bhd.

Technical support

Letter Box 1, Level 10, 11 & 12, Menara Axis, No 2, Jalan 51A/223, 46100 Petaling Jaya,
Selangor Darul Ehsan, Malaysia
TEL 603-79584700  FAX 603-79584110  [email protected]

Repair service

Letter Box 1, Level 10, 11 & 12, Menara Axis, No 2, Jalan 51A/223, 46100 Petaling Jaya,
Selangor Darul Ehsan, Malaysia  
TEL 603-79584700  FAX 603-79584110  [email protected]

Philippines

YKL Development & Trdg. Corp.

Technical support

24 Sto. Domingo St., Quezon City 1100, Philippines
TEL 632-7436601~06  FAX 632-7324661  [email protected]

Repair service

24 Sto. Domingo St., Quezon City 1100, Philippines
TEL 632-7436601~06  FAX 632-7324661  [email protected]

Singapore

Fuji Photo Film Singapore Pte Ltd

Technical support

10 New Industrial Road Fujifilm Building Singapore 536201

& Repair service

TEL 65-6380 5557  FAX 65-6281 3594  [email protected]

South Korea

Korea Fujifilm Co., Ltd.

Technical support

30-1, Mukjeung-dong, Jung-gu, Seoul, Korea
TEL +82-2-3282-7363  FAX +82-2-2269-7435  [email protected]

South Korea

Yonsan AS Center (Fujidigital)

Repair service

#301, 3F, Jeonjaland, 16-9, Hangangro3-ga, Yongsan-gu, Seoul, Korea
TEL +82-2-701-1472  FAX +82-2-718-1331  [email protected]

South Korea

Kangnam AS Center (Digitalgallery)

Repair service

2F, Hyeongin Tower, 23-2, Bangyi-dong, Songpa-gu, Seoul, Korea
TEL +82-2-2203-1472  FAX +82-2-418-5572  [email protected]

South Korea

Busan AS Center (Digital-Sewon)

Repair service

241-4, Bujeon-dong, Busanjin-gu, Busan, Korea
TEL +82-51-806-1472  FAX +82-51-817-0083  [email protected]

Taiwan

Hung Chong Corp.

Technical support 

No. 38, Min-Chuan E. Rd. Sec. 6, Taipei (114), Taiwan, R.O.C.

& Repair service

TEL 886-2-6602-8988  FAX 886-2-2791-8647 [email protected]

Thailand

Fuji Photo Film (Thailand) Ltd.

Technical support

388 SP Building, 8th Floor, Phayathai, Bangkok 10400
TEL +662-2730029 ext. 755  FAX +662-2730239  [email protected]

Repair service

388 SP Building, 8th Floor, Phayathai, Bangkok 10400
TEL +662-2730029 ext.761,762  FAX +662-2730239  [email protected]

133

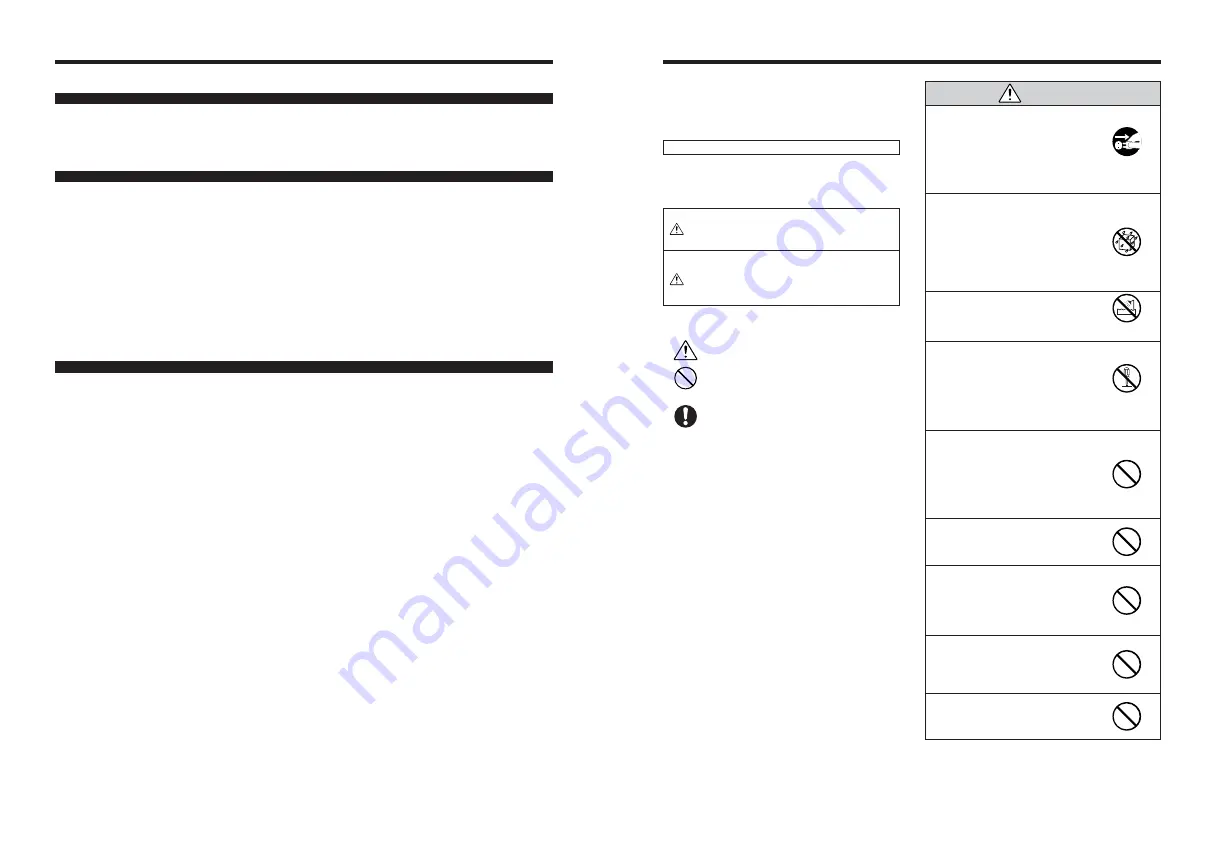
Safety Notes

h

Make sure that you use your FinePix E900 camera
correctly. Read these Safety Notes and your
Owner’s Manual carefully before use.

h

After reading these Safety Notes, store them in a
safe place.

About the Icons

The icons shown below are used in this document to
indicate the severity of the injury or damage that can
result if the information indicated by the icon is ignored
and the product is used incorrectly as a result.

WARNING

This icon indicates that death
or serious injury can result if
the information is ignored.

CAUTION

This icon indicates that
personal injury or material
damage can result if the
information is ignored.

The icons shown below are used to indicate the nature
of the information which is to be observed.

Triangular icons tell you that this
information requires attention (“important”).

Circular icons with a diagonal bar tell you
that the action indicated is prohibited
(“Prohibited”).

Filled circles with an exclamation mark tell
you an action that must be performed
(“Required”).

If a problem arises, turn the camera
off, remove the batteries, disconnect
and unplug the AC power adapter.

Continued use of the camera when it is
emitting smoke, is emitting any unusual
odor, or is in any other abnormal state
can cause a fire or electric shock.

h

Contact your FUJIFILM dealer.

Do not allow water or foreign objects
to enter the camera.

If water or foreign objects get inside the
camera, turn the camera off, remove
the batteries and disconnect and
unplug the AC power adapter.
Continued use of the camera can cause
a fire or electric shock.

h

Contact your FUJIFILM dealer.

Do not use the camera in the
bathroom or shower.

This can cause a fire or electric shock.

Never attempt to change or take
apart the camera. (Never open the
casing.)
Do not use the camera when it has
been dropped or the casing is
damaged.

This can cause a fire or electric shock.

h

Contact your FUJIFILM dealer.

Do not change, heat or unduly twist
or pull the connection cord and do
not place heavy objects on the
connection cord.

These actions could damage the cord
and cause a fire or electric shock.

h

If the cord is damaged, contact your
FUJIFILM dealer.

Do not place the camera on an
unstable surface.

This can cause the camera to fall or tip
over and cause injury.

Never attempt to take pictures while
in motion.

Do not use the camera while you are
walking or driving a vehicle.
This can result in you falling down or
being involved in a traffic accident.

Do not touch any metal parts of the
camera during a thunderstorm.

This can cause an electric shock due to
induced current from the lightning
discharge.

Do not use the batteries except as
specified.

Load the batteries with the 

and 

marks.

WARNING

Unplug from 

power socket.

Do not use in the

bathroom or shower.

Do not

disassemble.

Содержание FinePix BL00494-200(1)

Страница 1: ...ow you how to use your FUJIFILM DIGITAL CAMERA FinePix E900 correctly Please follow the instructions carefully OWNER S MANUAL 1 2 3 4 5 6 Getting Ready Settings Using the Camera Advanced Features Soft...

Страница 2: ...trictions 3 1 You shall not distribute rent lease or otherwise transfer all or any part of Software Media or Documentation to any third party without FUJIFILM s prior written consent You also shall no...

Страница 3: ...MODE PHOTOGRAPHY M N PHOTOGRAPHY FUNCTIONS 3 Advanced Features WHITE BALANCE SELECTING THE LIGHT SOURCE 60 H FOCUSING 62 AF CENTER AF MULTI 62 AF AREA CONTINUOUS AF 63 MF Manual Focus 64 G SHARPNESS 6...

Страница 4: ...e note that this camera may cause interference to other equipment in the hospital or aircraft For details please check with the applicable regulations Handling Your Digital Camera This camera contains...

Страница 5: ...to adjust the length 0 1 0 2 Camera parts and features Refer to the pages in parentheses for information on using the camera parts or features T Tele zoom button P 22 23 Flash pop up button P 21 45 Fl...

Страница 6: ...AA size Ni MH batteries h See P 119 120 for other notes on using batteries h When first purchased or if left unused for a long period the amount of time which AA size Ni MH batteries can be used may...

Страница 7: ...ies greatly depending on the camera operation mode Consequently even if C or V is not displayed in Playback mode one of them may appear when you change to Photography mode 2 Depending on the battery t...

Страница 8: ...ENU OK button to set the date and time The message also appears when the batteries have been removed and the camera has been left for a long period To set the date and time later press the DISP BACK b...

Страница 9: ...TE TIME AM AM SET SET CANCEL CANCEL DD MM YY DD MM YY YY MM DD YY MM DD 9 24 2005 MM DD YY MM DD YY 10 00 DATE TIME DATE TIME SET SET CANCEL CANCEL YY MM DD YY MM DD 2007 2006 2005 2004 2003 9 4 2 0 1...

Страница 10: ...he battery charge Use the Discharging rechargeable batteries function in the following situations i When the batteries only last for a short time after being charged normally i When the batteries have...

Страница 11: ...ition Natural light Portrait Sports Night Movie Exposure compensation button With the button held down press d or c to select the exposure compensation Manual Aperture priority Auto Shutter priority A...

Страница 12: ...ecting a setting Press the up or down arrow on the 4 direction button BASIC OPERATION GUIDE 3 Brace your elbows against your sides and hold the camera with both hands Position your right thumb so that...

Страница 13: ...1 5 m 2 0 ft to 4 9 ft using the viewfinder only the shaded area in the figure is photographed When using the viewfinder to take pictures press the DISP BACK button to turn the LCD monitor off Turnin...

Страница 14: ...4 In this shot the subjects two people in this case are not in the AF frame Taking the picture at this point will result in the subjects being out of focus 1 6 6 N N A A A 6 6 N N A A A AF Autofocus...

Страница 15: ...he image into 3 roughly equal parts horizontally and vertically The resulting printed image may be shifted slightly from the scene frame VIEWING THE IMAGES w PLAYBACK PLAYBACK MODE Move to Photography...

Страница 16: ...9 frames appears Text displayed No text displayed Multi frame playback Sorting by date Changing to Sorting by date mode displays the images taken on the same day as the image selected in Multi frame p...

Страница 17: ...100 0009 100 0009 100 0009 Erased frames files cannot be recovered Back up important frames files onto your PC or another media Press the w button for about 1 second to turn the camera on in Playback...

Страница 18: ...reference 0 and then brightens or darkens the image By selecting auto bracketing you can shoot 3 frames one underexposed one at the reference exposure 0 and one overexposed 0 FOCUSING DISTANCE PHOTOGR...

Страница 19: ...y settings P 43 48 D Exposure compensation Uses the AE exposure as a reference value of 0 This function brightens or darkens the shot e Macro Used for close up shots d Flash Used for shots in dark loc...

Страница 20: ...i Setting the camera to Playback mode i Turning the camera off The shutter speed and aperture setting display When the brightness of the subject is outside the camera s brightness metering range appea...

Страница 21: ...F 250 F 6 6 N N ISO 400 ISO 400 ISO 400 320 F6 4 Aperture 6 6 N N ISO 400 ISO 400 ISO 400 APERTURE PRIORITY AUTO PHOTOGRAPHY FUNCTIONS Set the Mode dial to This is an automatic mode to set the apertu...

Страница 22: ...M or mode 1 1Hold down D button 2Press d or c to set the compensation value The symbol indicating the compensation direction or turns yellow The D icon also turns yellow while exposure compensation is...

Страница 23: ...e d c button The last displayed setting is the selected mode If the flash is used in dusty conditions or when it is snowing white dots may appear in the image due to flash reflecting off the dust part...

Страница 24: ...may be overexposed when shooting bright scenes To take a picture of a main subject at night with the background brightly lit use the Night setting in Photography mode P 38 Red eye effect When using t...

Страница 25: ...2 3 4 Release shutter button This mode allows you to release the shutter up to 40 times max 1 5 frames sec and record the last 4 frames If you take your finger off the shutter button before 40 shots h...

Страница 26: ...rting point Point where you want to take the picture FAR NEAR Continuous shooting and flash When a Continuous shooting mode is selected the flash mode is forcibly set to v Suppressed flash However whe...

Страница 27: ...g the number of available frames also changes P 26 3 0 1 0 2 QUALITY MODE NUMBER OF RECORDED PIXELS p PHOTO MODE PHOTOGRAPHY Area shot and quality setting Normal shooting provides an aspect ratio of 4...

Страница 28: ...r in Photography mode AUTO cannot be selected in the sensitivity setting When selecting AUTO as the sensitivity setting the camera selects the best sensitivity setting for the subject s brightness STD...

Страница 29: ...ting for scenes where the brightness of the subject and background differ markedly so that the MULTI setting is unlikely to achieve the desired results White balance P 60 Change this setting to suit f...

Страница 30: ...o Playback mode i Turning the camera off 1 Using the 2 second self timer This is useful when you worry about camera shake even if attaching the camera on a tripod PHOTOMETRY Available Photography mode...

Страница 31: ...Change the white balance setting to suit for the surroundings and lighting In AUTO mode the correct white balance may not be achieved for subjects such as close ups of people s faces and pictures take...

Страница 32: ...CUSING FOCUSING AUTO AUTO SET SET 1 2 OFF OFF STD STD AF CENTER AF MULTI AF AREA CONTINUOUS AF K MF Manual Focus 2 The AF frame appears in the location to which the target point was moved Take the pic...

Страница 33: ...the amount of light emitted by the flash to suit the photography conditions or to achieve a desired effect h Compensation range 2 3 EV to 2 3 EV in approx 1 3 EV increments total 5 levels selectable S...

Страница 34: ...ping upwards to the left Shadows Pixels Highlights Brightness The shape of the graph will vary depending on the subject 2 1Press a or b to select ERASE 2Press c ERASE ERASE ALL FRAMES ALL FRAMES FRAME...

Страница 35: ...the DISP BACK button Pressing the MENU OK button repeatedly erases consecutive frames files Take care not to erase a frame file by mistake Protected frames files cannot be erased Unprotect the frames...

Страница 36: ...LECT PICTURES THAT YOU LIKE TO PRINT YOU LIKE TO PRINT DPOF DPOF PRINT ORDER PRINT ORDER DPOF DPOF 2 Press the p button If there were previous DPOF settings perform step 3 T appears on the LCD monitor...

Страница 37: ...h DPOF ALL RESET P 75 Total number of prints SPECIFYING DPOF SETTINGS EASILY p PHOTO MODE PLAYBACK WITH DATE WITH DATE WITHOUT DATE WITHOUT DATE RESET ALL RESET ALL WITH DATE WITH DATE 1 2 3 1Press a...

Страница 38: ...Press the MENU OK button Pressing the DISP BACK button while choosing settings will cancel all current settings If there were previous DPOF settings only the modifications are canceled 0 1 0 2 Cancel...

Страница 39: ...ORMAT function erases all the frames files including protected frames files P 97 1Press the w button to turn the camera on in Playback mode 2Press the MENU OK button to display the menu on the LCD mon...

Страница 40: ...tton to turn the camera on in Playback mode 2Press the MENU OK button to display the menu on the LCD monitor AUTOMATIC PLAYBACK PLAYBACK MENU REC STANDBY REC STANDBY START START CANCEL CANCEL 30s 4 RE...

Страница 41: ...lay the voice memo 2The playback time appears on the LCD monitor along with a progress bar When the sound is difficult to hear adjust the volume P 82 93 Playing back voice memos Playback Pause Resume...

Страница 42: ...os PLAYING BACK VOICE MEMOS PLAYBACK MENU Press c 3 1 2 SET SET TRIMMING TRIMMING 1Press the w button to turn the camera on in Playback mode 2Press d or c to select the trimming frame file 1 0 1 0 2 1...

Страница 43: ...m to 128 mm Max zoom scale 4 h Focal range Approx 60 cm 2 0 ft to infinity 13s s STANDBY STANDBY Because sound is recorded concurrently with the images make sure that you do not cover the microphone w...

Страница 44: ...ec 13 sec 55 sec 111 sec 223 sec 7 4 min 14 9 min DPC 16 16 MB DPC 32 32 MB DPC 64 64 MB DPC 128 128 MB DPC 256 256 MB DPC 512 M512 512 MB DPC M1GB 1 GB Recording times per xD Picture Card These figur...

Страница 45: ...onitor along with a progress bar Take care not to block the speaker When the sound is difficult to hear adjust the volume P 89 93 If the subject of the shot is very bright white vertical streaks or bl...

Страница 46: ...H SET SET SET SET NTSC NTSC 4 1Press c to move to menu item 2Press a or b to select the menu item 0 1 0 2 SET UP SET UP SET SET 1 2 AUTO AUTO OFF OFF STD STD 2 1Press a or b to select SET UP 2Press c...

Страница 47: ...ely from previous numbers or begin again 97 FORMAT OK Erases all files 16 DATE TIME SET Corrects the date and time 97 TIME DIFFERENCE SET Specifies the time difference settings 20 ENGLISH Specifies th...

Страница 48: ...focal length Approx 128 mm to 973 mm max zoom scale approx 7 6 h Optical zoom focal length Approx 33 mm to 132 mm max zoom scale 4 h Digital zoom focal length Approx 132 mm to 1003 mm max zoom scale a...

Страница 49: ...ALL DATA ERASE ALL DATA OK OK CANCEL CANCEL FORMAT Initialize format the xD Picture Card for use with the camera Because initializing the xD Picture Card erases all the frames files including protect...

Страница 50: ...minimum Amount required for operation 600 MB minimum When using ImageMixer VCD2 LE for FinePix 2 GB or better Minimum 2 GB when RAW FILE CONVERTER LE is used must specified in the OS as virtual memory...

Страница 51: ...oftware may not operate correctly if the connection is faulty i Additional USB interface board is not guaranteed i On Macintosh PCs allocate at least 400 MB of virtual memory when RAW FILE CONVERTER L...

Страница 52: ...When a camera is connected open 5 2 INSTALLATION ON A Mac OS X 1 Turn your Macintosh on and start up Mac OS X Do not launch any other applications 2 When the bundled CD ROM is loaded into the CD ROM d...

Страница 53: ...charge the Ni MH batteries 6 1 CAMERA CONNECTION 6 Viewing Images 1 DC IN 3V socket A V OUT socket 6 1 2 Connecting to a TV Turn off the camera and TV Plug the A V cable included into the A V OUT Aud...

Страница 54: ...era on in Playback mode 2Select PICTBRIDGE in USB MODE in the SET UP menu P 90 3Press the POWER button to turn the camera off Do not connect to a PC when the USB MODE setting is set to PICTBRIDGE See...

Страница 55: ...number of prints SHEETS SHEETS PRINTING PRINTING CANCEL CANCEL 1 9 1 9 6 3 CONNECTING TO A PC The Connecting to a PC section explains how to connect the camera to your PC using the USB cable mini B a...

Страница 56: ...onitor DSC mode is not selected in USB MODE Disconnect the USB cable mini B to the camera and restart the procedure from step 1 Windows XP 1The Found New Hardware help message appears in the bottom ri...

Страница 57: ...FinePixViewer in the FinePixViewer Help menu 2Click Basic Operation and then click Slide Show in the menu that appears 3The Slide Show information appears Press the key to view the previous page or t...

Страница 58: ...available Digital Photo Printer CX 550 Personal Computer commercially available USB PictBridge Print creation xD Picture Card FinePix E900 Digital Camera TV monitor commercially available Audio Visua...

Страница 59: ...TL FXE01 should only be used for telephoto shots where eclipsing does not occur Eclipsing occurs at wide angle settings Use the LCD monitor to adjust the shot composition when attaching the teleconve...

Страница 60: ...ts these items can cause damage Using the Camera When Traveling When traveling overseas do not place your camera in the check in baggage Baggage can be subjected to violent shocks and the camera may b...

Страница 61: ...se or store xD Picture Card in hot and humid places h Clean the xD Picture Card with a soft dry piece of cloth when dirty h When carrying or storing an xD Picture Card keep it in the special protectiv...

Страница 62: ...ed back i Wipe the contact area on the xD Picture Card with a soft dry cloth It may be necessary to format the xD Picture Card If the message still appears replace the xD Picture Card i Contact your F...

Страница 63: ...lly charged batteries i Change the Photography mode i Set continuous shooting to OFF The flash settings are restricted because the camera settings are tailored to the scene being shot Change the Photo...

Страница 64: ...2 5 in 1 4 in not including accessories and attachments Camera mass weight Approx 200 g 7 1 oz not including accessories batteries and xD Picture Card Weight for photography Approx 260 g 9 2 oz includ...

Страница 65: ...19 4542 FAX 05982 412 0046 kiel fujifilm com uy Venezuela C Hellmund Cia Sa Technical support Av Ppal Diego Cisneros Caracas Venezuela Edf Oficentro Repair service TEL 0212 2022300 FAX 0212 2399796 he...

Страница 66: ...Yemen 130 FUJIFILM Digital Camera Worldwide Network Croatia I I d o o Technical support Hondlova 2 Zagreb Croatia TEL 38512319060 FAX 2310240 dsaravanja fujifilm hr Repair service Hondlova 2 Zagreb C...

Страница 67: ...n Repair service 241 4 Bujeon dong Busanjin gu Busan Korea TEL 82 51 806 1472 FAX 82 51 817 0083 merahan yahoo co kr Taiwan Hung Chong Corp Technical support No 38 Min Chuan E Rd Sec 6 Taipei 114 Taiw...

Страница 68: ...to hold it and gently release the card Request regular internal testing and cleaning for your camera Build up of dust in your camera can cause a fire or electric shock h Contact your FUJIFILM dealer...

Страница 69: ...26 30 Nishiazabu 2 chome Minato ku Tokyo 106 8620 Japan http home fujifilm com products digital Printed in Japan FPT 507108 YP Printed on recycled paper...

Отзывы: