


Uninstalling the software
12
91
Macintosh
UNINSTALLING THE SOFTWARE
Only perform this operation when you no longer require the installed software or when the software
was installed incorrectly.
Uninstalling Mass Storage Driver
1
Check that the printer power is off.
Open the “Extensions” folder in the System Folder of boot volume, and put the following
four files into the “Trash”.
“USB04CB_StorageDriver”
“USB04CB_StorageShim”
“USB04CB_VcDriver”
“USB04CB_VcShim”
2
Uninstalling Exif Launcher and FinePixViewer
1
After quitting Exif Launcher in the FinePixViewer “Settings”
→
“Exif Launcher Setting”
menu, move the Exif Launcher file from the “Startup Items” folder in the System folder to
the “Trash”. Then click “Empty Trash” in the “Special” menu (
→
P. 96
■
I want to stop
FinePixViewer from launching automatically).
After your have exited FinePixViewer, drag the installed “FinePixViewer” folder to the
“Trash” and click “Empty Trash” in the “Special Menu”.
2
Restart the Macintosh.
3
Click “Empty Trash” in the “Special” menu.
4
90
Printing from the Macintosh
11
■
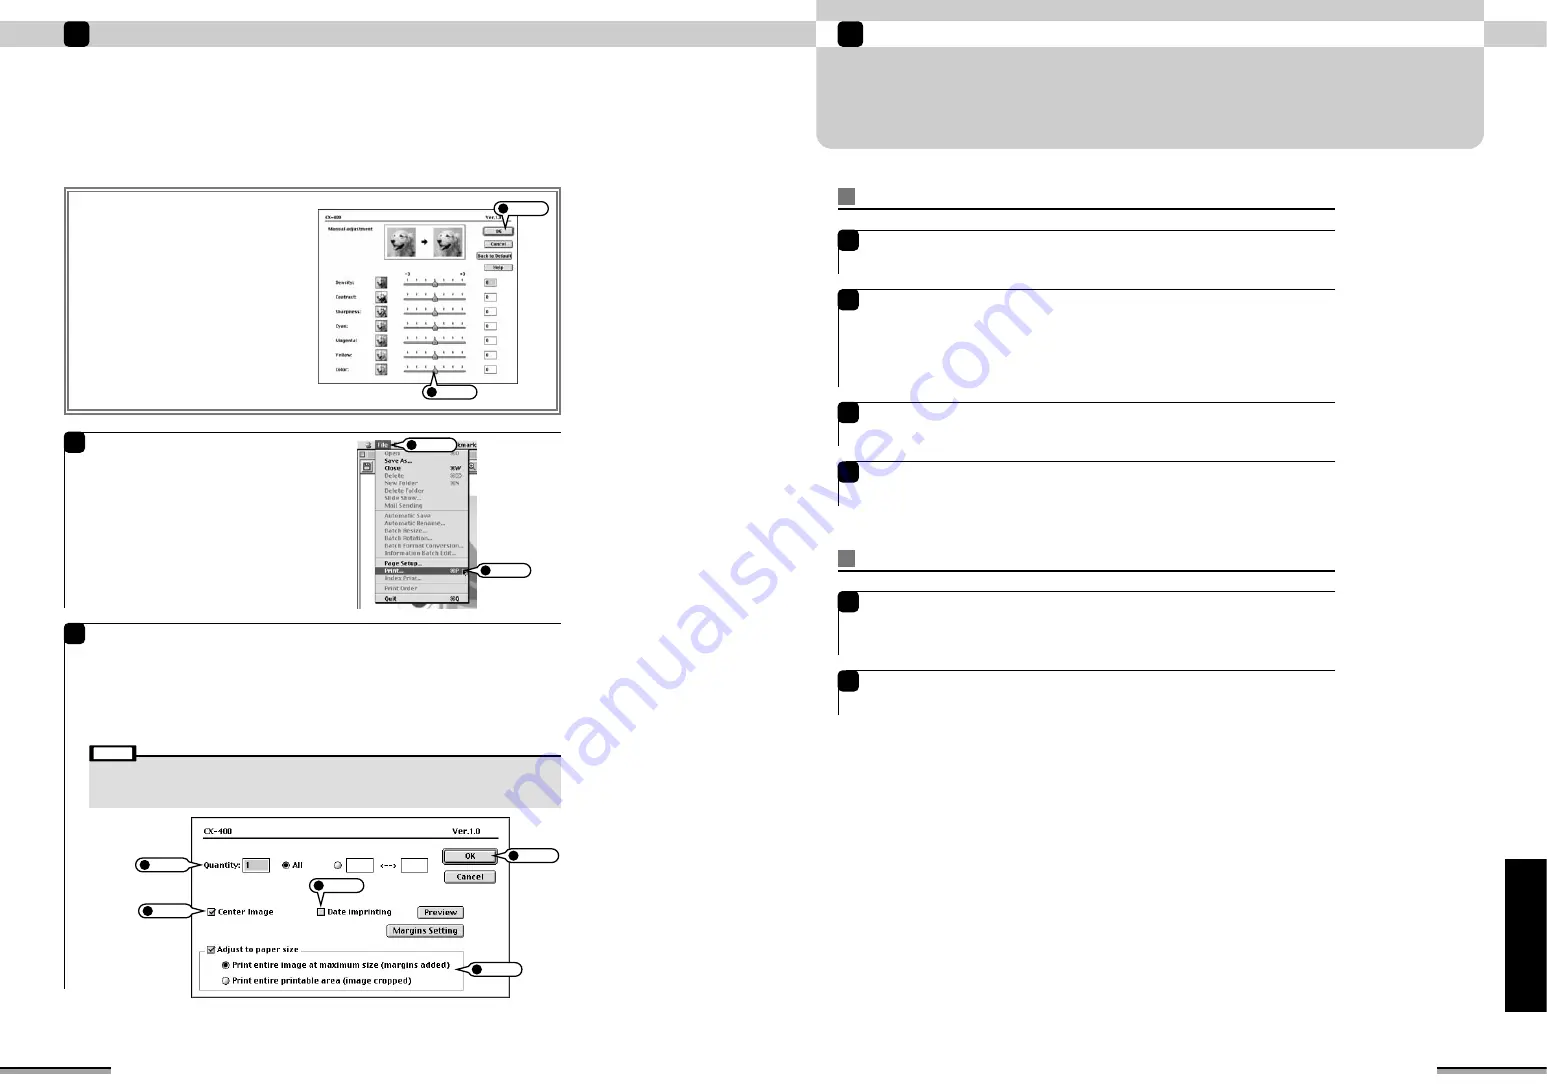
Manual adjustment
Move and set the bar of each item. The
picture at the top right-hand side of the screen
varies with the set value.
At the end of setting, click the [OK] button.
Click the “File” menu and click “Print”.
The “Set print” window appears.
4
Set number of prints, printing zone, and other items and execute printing.
q
Quantity: Selects the number of prints.
w
Center Image: Check when you want to print the picture at the center of the paper.
e
Date imprinting: Check when you want to print the date on the picture.
r
Adjust to paper size: Check when aligning the printing zoom rate with the paper.
At the end of setting, click the [OK] button.
5
• Check “Margins Setting”.
Once with border is selected and the [OK] button in the “Margins Setting” dialog box is clicked, margins are set and
stored. In the case of printing without border, be sure to set margins to 0. If margins are set to larger than 0, border
will be printed even if without border is selected.
Note
2
Click
1
Set
1
Set
2
Set
3
Set
4
Set
5
Click
1
Click
2
Click


