


39
Enjoy various printing!
2
Enjoy
various
printing!
38
OTHER PRINT SETTINGS
Pictures can be printed by setting [Print size], [Set border], and other items, as preferred.
Enjoy various printing!
2
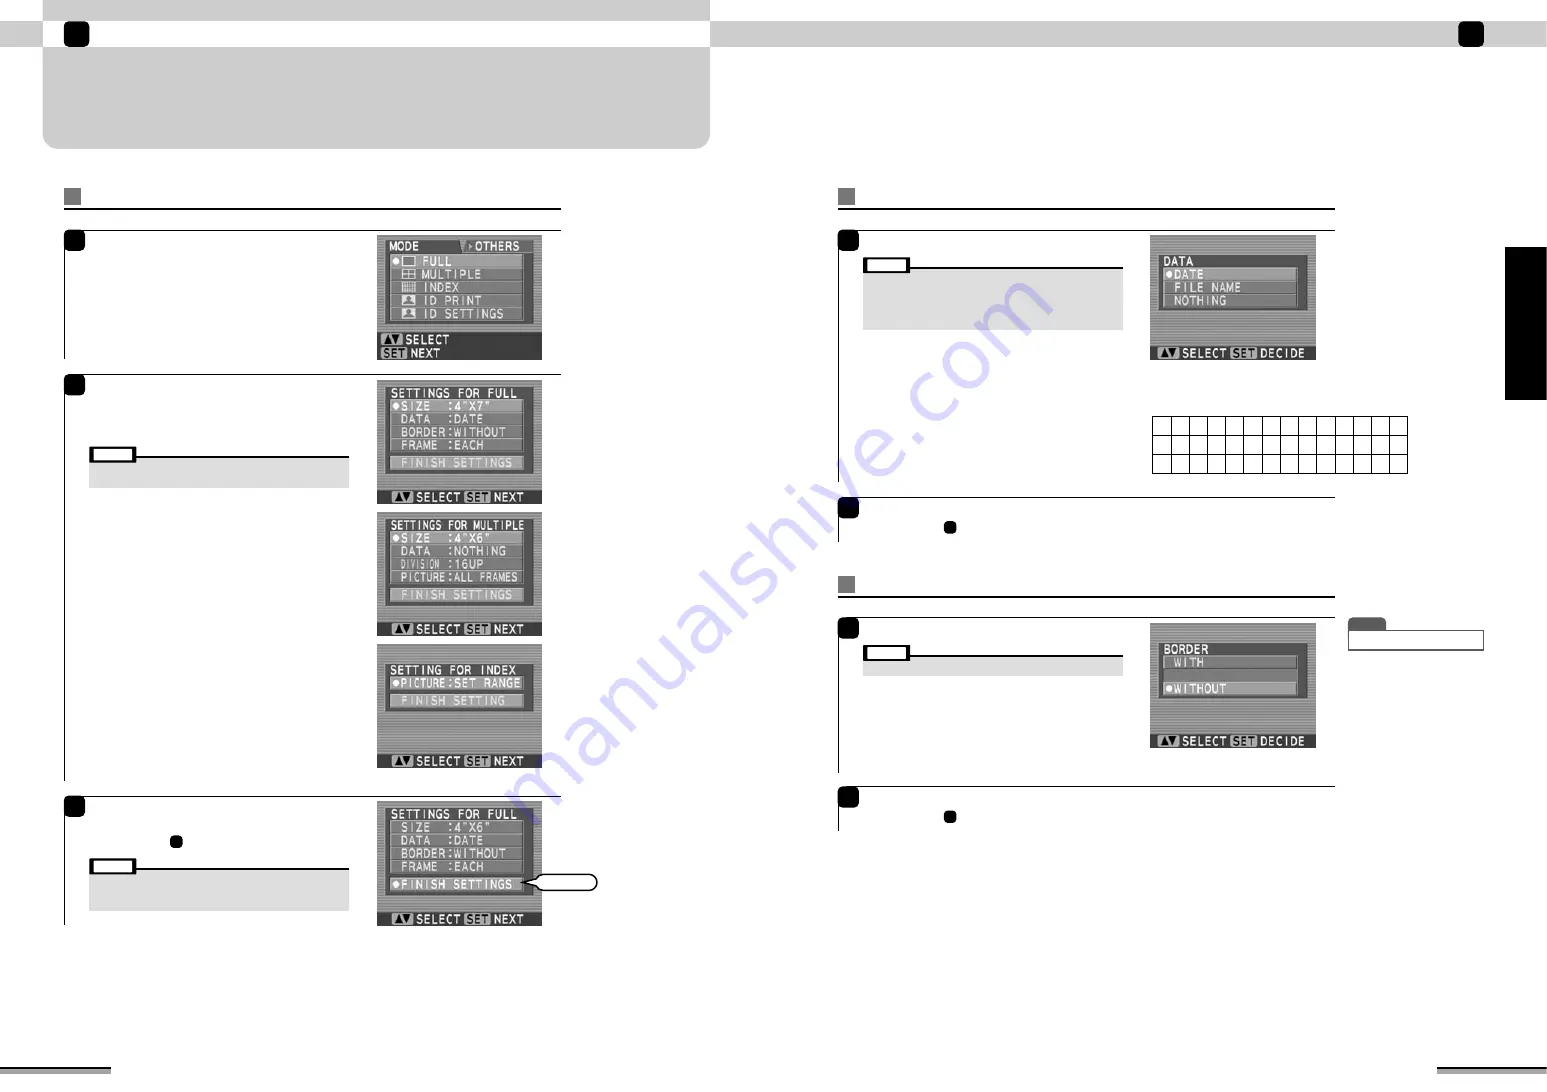
Print settings
1
Load the paper and memory card into the printer
and press the [CUSTOM] button at the top of the
printer.
Use
ab
to select the preferred print mode, and
press the [SET] button.
2
The setting window of each print mode is
displayed.
Use
ab
to select the item you want to set and
press the [SET] button.
SIZE:
Sets the paper finish size (Page 18).
DATA:
Sets if “DATE” and “FILE NAME” are to printed
simultaneously (Page 39).
BORDER:
Sets if “Without border” printing is to be performed
(Page 39).
FRAME:
Sets if “Each frame” or “All frames” is specified as
the print quantity (Page 20).
DIVISION:
Sets “Number of frames” of the picture per one
sheet of paper (Page 22).
PICTURE: (in the screen of SETTINGS FOR MULTIPLE)
Sets how the pictures are to be arranged at the
divided frames (Page 22).
PICTURE: (in the screen of SETTINGS FOR INDEX)
Sets the zone of the frames to be printed (Page 27).
• The items that are displayed vary depending on the print
mode.
Note
• This setting can be used only in the [FULL] and [MULTIPLE]
print modes.
• The date is not printed on pictures without date data.
• Only English numerals and English letters can be printed.
• The order of year, month and day depends on the country.
Note
Set data print
1
Use
ab
to select the desired setting.
DATE:
The photographed date is printed at the bottom
right-hand corner of the picture when printing.
(Example: 08. 01. 2002)
FILE NAME:
The filename of the picture is printed at the bottom
right-hand of the picture when printing.
(Example: 100-0001)
NOTHING:
Characters are not printed when printing.
2
At the end of setting, press the [SET] button.
Return to step
on page 38.
2
2
At the end of setting, press the [SET] button.
Return to step
on page 38.
2
• This setting can be used only in the [FULL] print mode.
Note
Set border
1
Use
ab
to select the desired setting.
WITH:
A border is printed around the picture when
printing.
WITHOUT:
A border is not printed around the picture when
printing.
T I P
• Initial setting is “WITHOUT”.
3
At the end of print setting, use
ab
to select
“FINISH SETTINGS” and press the [SET] button.
Return to step
on page 38.
1
• The set contents are saved until re-set or the power is turned
off. However, the data print setting is saved even when the
power is turned off.
Note
Select
Following English numerals and letters can be printed.
A B C D E F G H I J K L M N
A B C D E F G H I J
0 1 2 3 4 5 6 7 8 9
K L M N
O P Q R S T U V W X Y Z


