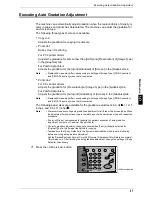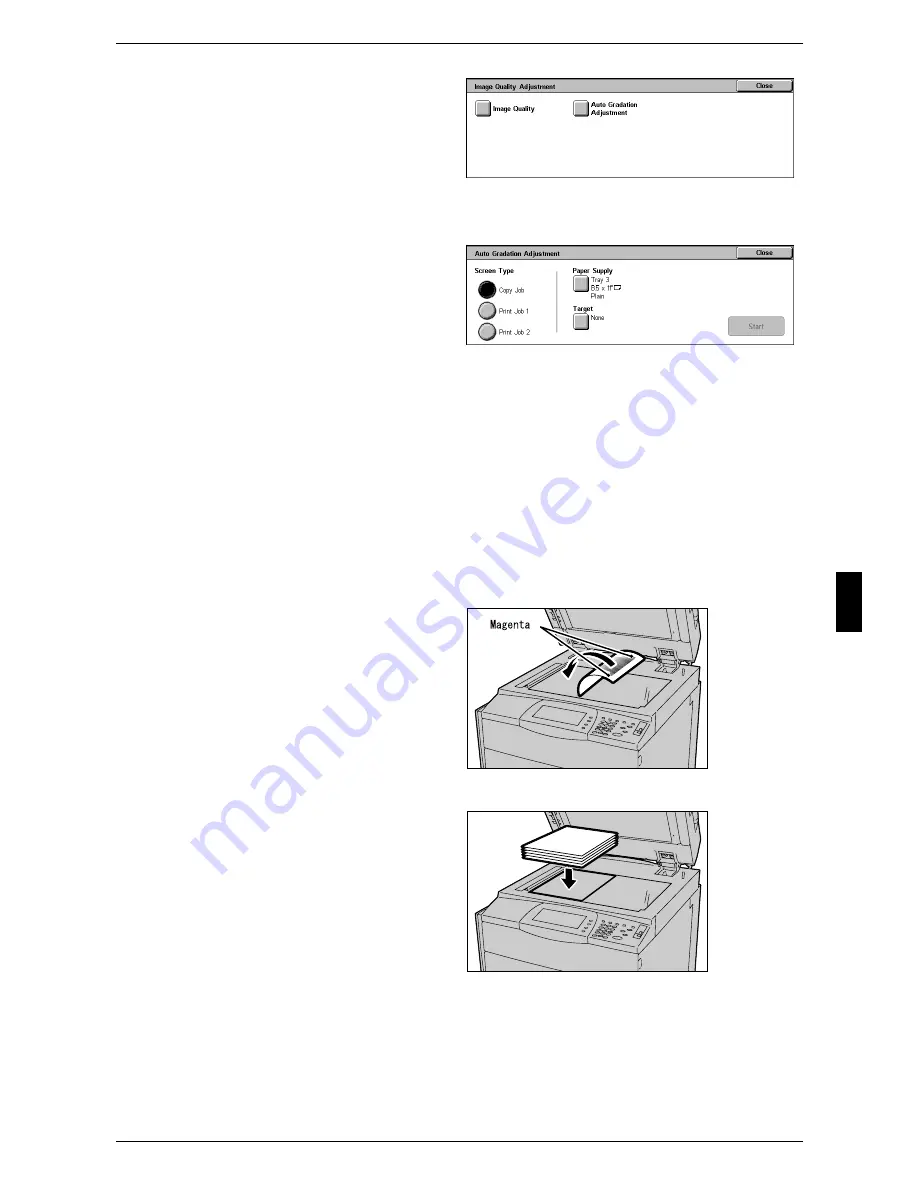
Executing Auto Gradation Adjustment
69
Mai
n
te
nan
c
e
5
9
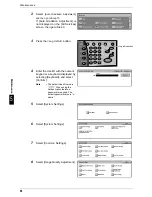
Select [Auto Gradation
Adjustment].
10
Load paper.
11
Select the screen type for
gradation adjustment.
Note
• The example described here
is for the [Copy Job] screen.
12
Select the tray that you loaded paper in the procedure 8 for [Paper Supply], and then
select [Close].
Note
• Paper Type can be set when you select the Tray 5(bypass).
13
Select [Applicable Area] to set an area for applying the gradation adjustment, and then
select [Close].
Note
• Normally, select [Copy/Print] for [Applicable Area]. When using external calibration for print
output, set [Applicable Area] if necessary.
14
Select [Start].
Note
• The message “Printing the Gradation Adjustment Chart. [Copy Job]” appears and the
document for gradation adjustment (Gradation Adjustment Chart) is printed.
15
Align the magenta patch of the
printed Gradation Adjustment
Chart against the left side of the
document glass.
Note
• Place the Gradation
Adjustment Chart on the
document glass.
16
Place at least five sheets of white
paper on the Gradation Adjustment
Chart to cover the Chart and close
the document cover.
Содержание ApeoSport C5540I
Страница 1: ...ApeosPort C6550 I C5540 I DocuCentre C6550 I C5540 I Quick Reference Guide ...
Страница 38: ......
Страница 102: ......
Страница 106: ......
Страница 108: ......


